How to Edit Pages in BoldGrid
In This Tutorial:
In order to modify your BoldGrid site, you will need to be able to edit the pages. This is because all of the content for BoldGrid Inspirations are in the pages. The following tutorial shows you how to modify the pages within the BoldGrid Administrator Dashboard.
Opening the Page Editor
In order to follow the sections below, you will need to begin by navigating to the Page Editor. The steps below will describe how to open the Page Editor, so you can follow along with the additional sections to follow.
-

-
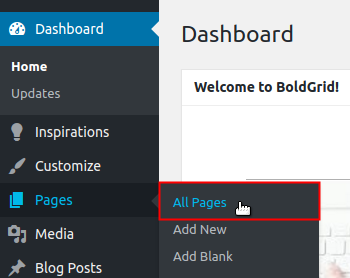
Next, hover your mouse over the Pages option from menu to the left and then click on All Pages.
-
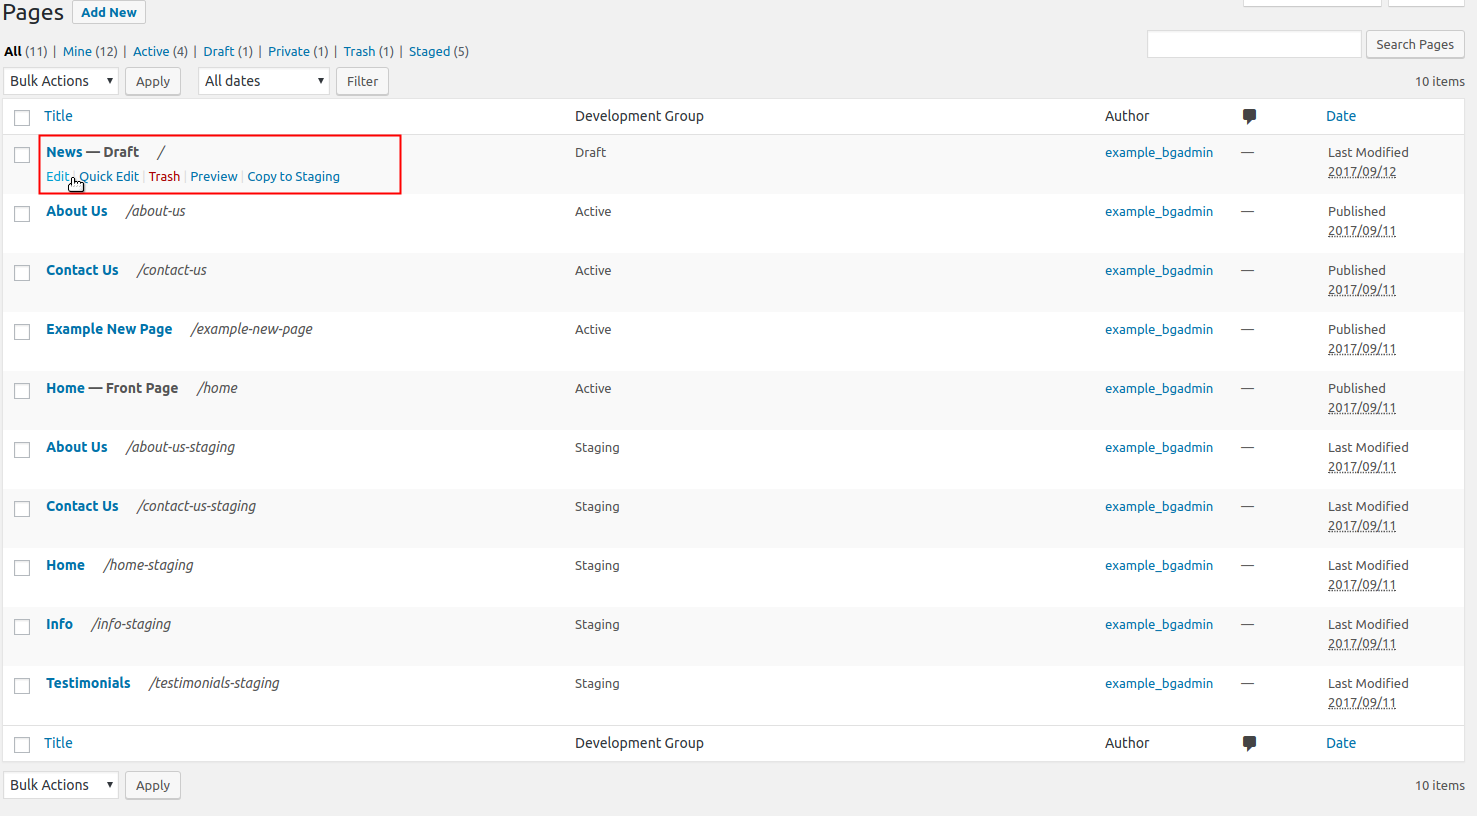
From the Pages list screen, find the page you want to work with, hover over it, and click on the Edit option.
-
Confirm you are using the editor in Visual mode and NOT Text mode. You can change the mode in the upper right corner of the editor area. The Visual tab should be highlighted.
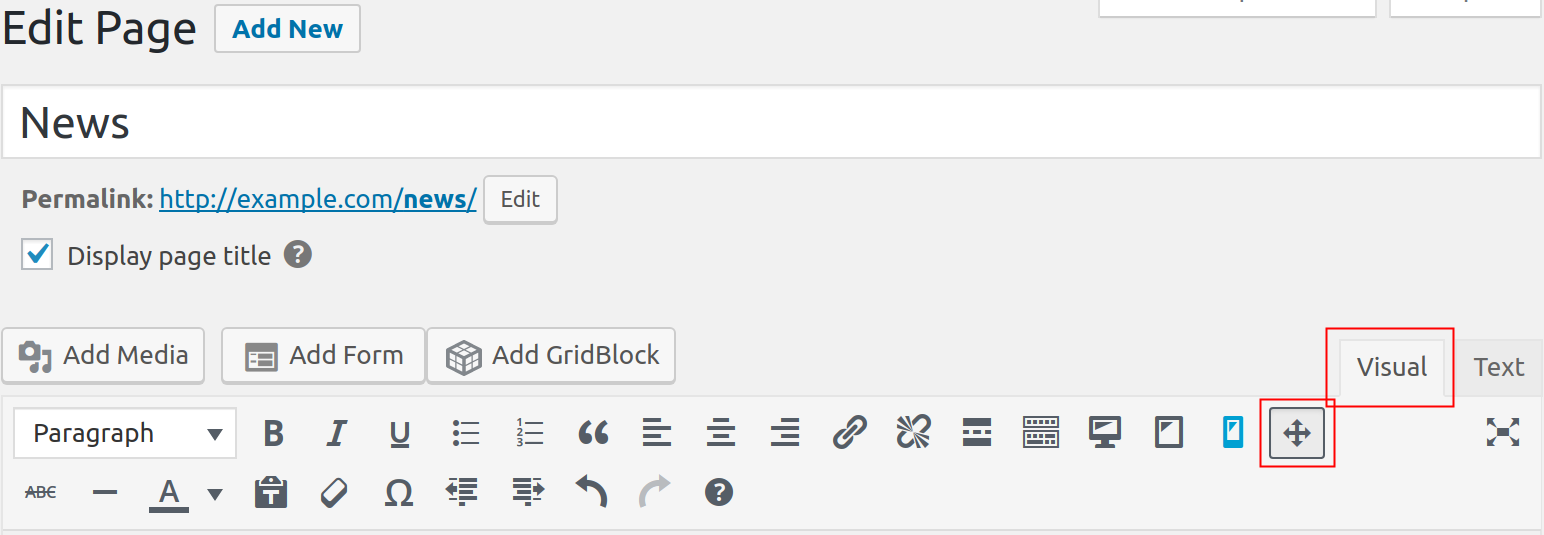
Also, be sure that the BoldGrid Editing tool is enabled. The screenshot to the right depicts how the both (BoldGrid Editing and Visual Editor) icons should appear to ensure they are enabled.
From here, we will demonstrate how to edit Columns, Rows, or specific Elements within your page.
Working with Columns
Columns are the vertical sections that are indicated by a blue menu. The steps below will guide you through editing the columns on your page.
Moving a Column
-
Open the editor as described above.
-
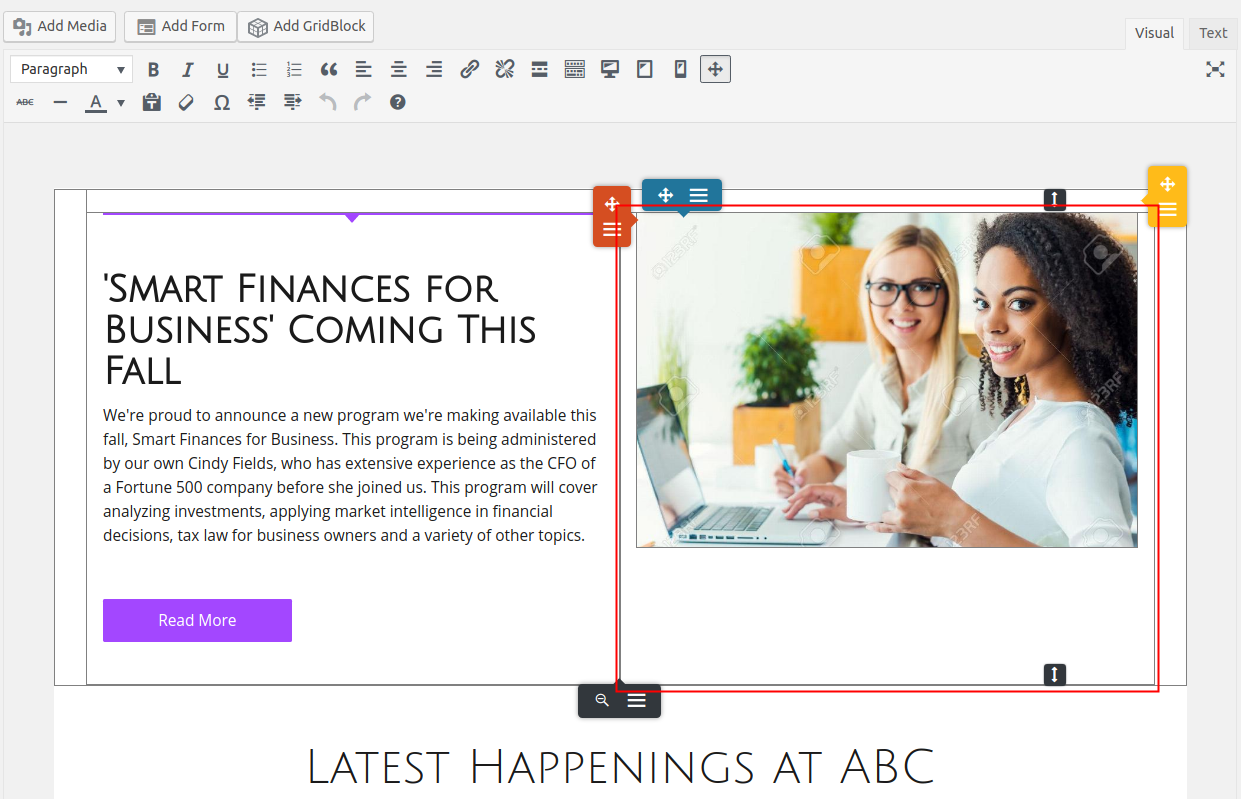
Place your mouse cursor into the column you wish to edit. You will see a few menus appear, including a blue one at the top of the current column. Notice the column is nested or bounded by the row it was created in. This is important in understanding the structure of BoldGrid pages otherwise known as Blocks. The screen shot to the right, highlights the right-most column in the first row. As you can see the column does not extend through the entire page. In this example, our two columns are "nested" inside the one row.
-
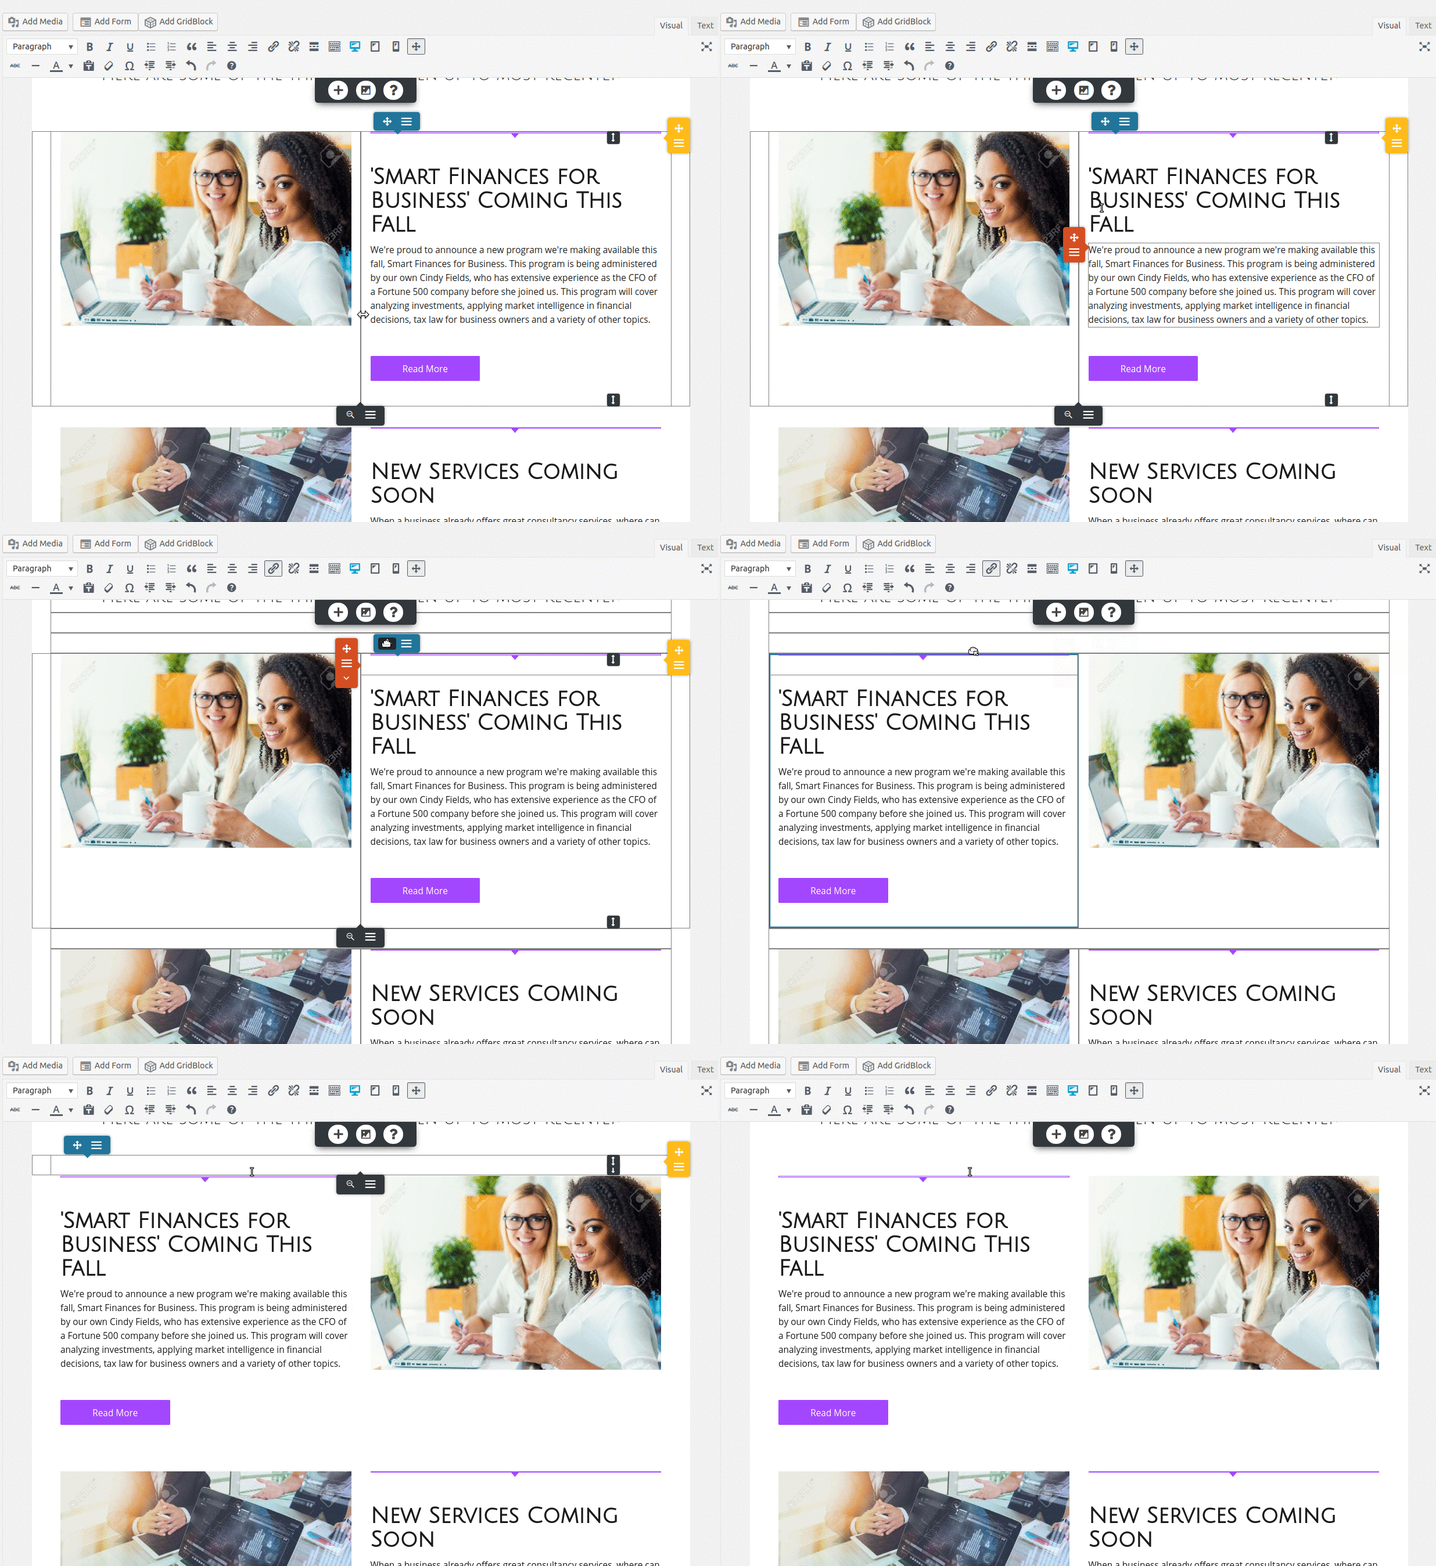
To move the column, click and hold the Drag Column button. Now, simply drag and drop your column to the desired location on the page.
Editing Column Contents
-
Open the editor as described above.
-
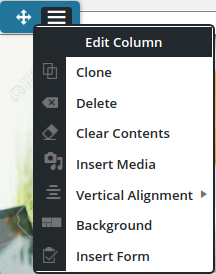
If you want to edit the specific content of the column, click the Edit Column button on the blue menu. This will present the Edit Column menu. The table below describes each option.
Clone Creates a new column to the right of the current one with exactly the same data. Delete Deletes the current column and all its contents. Any columns that remain to the right of a delete column are moved to the left most column position. Additionally, the remaining columns may need to be resized to remove the space to the right, depending on how you would like it to appear. Clear Contents Removes all the contents of the current column, however, the column remains. Insert Media Opens the Insert Media page to insert available media (images, audio, video, forms, etc). Vertical Alignment Aligns all the content of the column according to your selection. Background Opens the Column Background editor to customize the current column's background design. Insert Form Opens the Insert Media page to add your selection from the Available Forms to the current column.
Working with Rows
Rows are the horizontal sections that are indicated by a yellow menu. The steps below will guide you through editing the rows on your page.
Moving a Row
-
Open the editor as described above.
-

Place your mouse cursor into the row you wish to edit. You will see a few menus appear, including a yellow one to the right of the current row. The screen shot to the right, highlights the full row. As you can see the row is extended through the entire page.
-
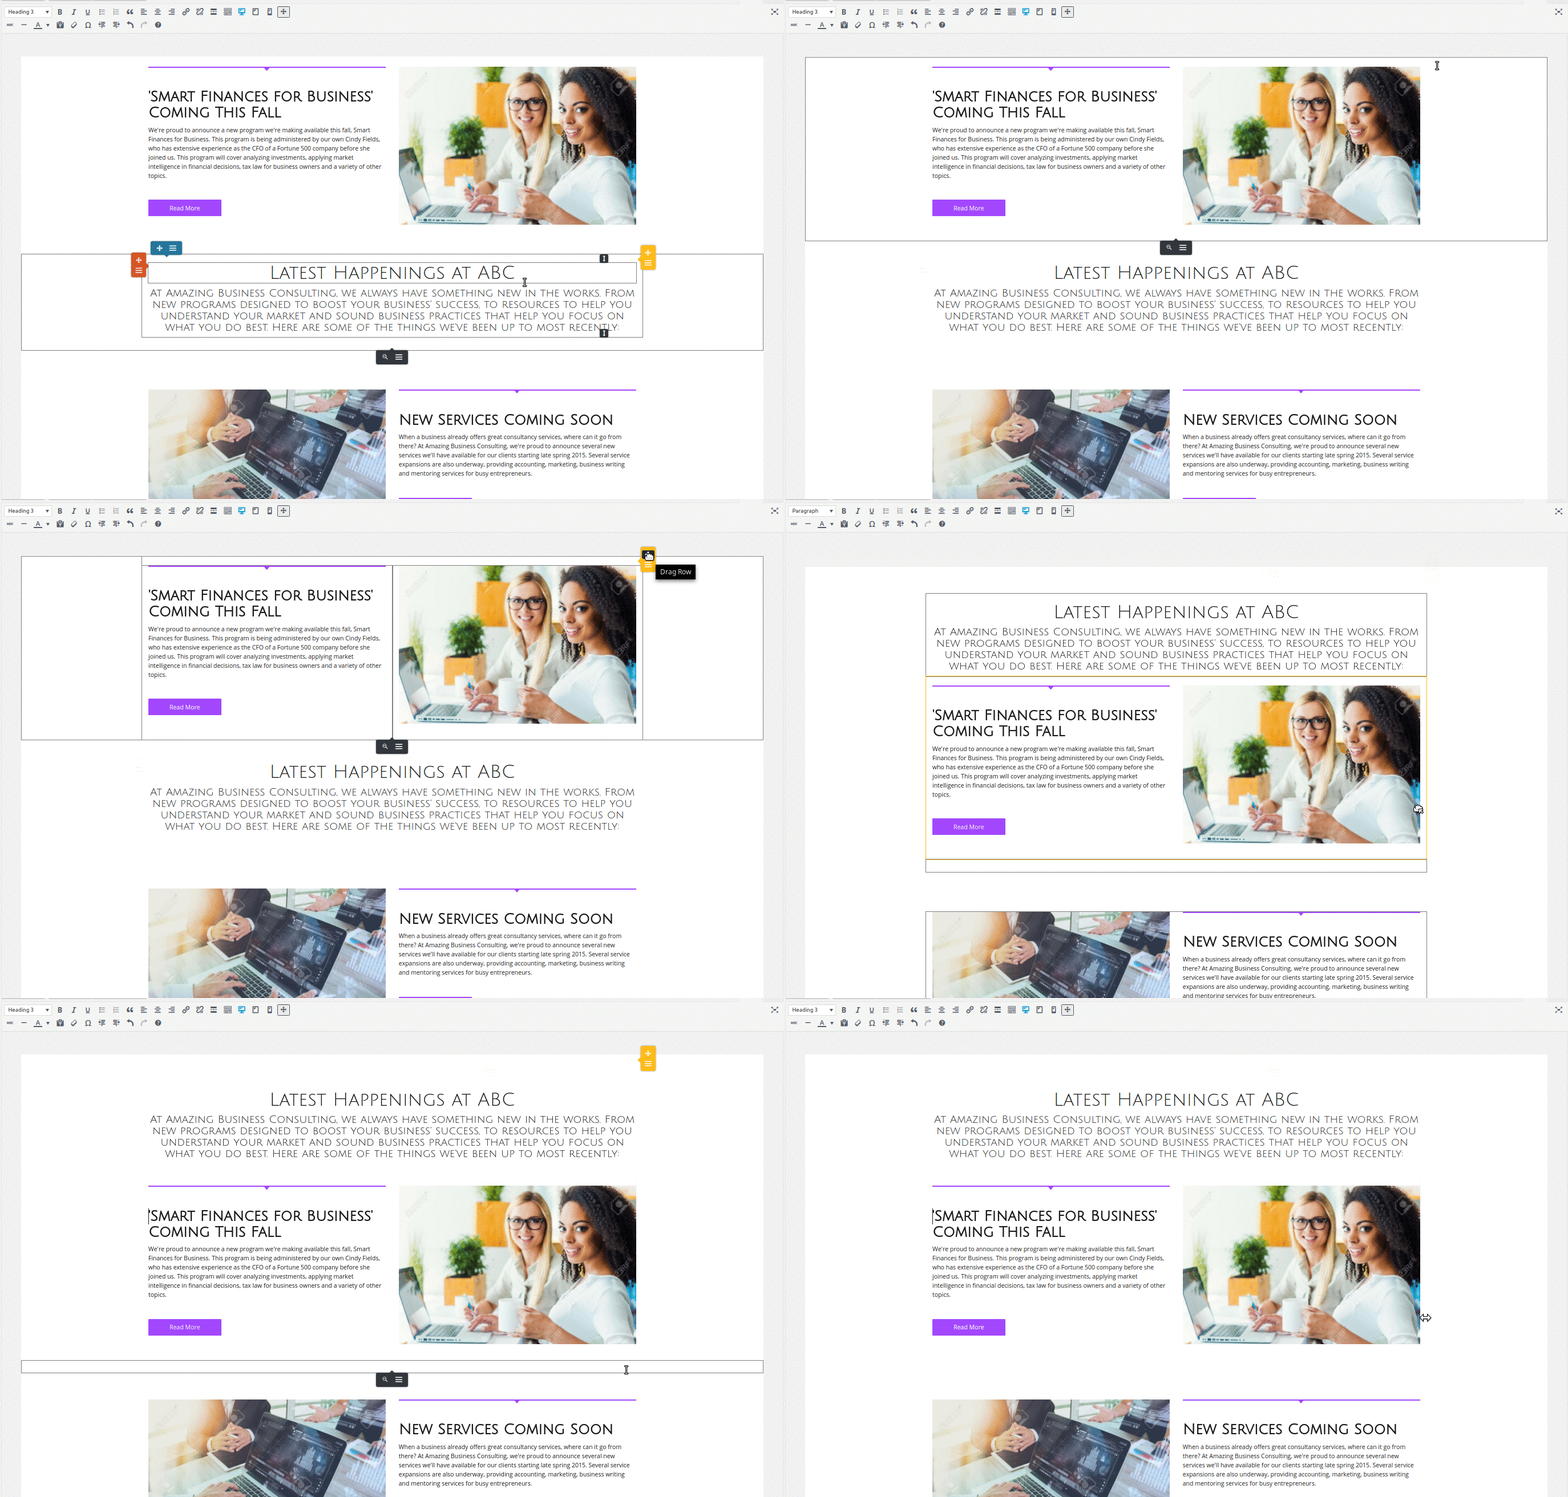
To move the row, click and hold the Drag Row button. Then, drag your row up or down the page.
Editing Row Contents
-
Open the editor as described above.
-
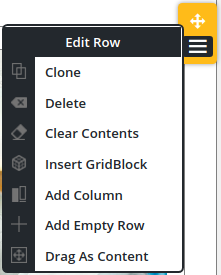
If you want to edit the specific content of the row, click the Edit Row button on the yellow menu. This will present the Edit Row menu. The table below describes each option.
Clone Creates a new row above the current one with exactly the same data. Delete Deletes the current row and all its contents. Clear Contents Removes all the contents of the current row, however, the row remains. Insert Block Opens the Insert Block editor where you can select from premade layouts and insert it above the current row. Add Column Adds a new column within the current row. Add Empty Row Adds a new row with no content above the current row. Drag as Content Selects the current row and converts it into an Element to be nested inside another row.
Working with Elements
Elements are the individual components "nested" inside of rows and columns. They are indicated by an orange menu. Their contents can vary from text, images, and other design elements. Follow the steps below to edit the elements on your page
Moving Elements
-
Open the editor as described above.
-
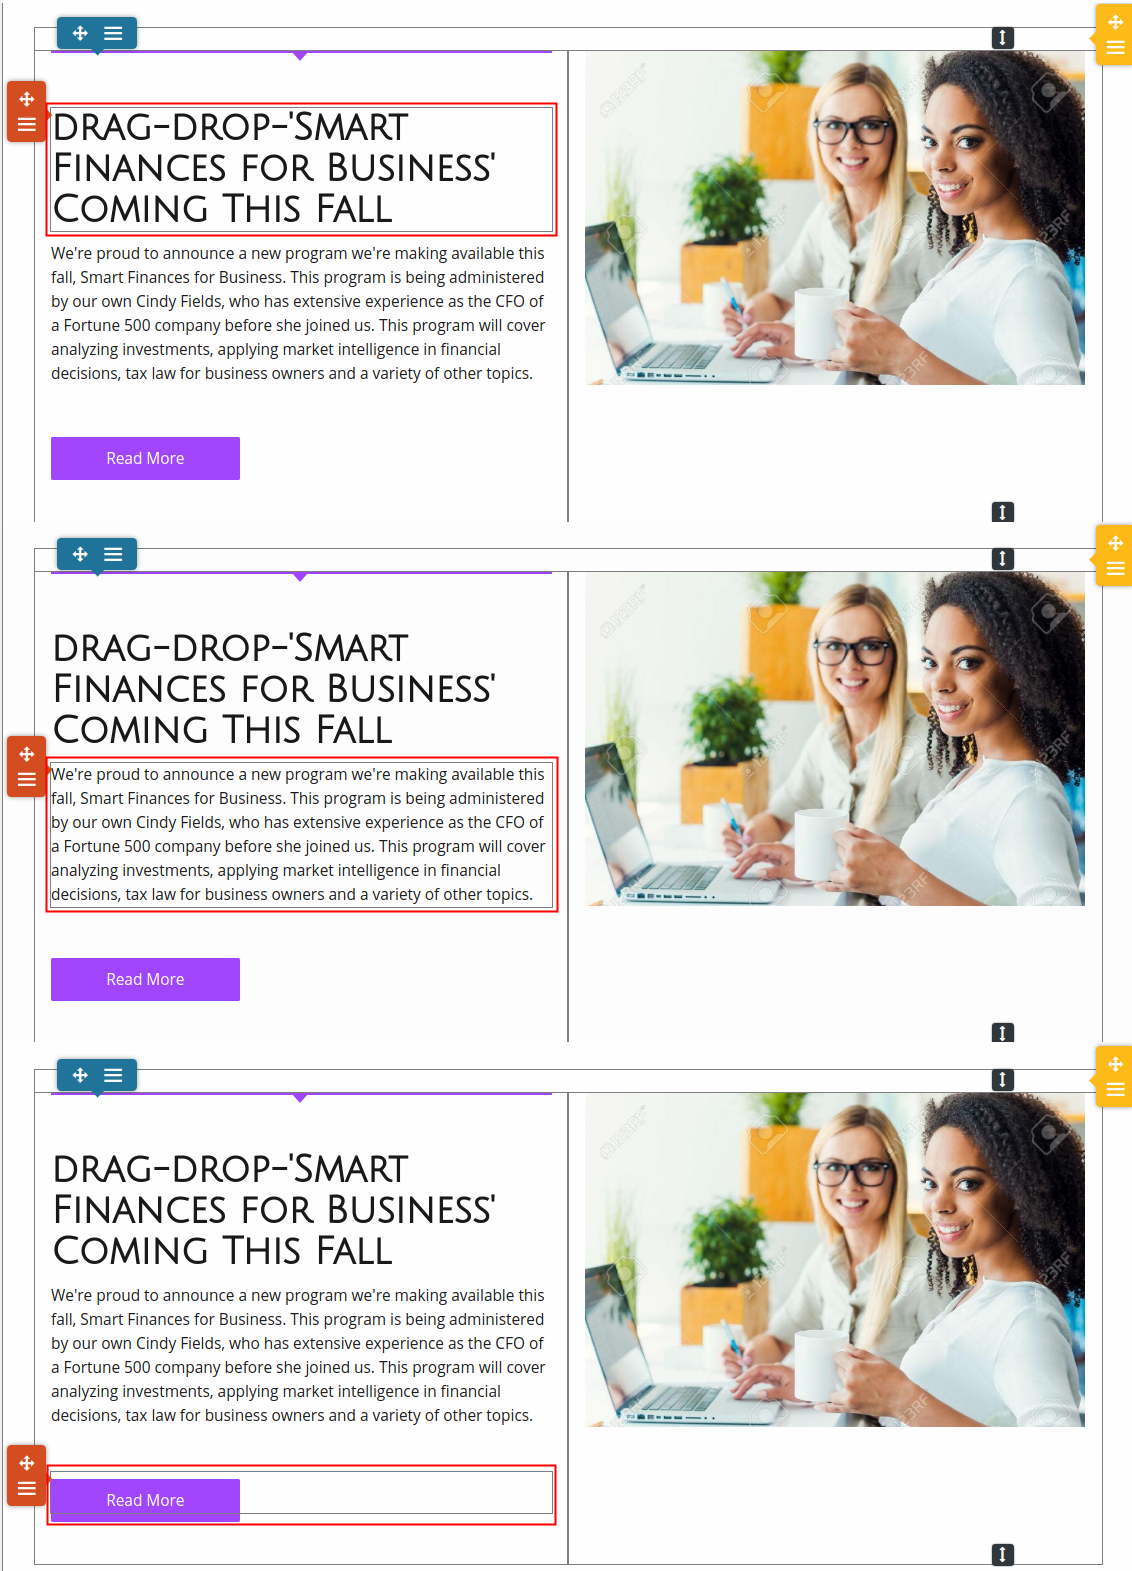
Place your mouse cursor over the element you wish to edit. You will see an orange menu appear to the left of the current element selected. The screen shot to the right shows multiple elements highlighted. As you can see there are multiple elements found in the first column of the first row (you can only select one element at a time).
-

To move the element, click and hold the Drag Content button. Then, drag the element to the desired location on the page. Notice you have more flexibility in moving and nesting the elements between rows, columns, and other elements on your page. Keep an eye on the placement of other elements when you drag your selection near them. This will determine how the other elements will be arranged to fit the element you are moving.
Editing Element Contents
-
Open the editor as described above.
-
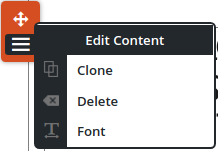
If you want to edit the specific content of the element, click the Edit Content button on the orange menu. This will present the Edit Content menu. The table below describes each option.
Clone Creates a new element underneath the current one with exactly the same data. Delete Deletes the current element and all its contents. Font Opens the Text Setting editor to modify the text within the content.
For more information, check out the BoldGrid Support Center. You can find a corresponding article there with a video to explain more on editing pages in BoldGrid.

We value your feedback!
There is a step or detail missing from the instructions.
The information is incorrect or out-of-date.
It does not resolve the question/problem I have.
new! - Enter your name and email address above and we will post your feedback in the comments on this page!