Adding a Layout Block in Concrete5
The previous guide covered deleting a block. As we continue our working with blocks series, this tutorial will guide you in adding a layout block to your concrete5 page. This allows blocks to be placed within another block, and can assist with formatting when you make your website. Essentially breaking a block into separate usable rows and columns. Due to this feature, Concrete5 allows a higher level of page customization.
Add a Layout Block:
- Login to your Concrete5 Dashboard.
- Navigate to the page you want to add a layout block to, by selecting it in the menu bar. Viewing the full sitemap may help locate the page.
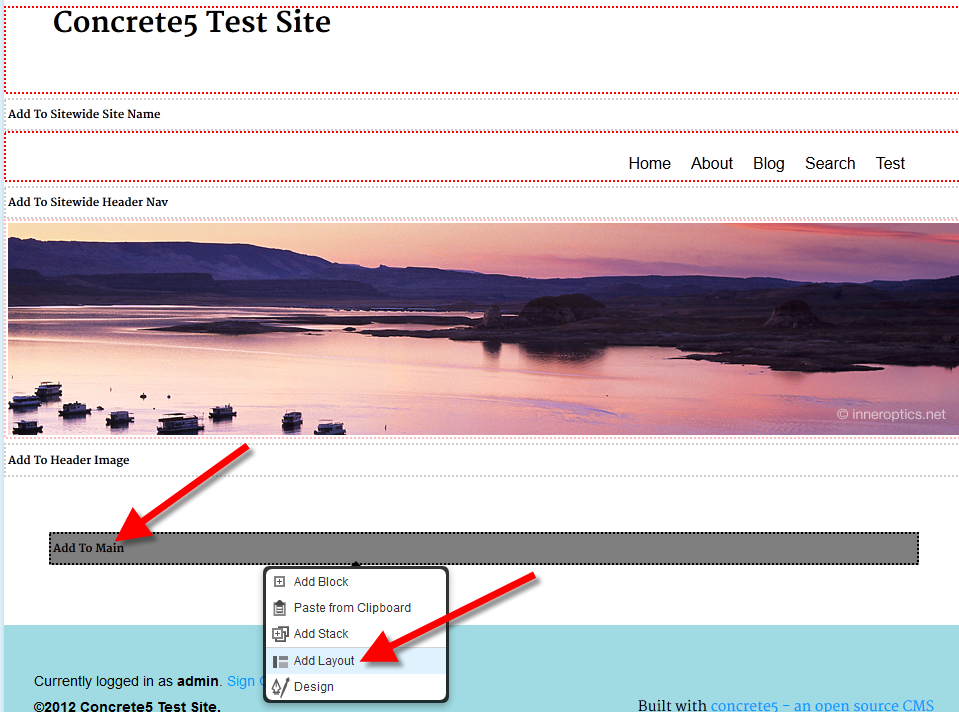
- Click the Edit button on the top left of the dashboard. Now when you roll your mouse over your page, editable blocks will become highlighted.
- Click on the block you want to add layout to, in my tests I want it in the main section, so I am selecting Add to Main. select Add Layout from the menu.
- On the Add Layout menu, choose how many Columns and Rows you want, and whether you want spacing between them (enter a number in pixels). If the Lock Width option is not checked, you can adjust the width of the layout after you have set it up. In my tests I used the default settings of 3 columns, 1 row, 0 pixels for spacing. I did not lock the widths or save the style as a preset.
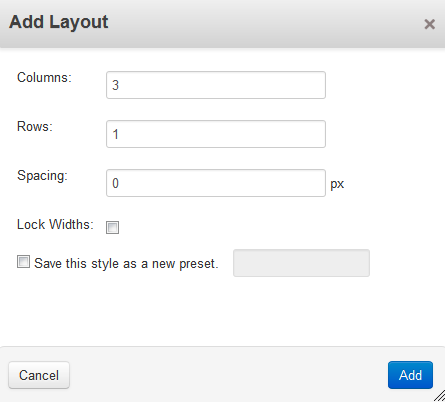
Once you have macde your selections, click the blue Add button on the bottom right to save. You will now see the additional cells available in the block.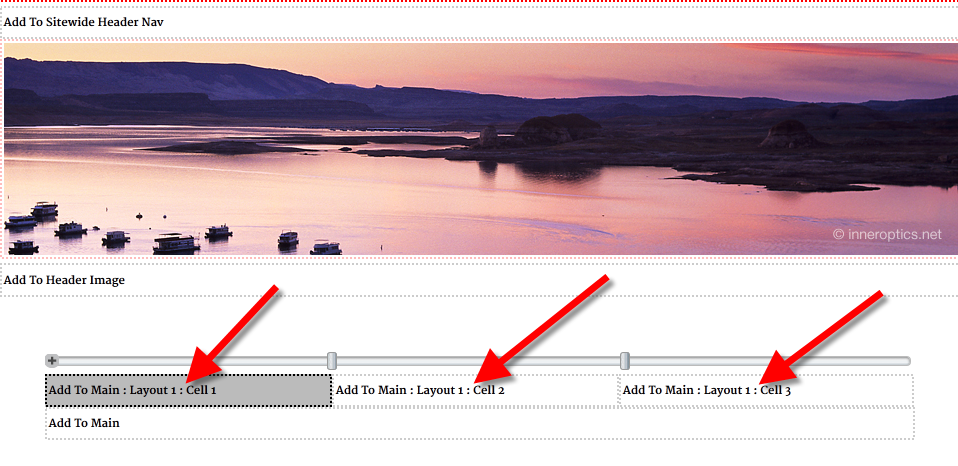
Congratulations, now you know how to add layout to a block in Concrete5. In the next tutorial we will show you how to organize Concrete5 block types.
Did you find this article helpful?
Tweet
Category
Working with Blocks in Concrete5
Help Center Login
Working with Blocks in Concrete5
Related Questions
Here are a few questions related to this article that our customers have asked:
Ooops! It looks like there are no questions about this page.
Would you like to ask a question about this page? If so, click the button below!

We value your feedback!
There is a step or detail missing from the instructions.
The information is incorrect or out-of-date.
It does not resolve the question/problem I have.
new! - Enter your name and email address above and we will post your feedback in the comments on this page!