Using the File Manager to Upload Files in Contao
Files can be moved into Contao using a FTP client, a hosting service's interface program and the application built-in to Contao called File Manager. The file manager includes functions such as creating a new folder, synchronizing files and uploading files. The following article focuses on uploading files using the Contao system module called File Manager.
Uploading Files with the Contao File Manager
- Login to the Contao Back end as an Administrator.
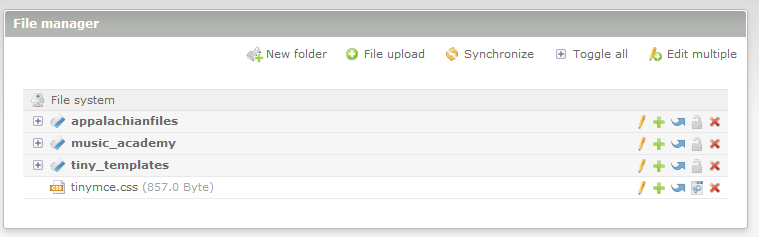 Scroll down the left hand side of the screen in the Back end modules section until you find SYSTEM. Click on FILE MANAGER at the top of the SYSTEM section in order to enter the Contao File Manager
 At the top of the File Manager, click on FILE UPLOAD. This will bring you to the positioning dialog. You can determine where your chosen file will be uploaded to your Contao files. Click on a clipboard at right in order to determine where your file will be uploaded. The clipboards match up with the folder divisions being used to organize the files in Contao.
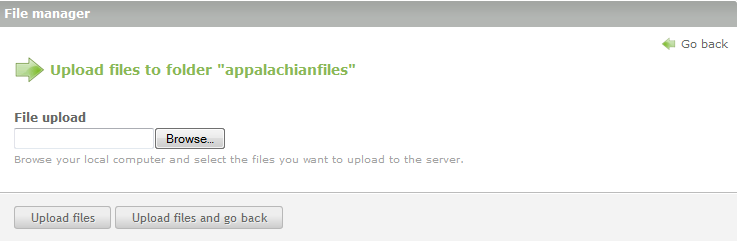 After you have selected the position where the file will be uploaded, you will see the Upload Files dialogue. Click on BROWSE in order to find the file tha that you wish to upload.
- Once you have located the file you wish to upload, click on OPEN and then select UPLOAD FILES or UPLOAD
FILES AND GO BACK. 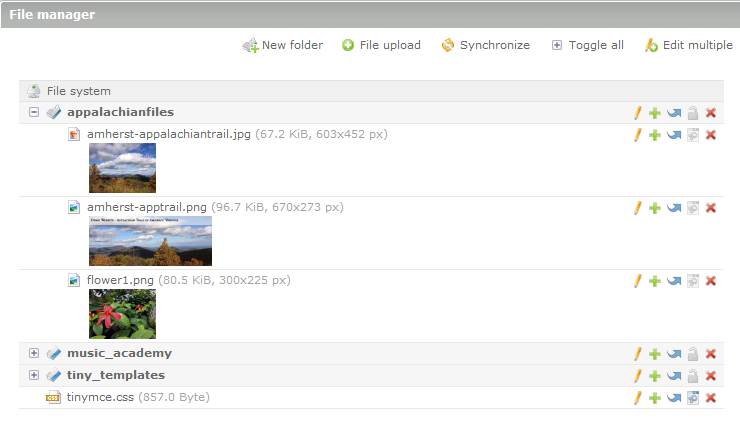 When your file has been uploaded, you will see it positioned in the location that you selected. This completes the instructions to uploading the files, but some files may need one more thing - meta information for the file that you have added to the Contao site. Click on the icon of the pencil (edit icon - the first icon in the group) to the right of the file in order enter the Meta info. This information includes the name, title, link and caption for the file. You can also add meta information based on language.
- After you finish adding the meta information, click on SAVE or SAVE AND CLOSE at the bottom of the File Manager window to save your entries.
Files that have been uploaded to Contao through the File Manager will be immediately available when adding them into articles. As an example, the screenshot below shows you where you can add images that you may have uploaded through the File Manager Uploader.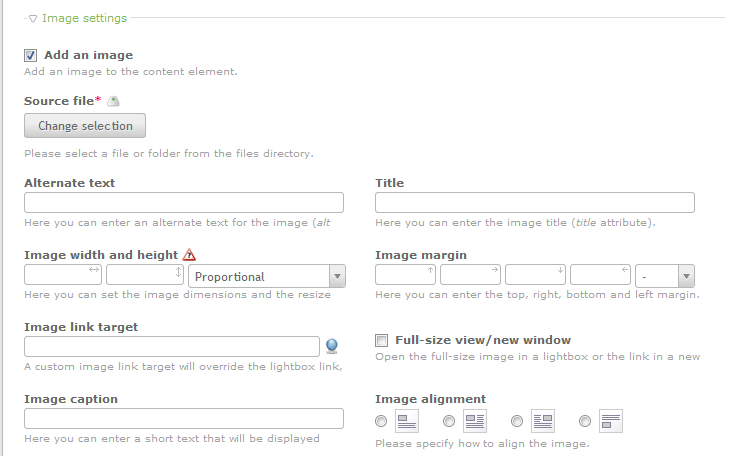
Clicking on the CHANGE SELECTION button lets you select the image files that were added during the File Manager upload. As per the dialog window below:
Did you find this article helpful?
Tweet
Next »
Syndication in Contao
Category
Creating Content with Contao
Help Center Login
Creating Content with Contao
Related Questions
Here are a few questions related to this article that our customers have asked:
Ooops! It looks like there are no questions about this page.
Would you like to ask a question about this page? If so, click the button below!

We value your feedback!
There is a step or detail missing from the instructions.
The information is incorrect or out-of-date.
It does not resolve the question/problem I have.
new! - Enter your name and email address above and we will post your feedback in the comments on this page!