How to Set the Category Image in OpenCart 1.5
The image used to represent your category is important in that it helps to identify the category to your customers and your employees. Setting the picture is an easy process that can be quickly done in the interface that OpenCart 1.5 Dashboard provides. The following tutorial will show you how to add an image to your product or product category within the Opencart 1.5.
How to add a category picture in the OpenCart 1.5 Administrator
- Login to the Administration Dashboard as an Administrator
- Place your mouse pointer over the menu item labeled CATALOG, until the drop-down menu appears and then click on CATEGORIES
- After selecting CATEGORIES, if you have added any previous categories you will see a list as appears in the screenshot below:
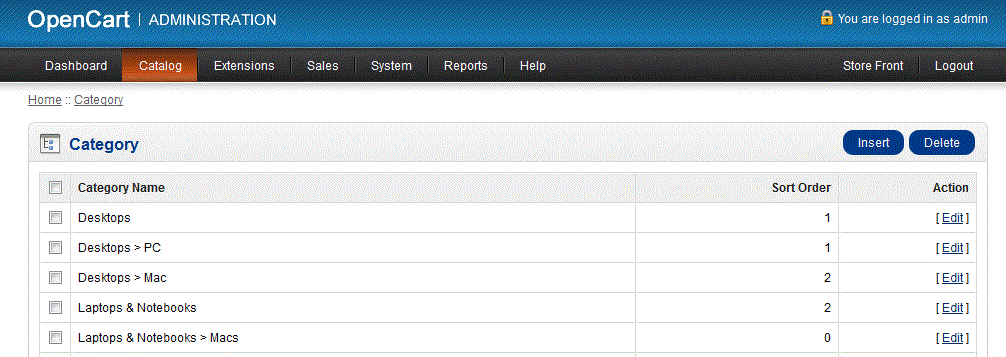
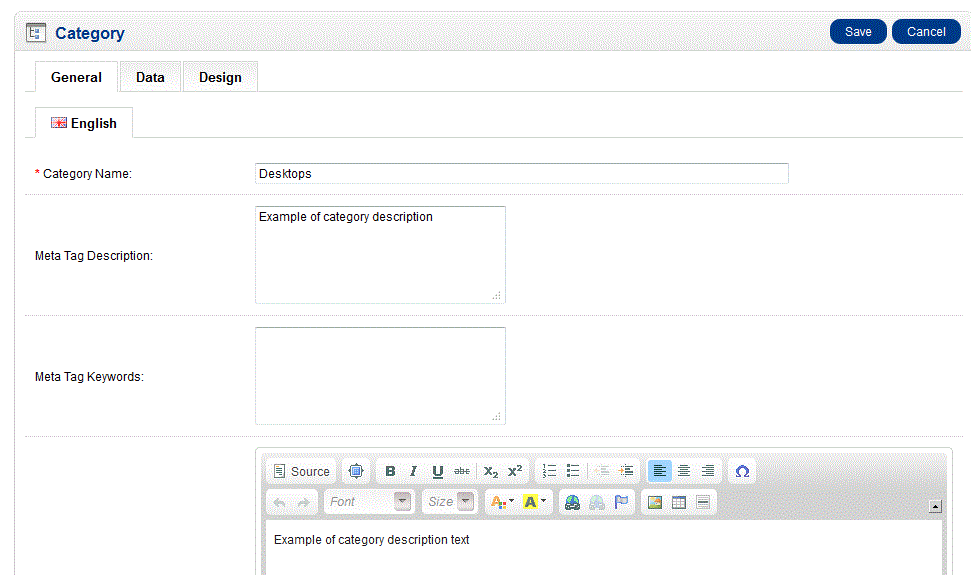
- Select a category name or click on INSERT to create a new category. When the next window opens, it will show you the following:
- Select the DATA tab then scroll down to IMAGE
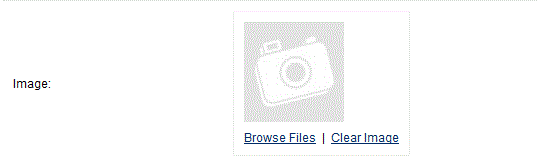
- Select the Image that will be used by clicking on the BROWSE FILES option. Or, to remove the image, select CLEAR IMAGE
- To save the image you have selected click on the blue SAVE in the top right hand corner
Here is an example of the setting in the Administrator for the category of DESKTOPS and the picture that had been assigned to that category. The following screenshot shows the picture as it shows in the storefront: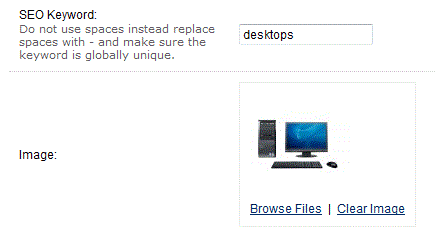
Image for the category appears in the storefront as per below:
The image for any product is a definite advantage in that it helps your customers or administrators to quickly identify a product or product category. Choose your images wisely and make sure that they are optimized for display for the Web. For more information on adding a new category, please go to Overview of Setting Up Categories in the Catalog for OpenCart 1.5.
Did you find this article helpful?
Tweet
Help Center Login
Catalog Categories and Options for OpenCart
Related Questions
Here are a few questions related to this article that our customers have asked:
Ooops! It looks like there are no questions about this page.
Would you like to ask a question about this page? If so, click the button below!

We value your feedback!
There is a step or detail missing from the instructions.
The information is incorrect or out-of-date.
It does not resolve the question/problem I have.
new! - Enter your name and email address above and we will post your feedback in the comments on this page!