Installing PrestaShop 1.6 through Softaculous
PrestaShop version 1.6 has been released and is available for installation through the Softaculous installation application in cPanel. The following article walks you through the steps of setting up PrestaShop using Softaculous.
Installing PrestaShop 1.6 using Softaculous
- Login to the cPanel.
- Scroll down to the Software/Services section and then click on the Softaculous icon.
-
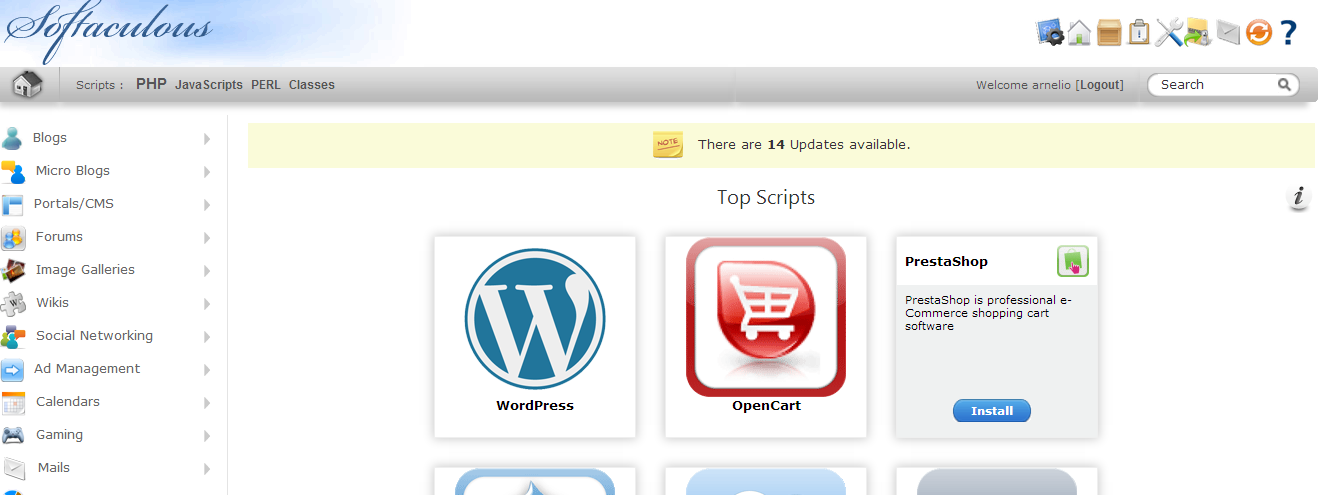
This will launch Softaculous. You will then see the programs that you can load. PrestaShop is one of the featured programs and should be on the first row as per the screenshot to the right. If you do not see it, click on the Search field in the top right hand corner and type "PrestaShop". Click on the PrestaShop icon or the button that is labeled Install. If you click on the icon, you will see a list of the current PrestaShop installations. To launch the install program on this screen, click on the blue Install button in the top right hand corner.
-
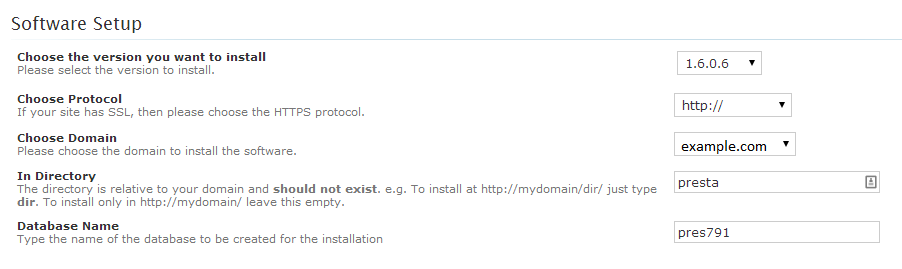
Next you will see the Software Setup screen for PrestaShop in Softaculous.
Software Setup This section describes the settings in the Software Setup section. Choose the version you want to install You can choose one of two versions to install: 1.6.0.6 or 1.4.11.0 Choose Protocol Choose to use either the HTTP or HTTPS protocol. Only choose HTTPS if you have an SSL certificate setup for the domain you're using to install Prestashop Choose Domain Select the domain name that you want to use for your installation In Directory Type in a directory name where PrestaShop will be installed. Be aware that this will affect the URL used for the PrestaShop installation. For example, if you typed "prestashop16" your url would be http://example.com/prestashop16. Database Name You can determine the name of the database used by the PrestaShop installation Database Settings The database settings allow you to enter your own prefix for the tables that are created with the database. By default the value is "ps_". Site Settings These settings are used to name your store and also determine the folder of the Administrator Dashboard. Store Name The store name can be set here or changed at a later date within the Modules under the Contact information block Admin folder This setting is important because it determines the URL used to access the Administrator dashboard. For example, if you put admin123 in the Admin folder section, then the URL for the admin would something like this: http://example.com/admin123. Admin Account The Admin account includes the setting for the Administrator login. If you are not emailing the settings to yourself, you should make sure to record these settings and store them in a safe place. Admin Email This is the email address for your administrator Admin Password Password for the Administrator user First Name The first name of the Admin user Last Name The last name of the Admin user Advanced Options These options appear when you click on the '+' sign. Disable Update Notifications Softaculous is able to provide emails notifying you of an available update. Select this option to disable these messages. - Before you begin the install, skip to the bottom of the screen and click on Email installation details to: field. Fill in an email address so that you get a copy of the installation settings. This is good to have in case you forget the password or need the settings for other purposes.
- After you have completed entering the values for each of the settings above, click on INSTALL button to start the installation.
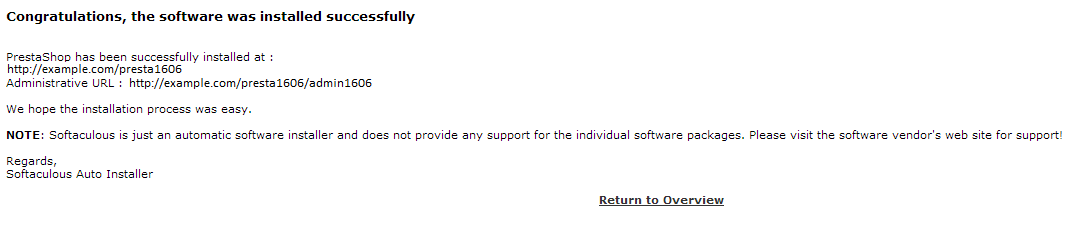
You will see a progress bar showing how much of the installation is complete. When the installation is finished, you will see a confirmation message. The message (see screenshot below) will include the URLs for access to both the administrator backend and the store front.
Did you find this article helpful?
Tweet
Category
PrestaShop 1.6
Help Center Login
Related Questions
Here are a few questions related to this article that our customers have asked:
Ooops! It looks like there are no questions about this page.
Would you like to ask a question about this page? If so, click the button below!

We value your feedback!
There is a step or detail missing from the instructions.
The information is incorrect or out-of-date.
It does not resolve the question/problem I have.
new! - Enter your name and email address above and we will post your feedback in the comments on this page!