Using Google Checkout with PrestaShop
Google Checkout is a method for processing payments provided by Google that you can use for receiving payments from your customers. Integration of Google Checkout with your PrestaShop site is easily set up through the Google Checkout payment module in PrestaShop. This payment module is included by default with the full PrestaShop installation. In this tutorial we will walk you through completing the installation of this payment module and configuring it for your PrestaShop store.
Please note, in order to use the Google Checkout module, you should already have a Google Checkout account. If you do not already have an account, please sign up for a Google Checkout account before installing and configuring this module for your PrestaShop installation.
- Begin by logging into your PrestaShop back office.
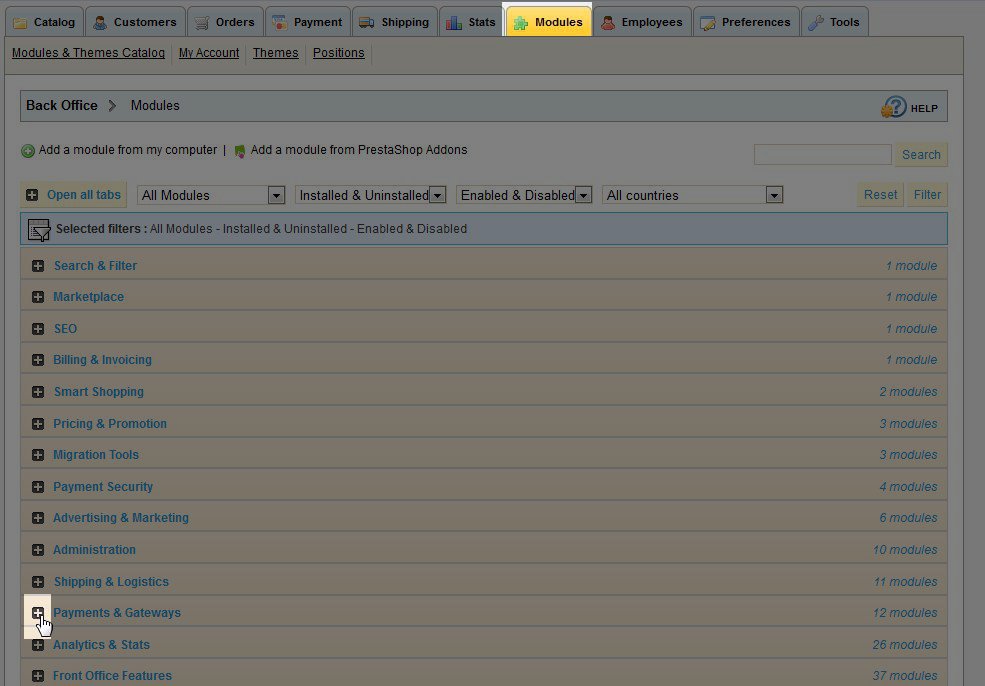
- Click on the Modules tab and expand the Payments & Gateways section under that tab.
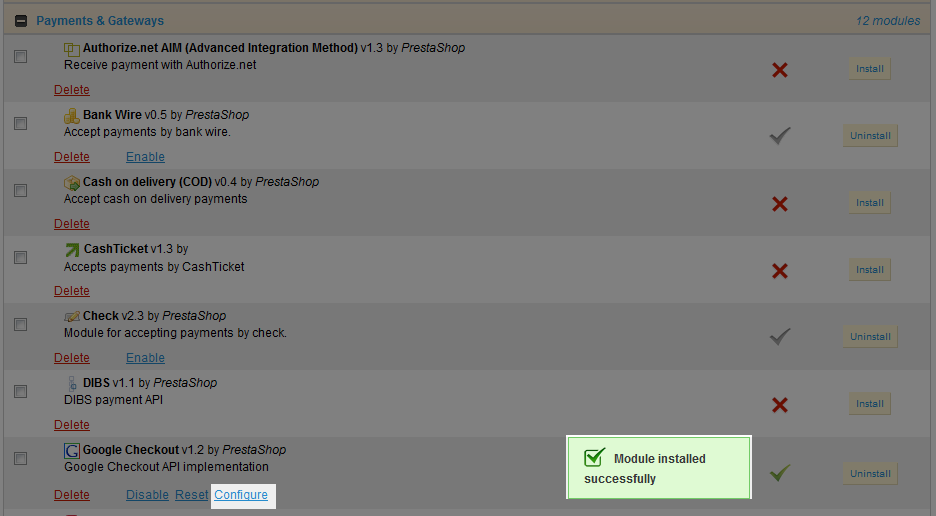
- Select the Install button for the Google Checkout module.
- Once you see the notification that the module installed successfully, click on the Configure link for the Google Checkout module.
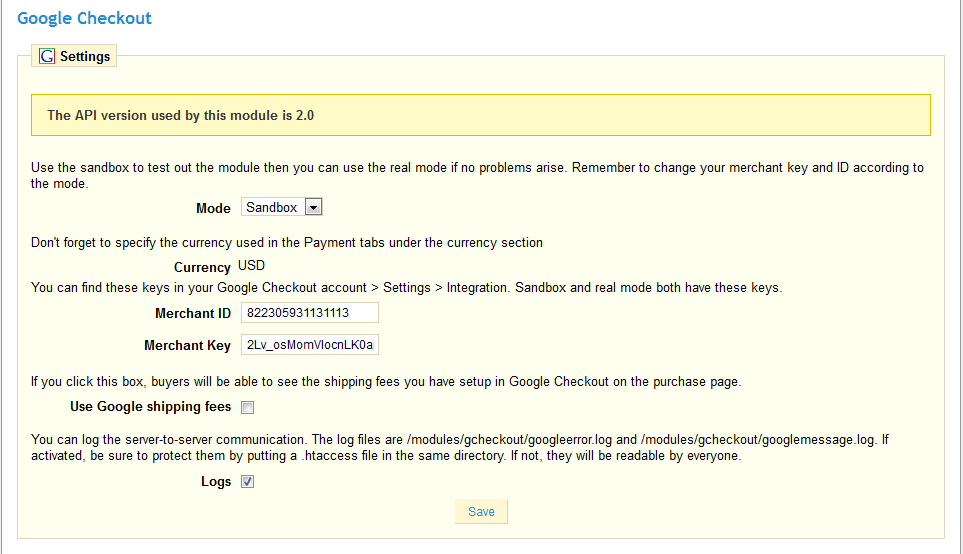
- From the Mode dropdown menu, select Sandbox for testing or Real when you have finished testing and you're ready to go live with the Google Checkout payment module for your PrestaShop store.
- In the fields provided, input your Merchant ID and Merchant Key for your Google Checkout account.
- If you have set up shipping fees in your Google Checkout account and would like to use those, select the box next to Use Google shipping fees.
- Logs of the communications between the servers can be kept by selecting the checkbox next to Logs. While there is a note in the instructions that references adding an .htaccess file to the directory, it's probably easier to simply change the file permissions for those two log files (googleerror.log and googlemessage.log) to 640. This way, the logs can still be updated, but anyone trying to view the log files through your site's URL will not be able to view or download them.
- Once you have completed your Google Checkout configuration settings, click the Save button to update your changes.
Congratulations, you have completed the set up of the Google Checkout payment module for your PrestaShop site.


We value your feedback!
There is a step or detail missing from the instructions.
The information is incorrect or out-of-date.
It does not resolve the question/problem I have.
new! - Enter your name and email address above and we will post your feedback in the comments on this page!