Create a Google Map in your WordPress Post/Page
The Google Maps Master Basic plugin provides an easy to use option in your WordPress Administrator dashboard for quickly adding maps in your pages and posts. The plugin is created with HTML5 and does not use Javascript or Ajax to help keep website performance quick and error-free. The following article goes over the installation and configuration of the Google Maps Master Basic Plugin.
Install Google Maps Master Plugin
The following instructions walks you through the installation of the plugin through the WordPress Administrator dashboard plugins interface.
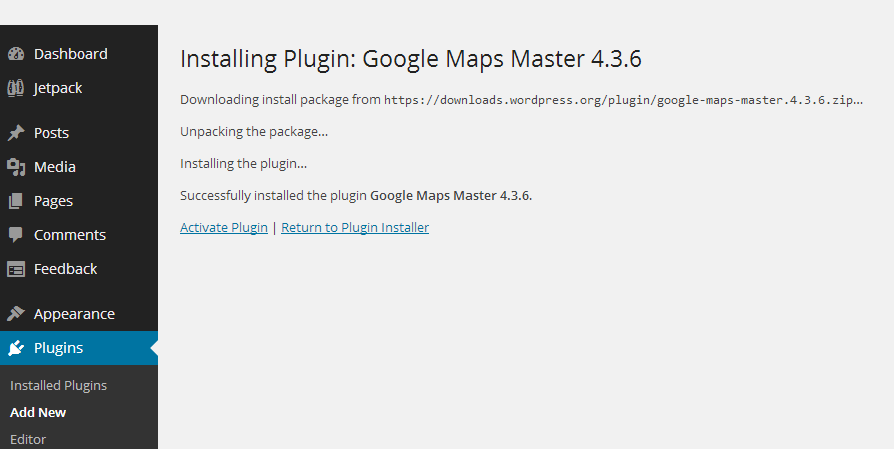
- Login to the WordPress Admin dashboard
- Click on Plugins
- Click Add New
- In the Search field, type "Google Maps Master", then click on Search Plugins
- The Google Maps Master plugin should appear first in the list. Click on Install Now to begin the installation
- You will then see a page appear that says that the plugin is being installed. The second to last sentence will show that the plugin has been installed successfully. Click on the link that says Activate Plugin
After the plugin has been activated, the installation is complete. The next thing you will need to do is decide how the map will appear on your page or post. This is done by setting up a widget. If you want to add more functionality, you can purchase the advanced version and additions for the plugin here.
Setting up the Widget for Google Maps Master Basic

Different elements that appear in your page or post can be added by using a widget. The areas that you can add a widget are the Primary Sidebar, the Content sidebar, and the Footer Widget area. Use the following steps to setup your Google Maps Master Basic and Google Maps Master Viral widgets.
- Login to the WordPress Dashboard.
- Click on Appearance in the menu bar at left, and select Widgets from the list.
- You will see a number of widgets represented by labeled rectangles on the page. Left-click and then drag the rectangle labeled Google Maps Master Basic to the area that you want the map to appear. There are three basic positions for the widget: Primary sidebar, Content sidebar, and Footer Widget area.
When you have finished placing your widget, the next step will be to fill in the settings for the plugin. This is done within the widget area. Each item or group of items in the configuration will be detailed below.
Configuring the map
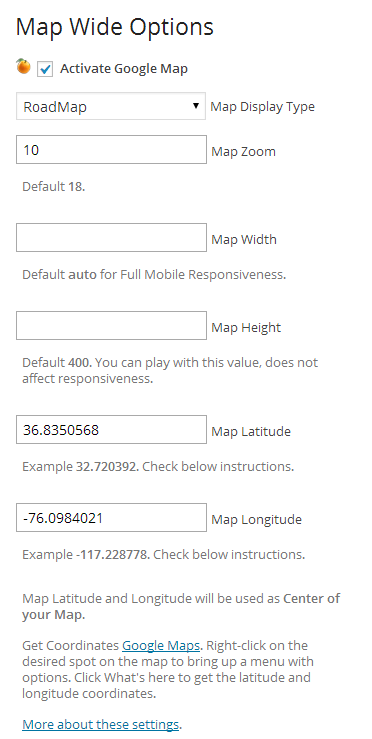
- Display Widget Title - This is the title that will appear on a page or post above the map. The position of this title depends on the widget position you have selected. If Google Maps is not activated, then you will not see a map, but the title will show if you have provided a title.
- Activate Google Maps - Click in this checkbox in order to display the Google maps
Map Display Type - To see the map display types, click on the listed options below:
- Map Zoom - The Map Zoom setting allows you to pre-determine how the map appears on the page or post. The default value is 18. Increase the value to see a closer view of the area. Decrease the number to see a wider view of the area.
- Map Dimensions - The Map Width and Map Height are the next two settings. If you leave the width setting blank, it is set to "auto" by default giving it full mobile responsiveness. This means that it will automatically adjust to a mobile device's screen size. The Map Height value can be adjusted without affecting its mobile responsiveness. Its default value is 400. Making the value bigger is increases the default magnification of the displayed map.
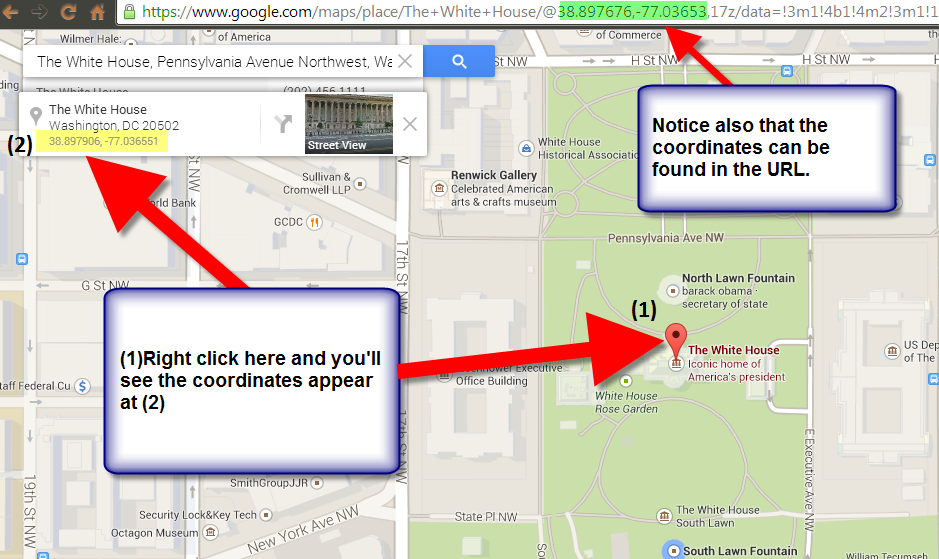
Map Coordinates - The map coordinates determine the area that is displayed on the map. There is a specific procedure to get these coordinates:
Step 1 - Open Google Maps
Step 2 - Navigate to the location you want to mark on the map by typing in the address in the search box in the top left hand corner
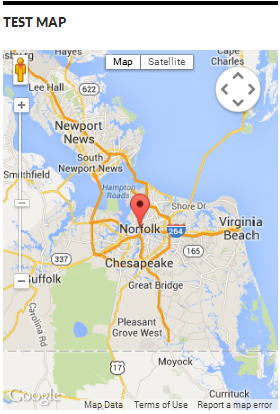
Step 3 - Right-click on the location and select "What's here" or get the latitude and longitude from the URL. The screenshot displays the location of these coordinates.
Step 4 - Obtain Map coordinates and record them so that you can use them for the Google Maps Master fields


Configuring the Map Marker Options
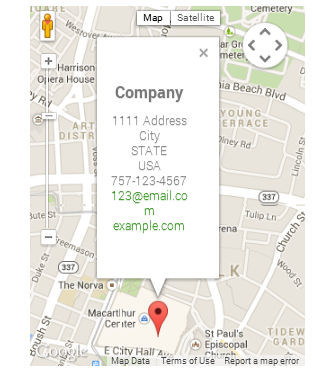
Marker Options - Marker options lets you place information on the marker that marks the location of the address you have selected on the map. There are many options available here. In order to fill them simply go to your Widgets, and select the Google Maps Master widget that you positioned in your WordPress page per the instructions above. Here is a list and a short description of each item:
| Marker option | Description |
|---|---|
| Activate Map Marker 1 | Activates the marker options so that they can be seen when the marker is clicked in the map |
| Select Marker 1 option | Lets you select one of two graphic marker options that appear on the map: Google Original Icon or TechGasp Original |
| Company Name | Name of the company |
| Logo | Marker option for a logo to be added with the name. Logo size allowed is 64px x 64px |
| Address (multiple fields) | Address of the location that includes the fields for Address, City, State, and Country |
| Phone numbers (multiple fields) | Phone numbers including the fields for a main phone number and a mobile phone number |
| Extra Field name | The extra field is provided for further text and description of another link you may want to add. For example: Read More or For further info |
| Extra link | Defines the website link that people are going to when they click on the Extra Field Name |
| Marker 1 latitude | Leave this field blank to leave map marker in the center of the map. Changing Marker 1 Latitude changes the position of the map marker |
| Marker 1 longitude | Leave this field blank to leave map marker in the center of the map. Change this setting to move the marker around the map. |
Summary
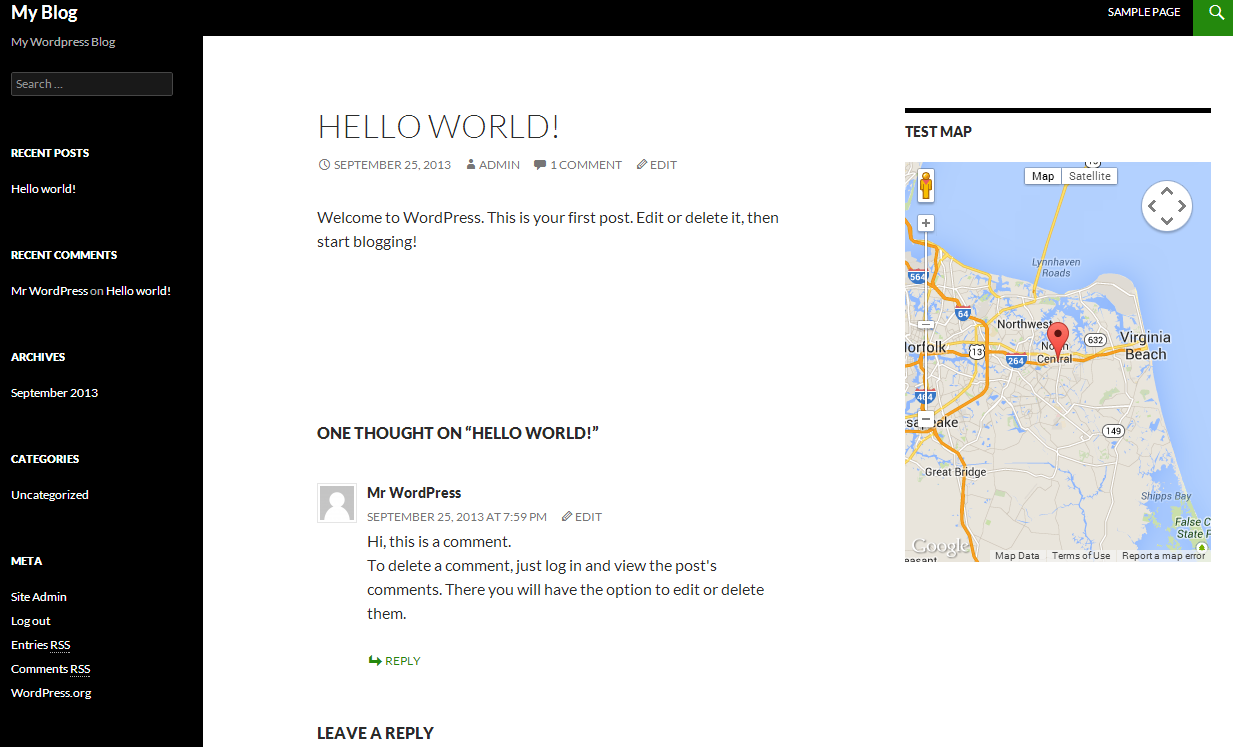
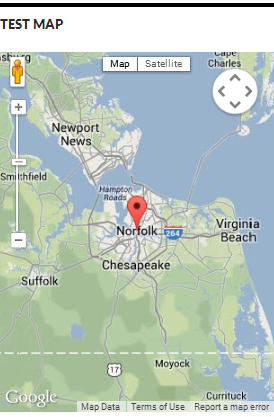
For further information, visit the TechGasp official documentation page on Google Maps Master Basic. When you have completed adding your widget and activating the map, then it may appear like the screenshot at right. In this case, the map is in the content sidebar position.
Did you find this article helpful?
Tweet
Help Center Login
WordPress Plugins
Related Questions
Here are a few questions related to this article that our customers have asked:
Would you like to ask a question about this page? If so, click the button below!

We value your feedback!
There is a step or detail missing from the instructions.
The information is incorrect or out-of-date.
It does not resolve the question/problem I have.
new! - Enter your name and email address above and we will post your feedback in the comments on this page!