Installing the WP e-Commerce Plugin in WordPress
The WP e-Commerce plugin is the most popular free e-commerce plugin for WordPress. While there are a few settings that will need to be configured to utilize this plugin, once it's set up you will find adding categories and products to be straightforward and simple.
Since this process may take a little time, depending on how many products you will be adding, you may want to put up a maintenance page for your site while you are working on creating the e-commerce area of your WordPress site.
Begin by logging into your WordPress dashboard.
Search for, install, and activate the WP e-Commerce plugin. Make sure that you are installing this specific plugin. There are several other plugins that include WP e-Commerce in their name and may add additional functionality, but we want to install and configure WP e-Commerce so we can begin selling products on our site.
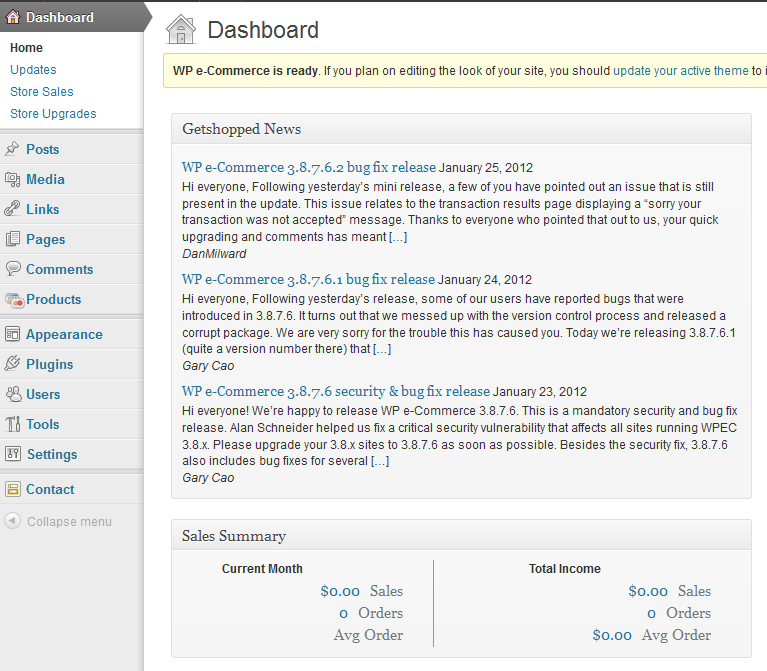
Once you have installed and activated the WP e-Commerce plugin you will notice a few changes to your WordPress dashboard:
Your Dashboard welcome page now includes a Getshopped News feed along with a Sales Summary for your online store.
Under Settings you will see a new menu item named Store. This is where you can manage general settings for your online store.
A new menu item named Products will also appear in the dashboard (just under Comments)
There are also 4 new pages created by the plugin installation:
Products Page
Checkout
Transaction Results
Your Account
We'll see how those pages are used in a later lesson, but to get started, let's work on the important settings for setting up your e-commerce shop in WordPress. Please note, there are many different settings available in WP e-Commerce, but we will be focusing on getting your store up and running on your site as quickly as possible.
In our next lesson, we'll work on configuring your basic store, taxes and shipping settings in WP e-Commerce.
Comments
|
Staff 17,314 Points
|
2015-03-27 10:22 pm
Hello Richie P.
This is an option (as are all of the plugins). There is not need to make this mandatory for users. I hope this helps to answer your question, please let us know if you require any further assistance. Regards, Arnel C. |


We value your feedback!
There is a step or detail missing from the instructions.
The information is incorrect or out-of-date.
It does not resolve the question/problem I have.
new! - Enter your name and email address above and we will post your feedback in the comments on this page!