Creating download links for files in Premium Website Builder
As you create your site using the Premium Website Builder, you may want to add features such as downloadable files. These are commonly done in the form of links. Perhaps you want to link to a pdf file for your visitors, as an example. Below is a step by step guide that teaches you how to create downloadable links within the Premium Website Builder.
Uploading and linking files in the Premium Website Builder
- Log into the Premium Website Builder
 Either from the main menu page or the upper right menu, click on the Editstep (step 4).
- This leads you to the main Editscreen. From here you can select the page you want to work with by clicking on the page name. The data for that page will appear in the right hand panel.
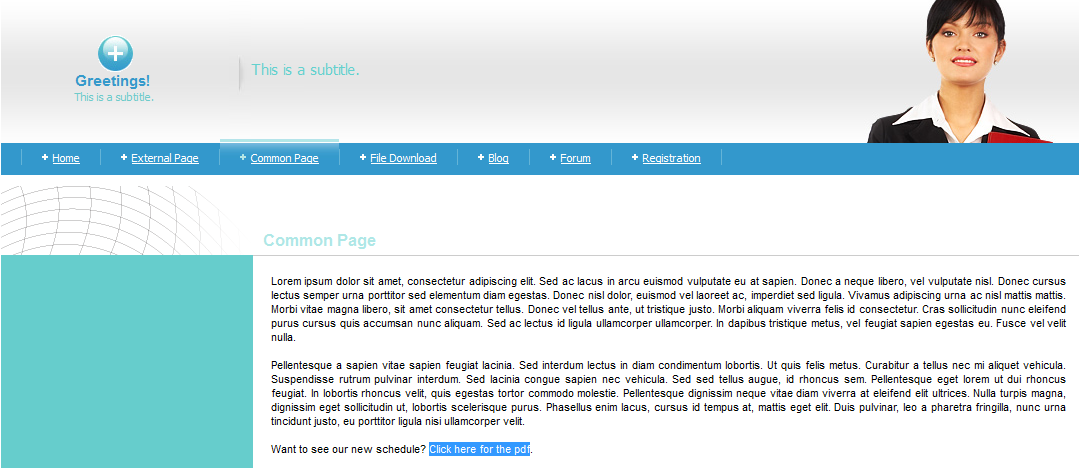 From the page edit screen, type or find the text you want to create a link from. After you find it, highlight it and click on the Link icon. This appears as a globe with a single chain link on it. Our example text is "Click here for the pdf."
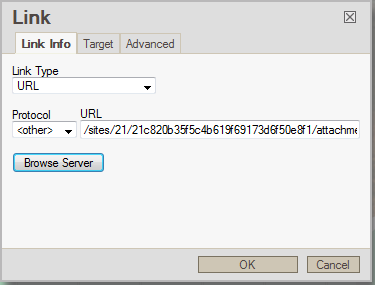
 This brings you to a link properties box. You should notice a Browse Serverbutton on the first tab. Click that to continue.
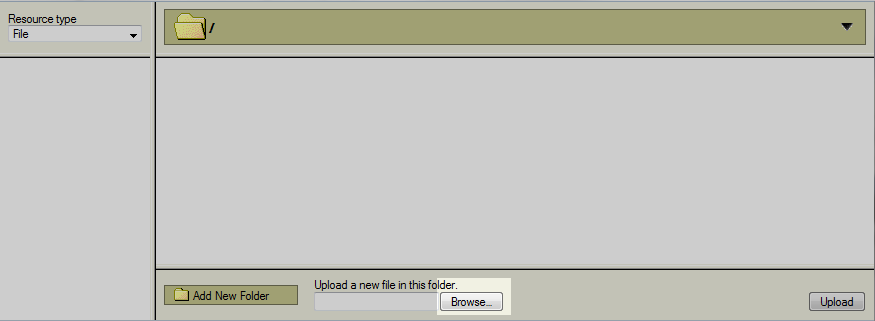 Now you will find yourself on a server browsing screen. Look to the bottom and you will see a Browse button. Click it to open up a screen where you can select a file from your local machine.
 After selecting the file from your machine, click the Open button. This adds the file path to the field next to the Browse button. From there, click on the Upload button to send it to the builder server.
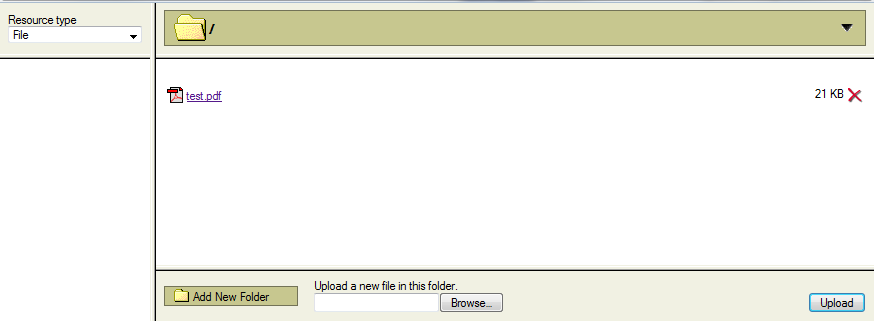 After uploading, the file will appear in the upper right panel of the server browser screen. The file name is designed as a link, so clicking on the file's name will cause it to automatically format and insert the data into the link editor popup.
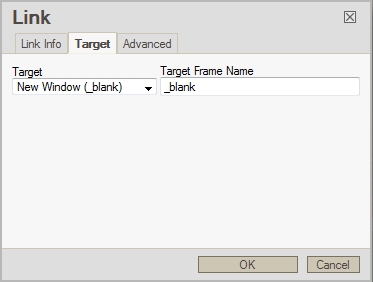 This step is not mandatory, but very common. Many times you want the link to open in another tab so the visitor still has your original site page open. To do this, click on the Target tab, then select New Window (_blank) from the dropdown menu. Click the OKbutton to save the information on all tabs and return you to the edit screen.
 Click the OK button at the bottom of the popup if you did not do so in the step above. This will finish the creation of the link.
- The link now appears on your page in the editor. Click on the Save Changes button in the upper left hand corner of the screen.
- After saving your changes, click on the Publish step (Step 5) from the upper right menu. This will place your new changes and your data file up on your hosting account. Now you can visit the site and ensure the link is working for your visitors.
Did you find this article helpful?
Tweet
Category
Premium Website Builder
Help Center Login
Related Questions
Here are a few questions related to this article that our customers have asked:
Ooops! It looks like there are no questions about this page.
Would you like to ask a question about this page? If so, click the button below!

We value your feedback!
There is a step or detail missing from the instructions.
The information is incorrect or out-of-date.
It does not resolve the question/problem I have.
new! - Enter your name and email address above and we will post your feedback in the comments on this page!