How to migrate your WordPress Database
In this class, we will be walking you through the steps on how to migrate our fictional Wordpress site, my-wordpress-site.com, from HostXYZ to Web Hosting Hub. As we don't want any issues during the migration, we have not updated the namservers for my-wordpress-site.com, so the site is still pointing to the servers at HostXYZ. After we have completed the WordPress Site migration and testing, we'll then update the domain's nameservers and point them to Web Hosting Hub.
Export a Backup of your WordPress Database
Your WordPress database contains all of the content that you've written for your site. phpMyAdmin is an industry standard for managing MySQL database, and as so many hosts provide this tool to their users, we'll show you below how to use it to download a backup of your database.
- At your old host, access phpMyAdmin
- Load your WordPress database by clicking the database name in the left
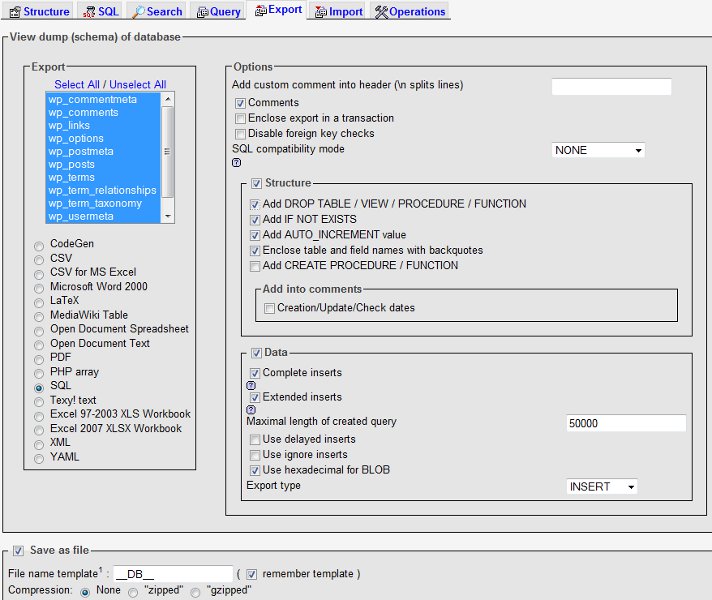
- Click "Export" at the top right.
- Under "Export", ensure that all tables are highlighted and that "SQL" is selected (these are the default settings)
- Under "Options", ensure that "Add DROP TABLE / VIEW / PROCEDURE / FUNCTION" is selected.
- Ensure that "Save as File" towards the bottom of the page is selected
- Click Go.
When you click Go, you will be prompted to download the backup file.
Create a new MySQL Database
We'll want to import the database we just exported above, but we'll first need to create a blank database. To do so:
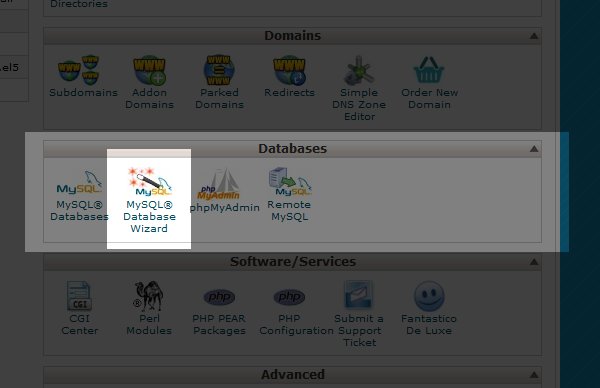
- Log into your Web Hosting Hub cPanel
- Click the "MySQL Database Wizard" link.
- In step 1 of the Wizard, enter a name for your database. You can call anything you want, such as wpress for example. Write this down somewhere.
- In step 2 of the Wizard, enter a database username and password. You can enter anything you want, such as wpuser. Write down your username and password somewhere.
- In step 3 of the Wizard, select "ALL PRIVILEGES" and click "Next Step"
Import the backup you just generated
Now that we've created a blank database, let's import our WordPress.

- Log into your cPanel at Web Hosting Hub
- Click the "phpMyAdmin" icon
- Select the database you just created by clicking the link in the left. In this example, I'll be clicking "_wpress".
- Click "Import" in the top right
- Click the "Browse" button and select the database backup file on your computer that you generated earlier
- Click "Go"
Congratulations, you just successfully migrated your WordPress database! Let's move on to our next step, migrating our WordPress application files.
Did you find this article helpful?
Tweet
Help Center Login
Migrate your WordPress Site to Web Hosting Hub
Related Questions
Here are a few questions related to this article that our customers have asked:
Ooops! It looks like there are no questions about this page.
Would you like to ask a question about this page? If so, click the button below!

We value your feedback!
There is a step or detail missing from the instructions.
The information is incorrect or out-of-date.
It does not resolve the question/problem I have.
new! - Enter your name and email address above and we will post your feedback in the comments on this page!