Working with the Oscommerce Product Listing
In this tutorial we will show you how to work with the Product and Categories listing in Oscommerce. The sort order is how the product or category list displays in your E-commerce store. In the osCommerce admin panel, products and categories are listed in the same location, and can be easily updated.
First, we will show you how to change the sort order, then we will show you how to delete and move products and categories.
Changing the Sort Order of a Category or Product:
- Login to the OsCommerce Administration Panel.
- Select the Catalog menu button on the left side of the screen.
- Under the catalog menu, click the Categories / Products option
- Select the Category or Product you want to change the sort order for by clicking it. When a Category or Product is selected, there will be play arrow under the Action menu.
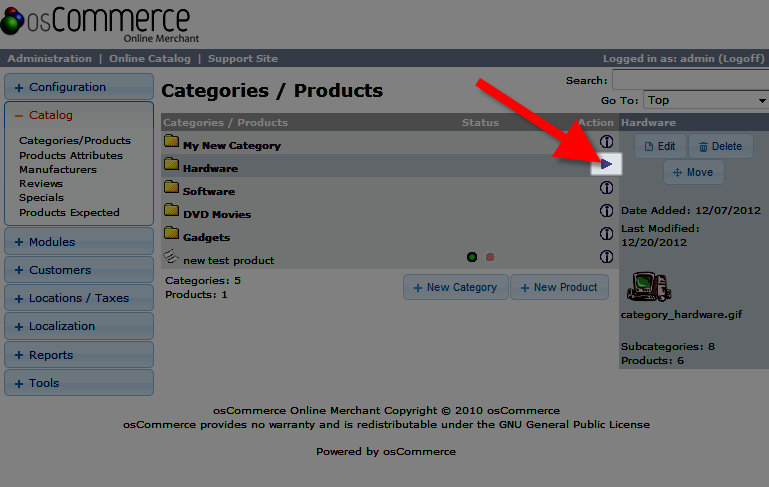
To select an item inside one of the listed Categories click folder image to the left, and it will list the contents of the folder. - After selecting the category / product click the Edit button over to the right. Under the Sort Order field enter a number, lower numbers will display closer to the top of the list.
- Click Save button to apply your change.
Deleting a Category or Product:
- Login to the Admin Panel of osCommerce.
- Click the Catalog menu button on the left.
- Select Categories / Products option under the Catalog menu.
- Select the Category or Product you want to delete by clicking it. When a Category or Product is selected, there will be play arrow under the Action menu.
- Select the Delete button to the right.
- OsCommerce will as "Are you sure you want to delete this category?" and list the selected Product or Category below, click the Delete button to confirm you want it removed.
Moving a Product or Category:
- Login to the OsCommerce Admin Panel.
- Select the Catalog menu button on the left side of the screen.
- Under the catalog menu, click the Categories / Products option
- Select the Category or Product you want to move by clicking it. When a Category or Product is selected, there will be play arrow under the Action menu.
- Select the Move button to the right.
- OsCommerce will state "Please select which category you wish Hardware to reside in" and after Move Hardware to: click the drop-down box, and choose where you want your selection moved.

- Clock the Move button to apply your modification.
Congratulations, now you know how to work with the Product and Categories listing in Oscommerce.
Did you find this article helpful?
Tweet
Category
Adding Products in osCommerce
Help Center Login
Adding Products in osCommerce
Related Questions
Here are a few questions related to this article that our customers have asked:
Ooops! It looks like there are no questions about this page.
Would you like to ask a question about this page? If so, click the button below!

We value your feedback!
There is a step or detail missing from the instructions.
The information is incorrect or out-of-date.
It does not resolve the question/problem I have.
new! - Enter your name and email address above and we will post your feedback in the comments on this page!