Adding or Editing Carriers in PrestaShop 1.5
The add carrier interface has been updated in PrestaShop versions 1.55 and above. It updates functionality for adding a carrier using a wizard interface. When you use the interface it "slides" to the left and right but will not let you advance until you have completed the mandatory items. The following tutorial introduces you to the carrier list interface and the Add Carrier Wizard.
How to Add/Remove a Carrier
In order to get to the section where you can add or edit carriers using the carrier wizard, there are a few steps.
- Login to PrestaShop Dashboard as an administrator.
- Hover over the menu bar where it is labeled Shipping, then click on Carrier when the drop-down menu appears.
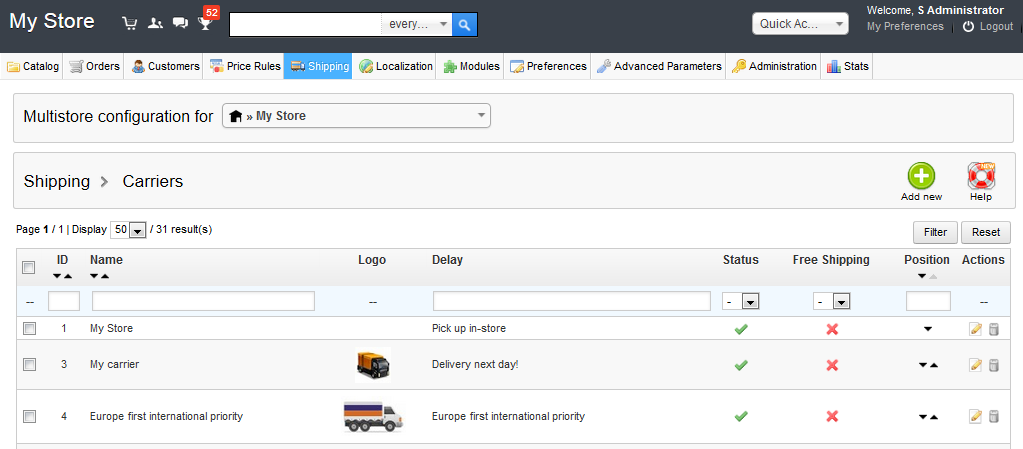
- If you have carriers already created, you should see a list of them in a table. Click on the green button labeled Add new in order to create a new carrier. Note that you will need to have set up an account with a local shipping company in order to properly create these settings. PrestaShop does not do that for you. For example, if you were to use the United States Postal Service, then you would need to contact them and set up an account. They will give you their shipping rates. You will need to determine how much your shipping costs are going to be set by using the rates you have been given. To learn more about adding a carrier, please go to the add carrier wizard further down in this article.
- If you want to REMOVE a carrier, go to your Shipping>Carriers screen (as illustrated in the screenshot above) and then click on the trash can icon in the far right to delete a specific carrier. WARNING: There is no confirmation of the deletion, it immediately happens. So before clicking on this icon be sure that you are deleting the correct item. There is no way to recover a deleted shipper unless you restore your entire PrestaShop database from a recent backup.
Getting Familiar with the Shipping > Carriers Screen
Before you add a carrier, let's get familiar with the Carrier list screen. It has a few functions that are helpful to manage the carriers that you create. The functions of the Carrier list include the options to enable/disable a carrier, enable/disable free shipping, and delete a carrier. Each of these functions are represented by icons in columns to the right of the screen. These columns are respectively labeled: Status, Free Shipping, Actions. To perform each function, simply click on the icon corresponding to the carrier in the list. The other thing you can do with the screen is determine the order in which the Shippers appear. In the column labeled Position, you can click on the up or down arrow to change the position of that carrier.
Using the Add Carrier Wizard
Once you have clicked on the Add new button, you will be able to start the process of setting up the details for your carrier. Each section of the carrier you are creating is described below. As you click on each section, you will need to fill in the values that apply to your carrier. You will find that you may need to create multiple carriers based on the products that you ship and shipping services that you wish to offer. Click on the items below in order to learn about each section of the Carrier creation process.
General Settings for the Carrier
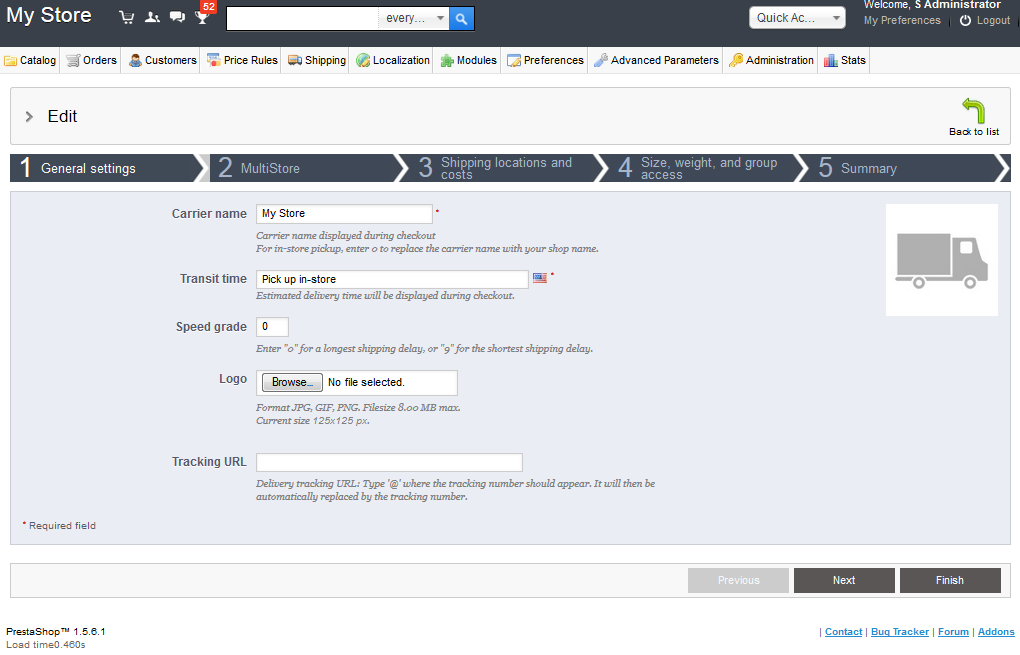
The General section includes the options for your carrier name, transit time, speed grade, carrier logo, and tracking URL. Note that each required field has a red asterisk added to the right of the field.
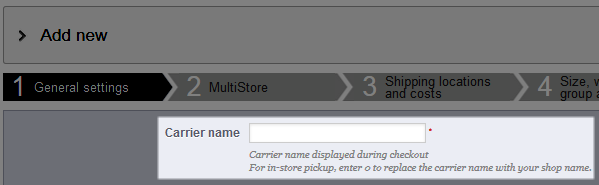
Carrier name
Click on the Carrier name blank. Type in the name of the carrier that you are trying to create. Carefully select the name of your carrier, but remember that you can always go back and easily edit the name.

Transit Time
Transit time is the estimated delivery time that is used by your carrier. For example, you can say that the carrier will deliver in one day. Click on the field and then type in the estimated delivery time for your carrier.

Speed grade
Speed grade is simply a value from 0-9 that allows you to rate the possible shipping delay for that carrier. Click on the field and enter an integer between 0-9 to rate the speed grade of this carrier.
Adding the Shipping Company Logo
Physically, adding the logo actually occurs several blanks down, but the logo appears to the right of the screen. Go to the fourth option down, labeled "Logo" and click on Browse. The limits for the file are listed under the browse button. Here's what it says:
Format JPG, GIF, PNG. Filesize 8.00 MB max.
Current size 125x125 px
Tracking URL
The tracking URL is the website address used to track the delivery of the package. This is provided to the customer so that they can track the package. The instructions provided by PrestaShop indicate that you should put a "@" symbol where the tracking number will need to go.
Enabling the carrier for Multistore PrestaShop installations
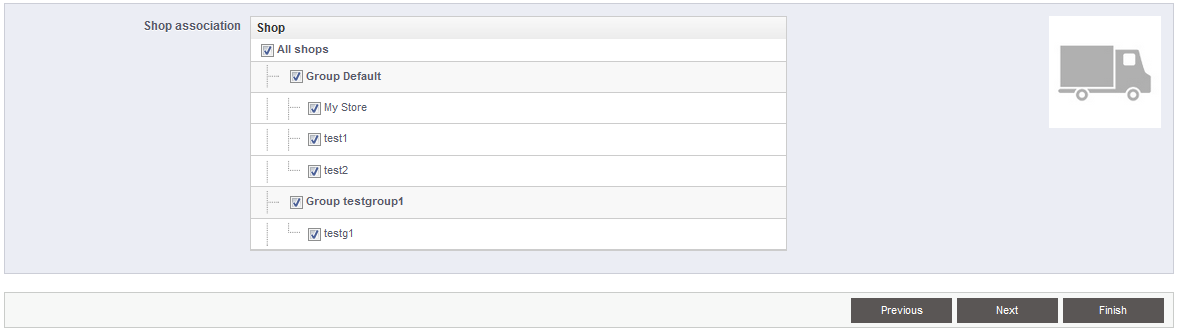
If you are using the multistore feature of PrestaShop, then you will need to use this section to make sure that the carrier is available for each of the stores you have created. If you are not using the multistore feature, then you will not need to worry about this setting.
For each Carrier definition you can assign all of your stores or a specific store by simply clicking on the checkbox for that store or group of stores.
Defining your Shipping Costs
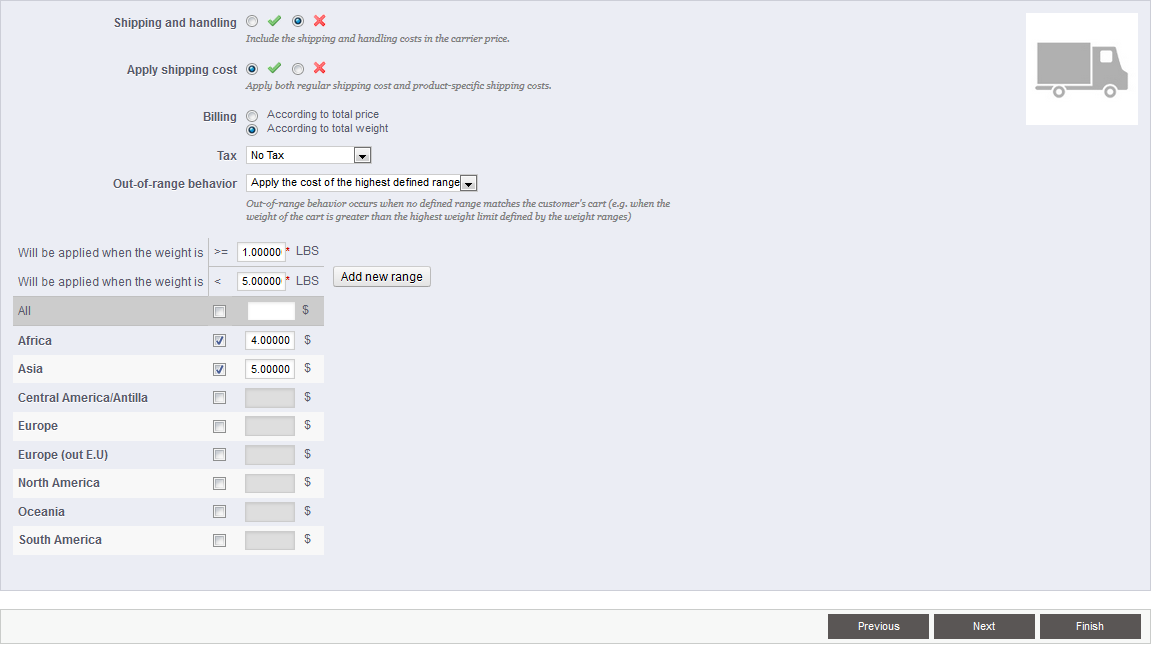
Shipping Locations and Costs
This section defines the delivery locations for your carrier. It also defines the handling costs. The shipping and handling costs are based on either price or weight of the items purchased. You can define this by setting up a range and you can also set up different cost per region.
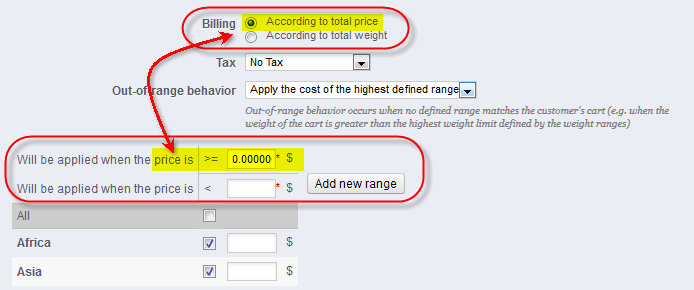
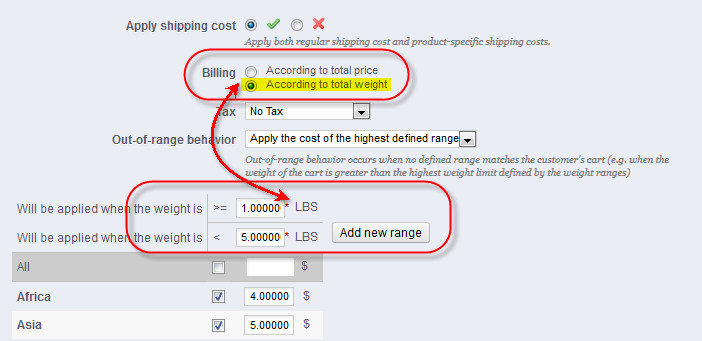
Billing
This setting determines if the range for shipping and handling cost will be based on price or by weight. Review the screenshots at right. Each screenshot shows how changing the billing option to price or weight will affect the setting.
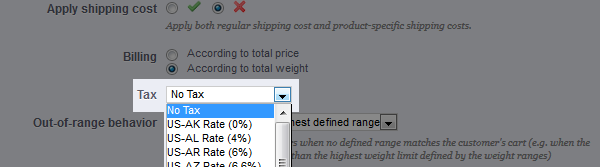
Shipping Tax
Shipping cost can also have tax applied. This section uses the tax rules previously defined within PrestaShop.

Out-of-range behavior
If the product is NOT within the defined range you will be able to select to disable the carrier or charge the highest defined range.
Defining Shipping and Handling charges based on cost or weight ranges
This area of the interface allows you to define your carrier cost of shipping and handling based on a weight/price range. It allows you to define a single cost for all regions or you can define a shipping cost per each region. You can also define multiple costs based on different weight/price ranges.
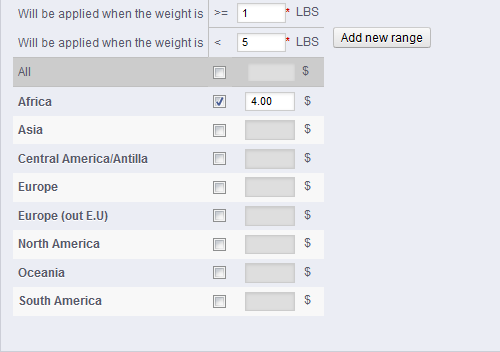
Defining a Single range
When you define a Single range for your carrier cost, the cost remains the same for all regions. This will depend on your carrier, so be careful to set this option as you generally will not see the same shipping cost between shipping to the United States and then somewhere overseas.
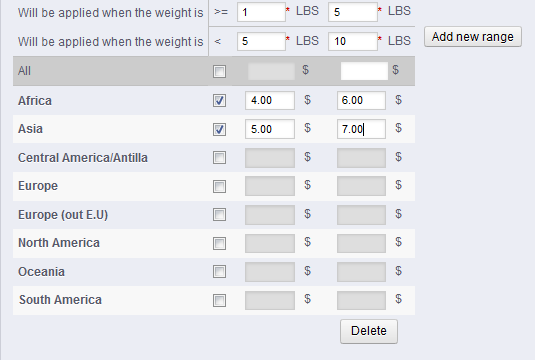
Defining regional ranges
Regional ranges allows you to set the shipping cost for specific regions.
Setting Up Size/Weight Maximums and Group Access
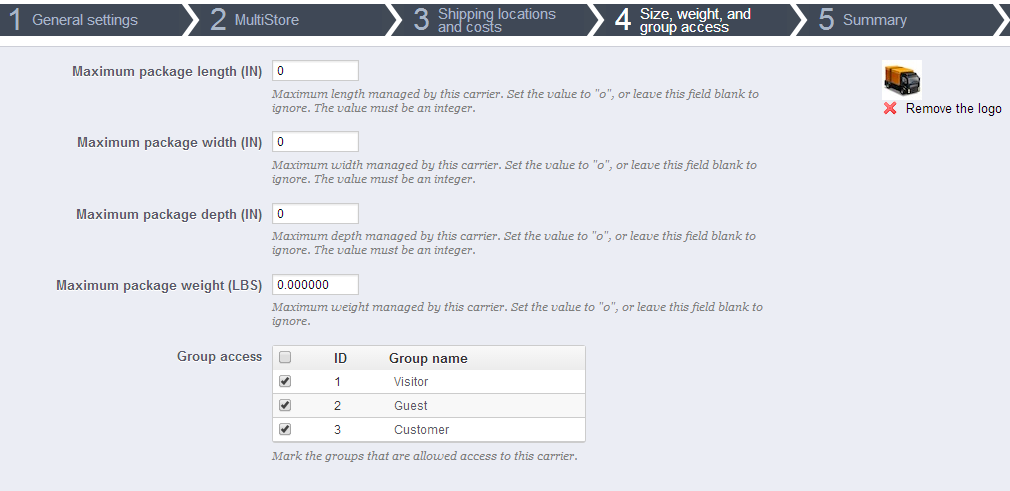
Size, Weight, and Group Access
The following settings are defined in order to provide a limit for the carrier that you are creating. You can also limit the carrier to specifically defined groups.
Maximum package length
This determines the maximum length that can be accepted by this carrier.
Maximum package width
This determines the maximum width that can be accepted by this carrier.
Maximum package weight
This determines the maximum weight that can be accepted by this carrier.
Access based on Group Type
This determines the group that can access this carrier definition.
Summary Screen
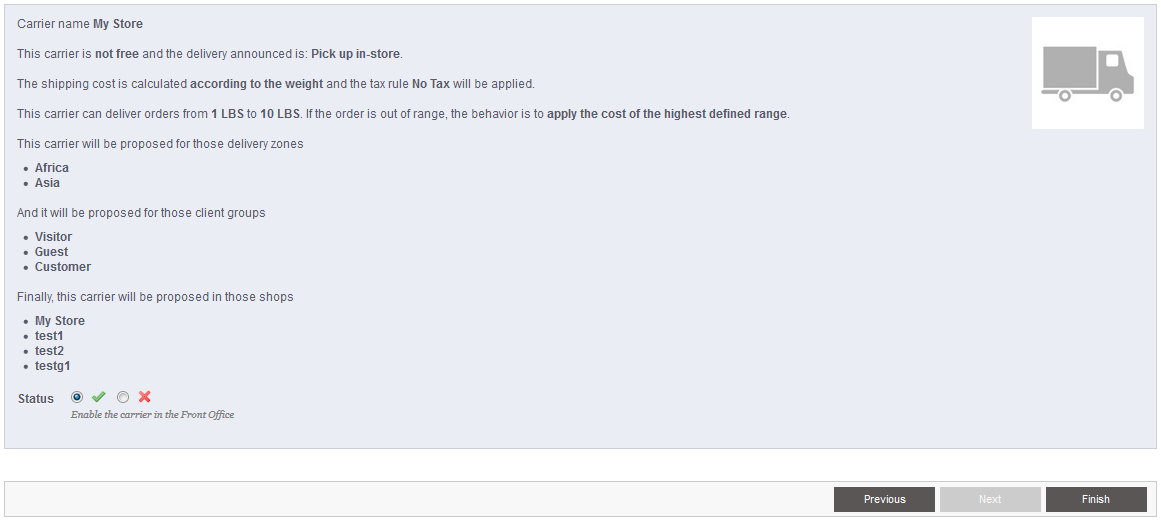
The Summary screen is exactly that - a summary of all of the settings that you have added. You can also set the carrier to be disabled here so that you don't have to take that extra step in the carrier list. Click on the FINISH button after you have finished reviewing your settings in order to save the newly created/edited carrier.
Finishing up a Carrier Edit
Editing the carrier is almost the same as creating a carrier, except that you're simply making changes to already existing settings in each of the steps. Clicking on Finish will simply update the carrier with your changes.
For further information on setting up handling charges and defining free shipping, please see How to set up Handling Charges in PrestaShop 1.5x.
Did you find this article helpful?
Tweet
Help Center Login
Related Questions
Here are a few questions related to this article that our customers have asked:
Ooops! It looks like there are no questions about this page.
Would you like to ask a question about this page? If so, click the button below!

We value your feedback!
There is a step or detail missing from the instructions.
The information is incorrect or out-of-date.
It does not resolve the question/problem I have.
new! - Enter your name and email address above and we will post your feedback in the comments on this page!