How to Setup W3 Total Cache for Wordpress
Wordpress, like any other website software, often sees sudden surges in traffic due to search engine bots or by a simple increase in website traffic. The effect of the increased traffic is that resources used on the hosting service may increase or decrease dramatically depending on the traffic coming to the server. Many of the resource requests occur when Wordpress is trying to keep up with the repeated quests from the increased traffic on the server.
Wordpress is a CMS (Content Management System) that requires access to the database for every visitor getting into the Wordpress front end. As traffic increases, the processes handling Wordpress visitors take longer to process as the database becomes inundated with requests. This causes a surge in CPU usage which can often cause the server to slow down.
To counter the CPU issue, a caching plugin for Wordpress would greatly help to alleviate the problem by minimizing multiple page requests of the same page. A page that is repeatedly requested would be cached and all visitors hitting the page after the first request would be getting a cached version of the website page that would not require database access.
As a result the customer sees the Wordpress page much faster and the overall CPU performance on the server would be improved. The following article shows how to setup and configure W3 Total Cache.
Installing W3 Total Cache
- Login to your Wordpress Administrator backend.
- Hover over Plugins in the left-hand menu and then click on ADD NEW at the top of the page to search for the plugin.
- In the SEARCH field, type in W3 Total Cache and then click on SEARCH PLUGINS.
- When the search completes you will see something similar to the following:
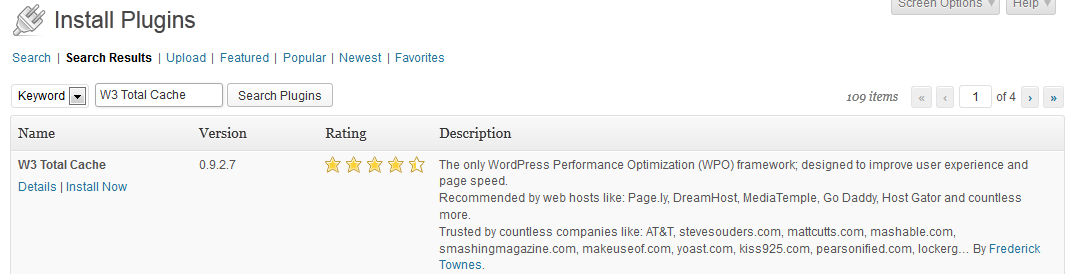
Click on INSTALL NOW, then confirm the install by clicking on OK in the confirmation dialog window. - Click on ACTIVATE PLUGIN on the confirmation screen indicating that W3 Total Cache was installed successfully. You will then see that the plugin has been added to the list plugins already loaded on your website.
- The installation and activation of the plugin will place a new menu item in your Wordpress Admin dashboard called PERFORMANCE. Click on PERFORMANCE, then click on GENERAL SETTINGS.
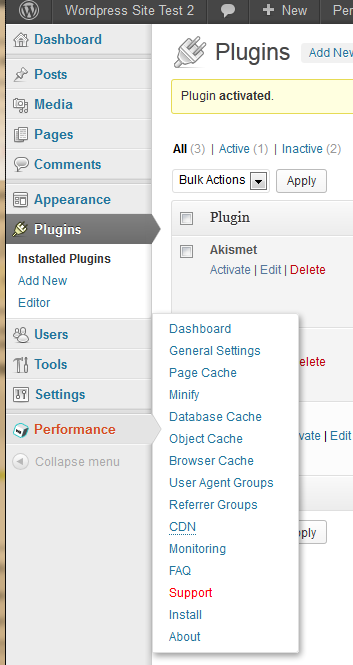
- Scroll down the GENERAL SETTINGS page and make sure to click on the checkbox to enable each section listed below:
Page Cache
Minify
Database Cache
Object Cache
Browser Cache
Note that there are a large number of other settings, but we are only focusing on the both items to enable caching on the Web Hosting Hub server. After you make sure that each setting has been enabled, click on the SAVE ALL SETTINGS button. - After you have enabled all of these settings, hover over the PERFORMANCE menu again then click on PAGE CACHE. Scroll down and make sure that each of the following settings are enabled by clicking a checkmark in the check box beside each setting:
Cache front page
Cache feeds: site, categories, tags, comments
Cache 404 (not found) pages
Cache requests only for yourdomain.com site address
Don't cache pages for logged in users - After you have finished enabling each of the above sections, click on SAVE ALL SETTINGS.
- In order to confirm that W3 Total cache is setup, view your Wordpress website, then click on CONTROL-U (control key + the U key on your keyboard), or go to VIEW > PAGE SOURCE. This will open up the source view of the page. Scroll to the bottom of the page and will see a confirmation that looks similar to the one below if the W3 total cache is properly configured:

This completes the installation of the W3 Total Cache, also sometimes known as w3tc. There many, options available for Total Cache. Make sure to go through the documentation for the caching applicaton before trying to make manual changes to the settings. With the cache enabled you'll see better page lods and improved resource usage from the server.
Did you find this article helpful?
Tweet
Comments

14 Points
|
2013-09-14 4:12 am
Hi WHH Support,
Step 10 to verify that W3TC is working is not documented properly back up in step 7. If you want to use the HTML comment mentioned in step 10 as "Proof that W3TC is working" then back up in step 7 you also need to: -------------------- Step 7. Scroll down the GENERAL SETTINGS page and make sure to click on the checkbox to enable each section listed below: Page Cache Minify Database Cache Object Cache Browser Cache Debug Mode -> Page Cache -------------------- With out the 'Debug Mode -> Page Cache' option ticked then step 10 will not be able to prove that W3TC was and still is working. This missing information was a recent point of contention in a WHH ticket where step 10 was being used by WHH staff as proof to say 'it needs to be fixed' in the support ticket conversations. Bottom line is that it was not broken, only the above instructions were missing a 'tick' in step 7. Kind regards, John. |

Staff 12,339 Points
|
2013-09-16 9:13 pm
Hello John.Lang,
Thank you for your comment. I installed Wordpress from scratch, then followed this guide exactly, and everything worked as described. I did have to update the wording in Step 8 as they have changed slightly: Cache home page-->Cache front page Cache requests only for yourdomain.com localhost-->Cache requests only for yourdomain.com site name If it is not functioning as described, most likely a Theme or Plugin you are using is interfering with the way W3 Total Cache works. Disabling the suspected Plugin or Theme in Wordpress, then testing again can help you troubleshoot the issue. If you have any further questions, feel free to post them below. Thank you, -John-Paul |

n/a Points
|
2014-06-18 5:45 pm
Hi there, In step 8 as of June 2014 the plugin says Don't cache front page (instead of Cache front page), which is different from the article. Should I check or uncheck that item?
Thanks |

Staff 2,342 Points
|
2014-06-18 6:03 pm
If it is now saying Don't cache front page, you will want to now leave this box unchecked.
|

n/a Points
|
2014-11-04 4:41 pm
Hi there, I was going through tutorial. Could not access General Settings, and when I clicked on an alternative link to it I got a message: You do not have sufficient permissions to access this page. Can you help? |
|
Staff 2,342 Points
|
2014-11-04 6:13 pm
Is the user that you are using set to the Administrator role? If you have multiple users, you may need to log in as the main administrator account that you defined when initially installing WordPress and adjust any additional users that you have defined so that they may be able to access W3 Total Cache.
|

n/a Points
|
2014-12-25 1:44 pm
I want to set W3 Total Cache. up so that cahe remains for say 3 days, at which point the cahe is cleared and renewd. I have about 22 pages. How can i achieve this is it using Cache preload Update interval: and Garbage collection interval:
Is it possible to have this automatic i.e without visiting page?
|

Staff 1,198 Points
|
2014-12-26 6:33 pm
Hello Paul,
The garbage collection interval will try to delete old cache files after it reaches the interval time set. This should achieve what you are looking to do, however your website needs to have traffic or else the php files will not execute. Kindest Regards, TJ Edens |
Help Center Login
Introduction to Plugins and Widgets
Related Questions
Here are a few questions related to this article that our customers have asked:
Ooops! It looks like there are no questions about this page.
Would you like to ask a question about this page? If so, click the button below!

We value your feedback!
There is a step or detail missing from the instructions.
The information is incorrect or out-of-date.
It does not resolve the question/problem I have.
new! - Enter your name and email address above and we will post your feedback in the comments on this page!