Setting up the GeoLocation Database in Prestashop 1.5
In order to lock out specific IP ranges that represent different countries, Prestashop uses a database that can be enabled for this purpose. It will appear that you can use the Geolocation option immediately, by you should see the following warning first: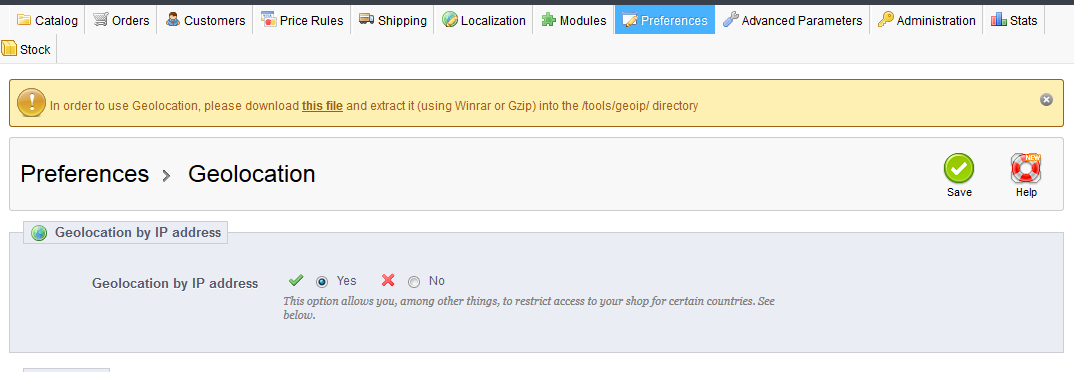
The link they give allows you to download the following file:
GeoCityLite.dat.gz. Use the following steps after downloading the file in order to use the Geolocation feature of PrestaShop 1.5.
NOTE: The Geolocation option in the menus under Preferences is not the same as the Geolocation module. See Setting up the Geolocation Module in Prestashop 1.5 for more information.
Setting up the GeoLocation Database in PrestaShop 1.5
- Login to the PrestaShop 1.5 dashboard.
- Hover over the menu bar where it is labeled PREFERENCES, then click on GEOLOCATION at the bottom of the drop-down menu that appears.
 You will see the Geolocation portion of PrestaShop appear. As per the screenshot above (and to the right), click on the link in order to download the GeoCityLite.dat.gz file. Make sure to remember where you placed the file.
- You can extract the file using a compression program like Winrar or Gzip and upload the compressed file contents, or you can utilize the extract option available in the Cpanel File Manager. For information on using the File Manager, go to Using the Cpanel File Manager. Upload the extracted file or upload the compressed file and extract with the Cpanel File Manager into the following path: /tools/geoip/directory. This path is found within your PrestaShop 1.5 installation location. You can use the Cpanel File manager to upload the files or an FTP client -whichever you prefer. Note that you will find that it is much faster to upload a single file using the File Manager and multiple files using FTP.
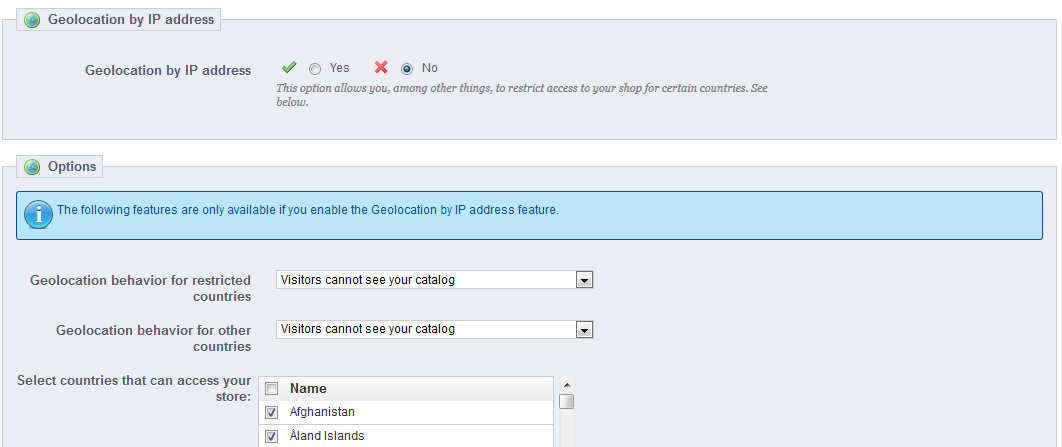 Once you have upload the file(s) into its proper place, then the Geolocation database is ready for use. You will be able to choose to enable the Geolocation option and block regions in the menus below.
- Once you selected your geolocation options, click on the green SAVE button in the upper right hand corner to save your entries.
Did you find this article helpful?
Tweet
Category
Prestashop 1.5
Help Center Login
Related Questions
Here are a few questions related to this article that our customers have asked:
Ooops! It looks like there are no questions about this page.
Would you like to ask a question about this page? If so, click the button below!

We value your feedback!
There is a step or detail missing from the instructions.
The information is incorrect or out-of-date.
It does not resolve the question/problem I have.
new! - Enter your name and email address above and we will post your feedback in the comments on this page!