Adding Return Reasons in OpenCart 1.5
Opencart is flexible with its return system in that it allows you to expand the choices that can be selected for return statuses, actions and reasons. By default, return Statuses include awaiting products, complete, and pending. If you need to add a different status - such as "in transit" - it is easily added. The following article explains how to add return statuses in the OpenCart 1.5 Administrator dashboard.
Creating New Return Reasons in OpenCart 1.5
- Login to the Administrator Dashboard
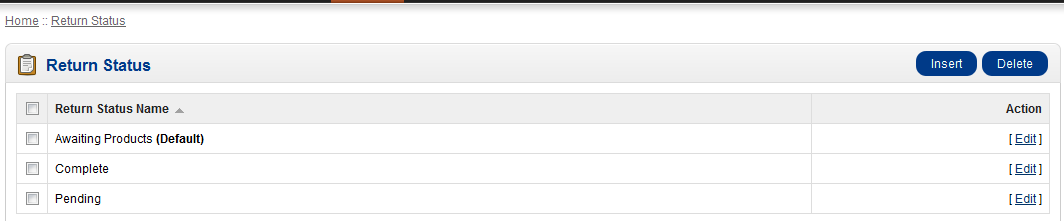
- Click on the menu bar where it shows SYSTEM. Scroll down the drop-down menu until you find Localisation, follow the menu to the right and then hover over RETURNS. Another menu will shoot out to the right. Click on Return Reasons and you will see the following:
- In order to edit an existing Return Status, click on the check box at left to select the Return Status in question, or click on EDITat the far right in order to edit the existing defdefinition. Here's what the screen may look like:
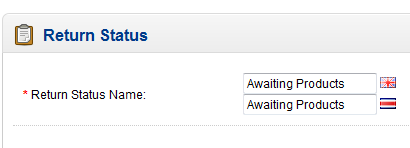
Edit the definition by clicking in the field and making the change. As per the screenshot above, there may be multi-lingual needs for these definitions. Make sure to change these labels to reflect the language needs of your storefront or customers. Click on SAVE in the top right hand corner to save entries. This will return you to the main list of statuses with a green check mark.
- In order to ADD a new Return Status click on INSERTin the top right hand corner and you will see the following:
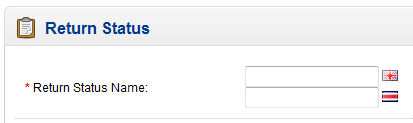
Click in the empty field(s) and define the Return Status. Bear in mind that you will have multiple fields only if you have multiple languages loaded into the system.
- Click on SAVE in the top right hand corner in order to SAVE your entries.
The RETURN Reasons let's you identify where the product is located in the process of returning back to your store or warehouse. Make sure to carefuly identify your return process and the stages that returning products will take. This will help you accurately identify your different return statuses.
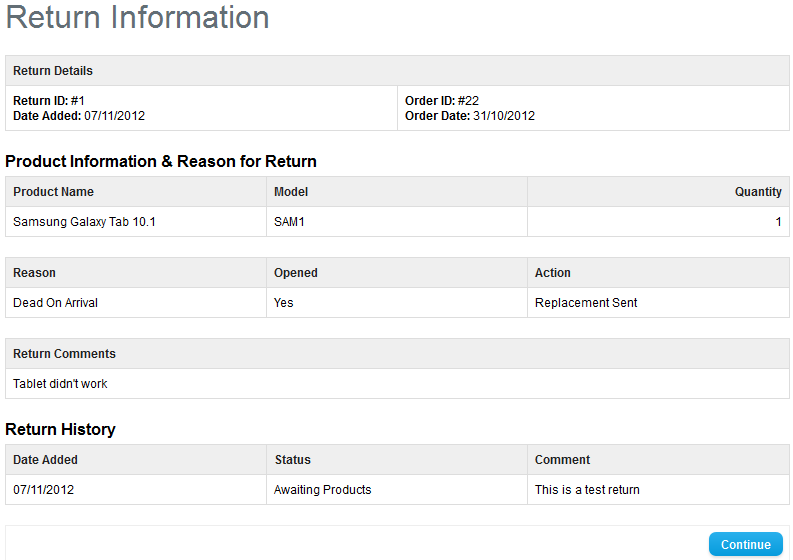
The customer sees a history of the RETURN by logging into their account. They can see Retuns in their store interface and will see the following:
Did you find this article helpful?
Tweet
Category
Returns, and Backorders in OpenCart
Help Center Login
Returns, and Backorders in OpenCart
Related Questions
Here are a few questions related to this article that our customers have asked:
Ooops! It looks like there are no questions about this page.
Would you like to ask a question about this page? If so, click the button below!

We value your feedback!
There is a step or detail missing from the instructions.
The information is incorrect or out-of-date.
It does not resolve the question/problem I have.
new! - Enter your name and email address above and we will post your feedback in the comments on this page!