Creating a Contao Blog Entry
The flexible nature of the Contao CMS allows you to use it for many purposes. In some cases, users will want Contao to be their blog software. It is very easy to do this as the main components of creating a blog - creating posts (text/html entries) with graphics plus the ability to allow comments - is a integral part of the Contao interface. The following article will show you how to quickly create a blog entry with a comment section.
Making a Contao Blog Post
- Login to the Contao Back end as an administrator
- Decide on the location of your Blog post. You can create a separate page or pick an existing one. For the purposes of this tutorial we will create a page called "Blog" and place it under one of the main pages in the demo site for Contao. Go to the Back end modules listed along the left hand side and then select the SITE STRUCTURE. Click on NEW PAGE and name it "Blog". You will see the following:
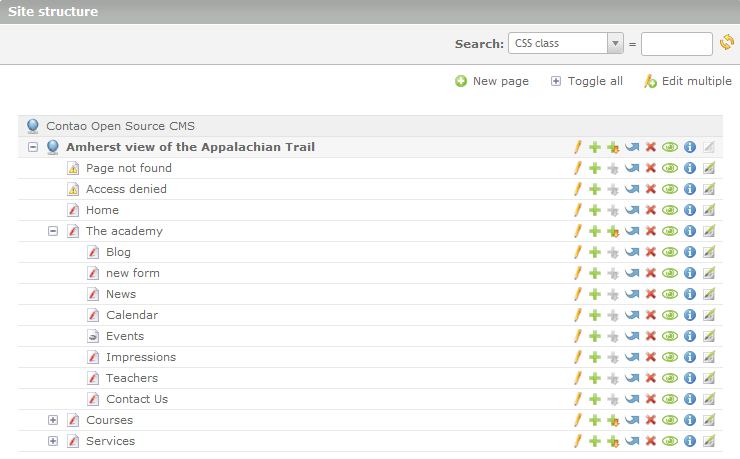
Note that the "Blog" Page was entered directly beneath the The Academy menu item. See Quick start to Creating a Page in Contao for further details on this process. - On the far right side of the page is the icon for editing the articles in the page (it's the last icon in the row of eight icons). If you hover over the icon you will see "edit the articles of ID##". After you click on this icon, the next step will require that you click on ADD NEW ARTICLE. This will bring you to this screen:
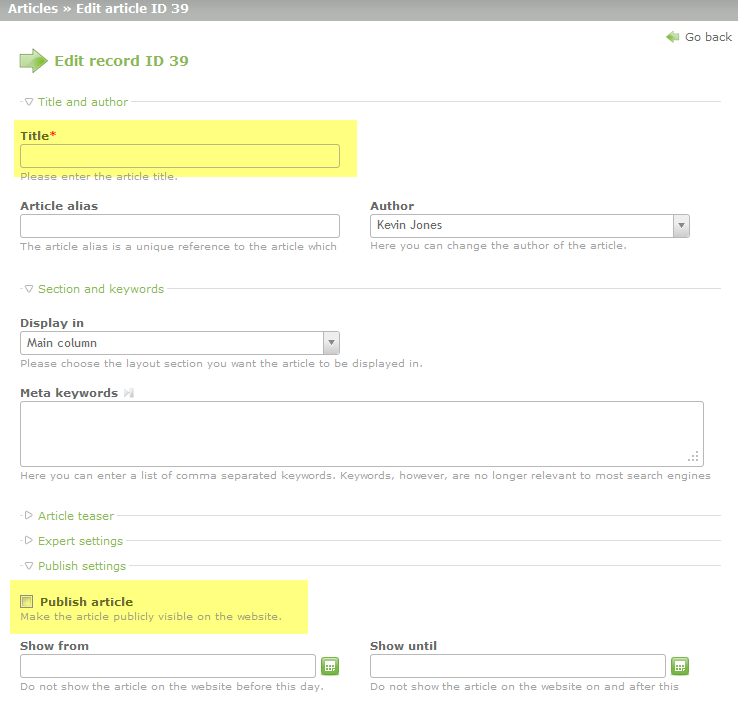
For the purpose of this tutorial, only the TITLE and the PUBLISH ARTICLE sections need to be filled. - Click on the pencil icon of the newly created article in order to add content. In the future, if you wish for the articles to all be published under this section, you can simply keep adding content here using this procedure. Here's a screenshot specifying where to click:
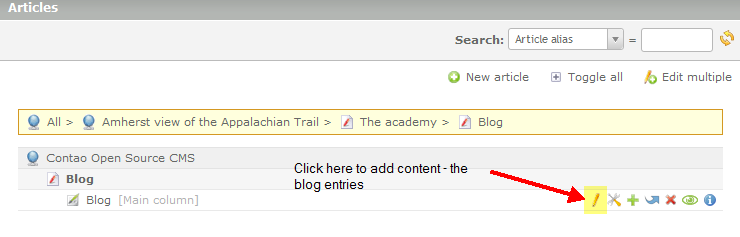
When the interface for adding elements appears, click on NEW ELEMENT to begin adding the blog content. - The first step in adding an item to an existing structure within Contao always begins with positioning that new item. When you click on NEW ELEMENT position the element by clicking on the first CLIPBOARD icon below the top item.
- At this point, you will need to select the ELEMENT TYPE. If you need more information on Element types, please see Element Types in the Contao CMS. For the purpose of this tutorial a text entry has been added that represents the blog entry. Leave Element Type on TEXT, then type in the Headline text. We used "Blog Entry" as per the screenshot below.
- Scroll down and then type in the text for your article using the provided editor. Note that you can do more than simply add text with the interface. The form for the content is long, so it is broken up into two parts (and not all of the form is shown).

Scroll down to the next section of the Content element entry and you will see the Image Settings section. Click on the checkbox to ADD AN IMAGE. - In this section you can specify a graphic and how it will appear in the article entry. The screenshot shows a graphic that has been added:
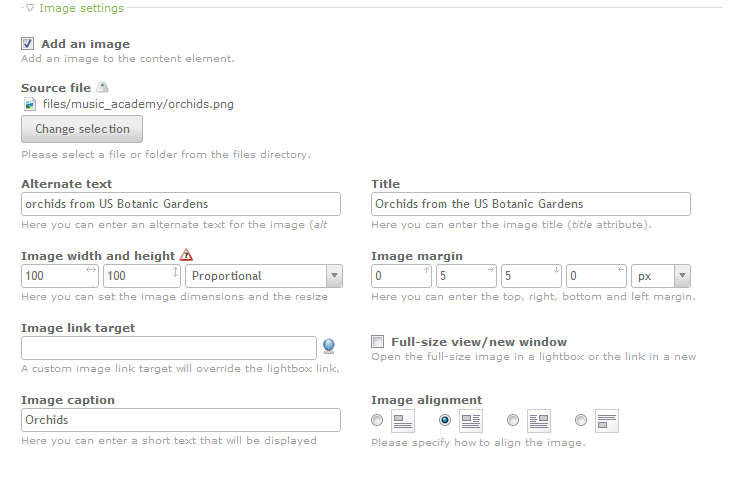
Take your time to familiarize yourself with the different image settings. The image here is small for the purposes of the article - only 100 x 100 pixels. The image margin, alternate text, title, and image caption are set for the added image. Finally, the useful option for Image alignment lets you determine the layout in relation to the text for the article. The second option in this section was selected so that the text would flow to the right and bottom of the image. However, there is not enough sample text to wrap, so the text stays to the right. Here's an example what is shown with these options set: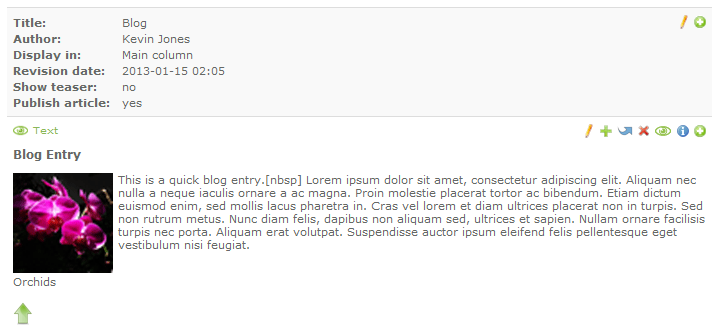
Click on ADD NEW ELEMENT to proceed to the next step. - The element the distinguishes blogs from simple websites is the option for user interaction using comments. In order to add this capability, you simply have to select the ELEMENT TYPE drop-down menu and click on COMMENTS. When you select COMMENTS, you will see the top part of the form for configuring Comments:
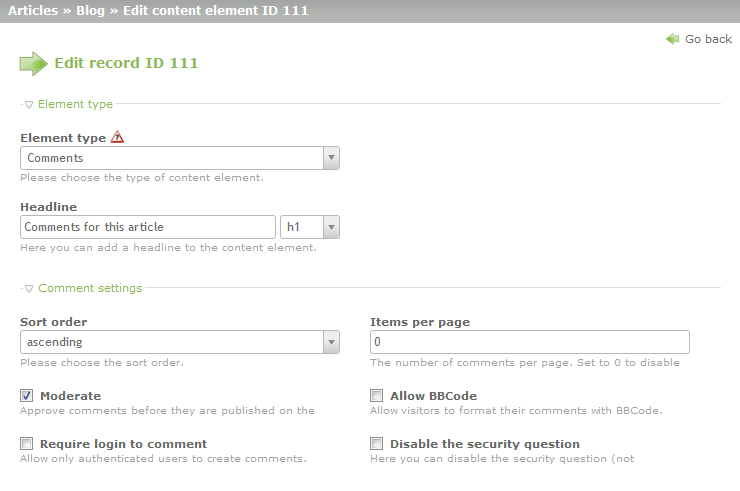
The title for the comments section is "Comments for this article" and then the next section is the Comment settings. It is important to note that this section includes the option to require moderating the comments (before they are published), requiring login to the front end as a member before being able to comment, limiting the number of comments per page, allowing BBCode, and disabling the security question (which is not recommended). These are the key options for the comments section and to simplify this tutorial, the only settings set for the form as shown above. - Scroll to the bottom of the form and click on SAVE AND CLOSE in order to save your entries and complete setup of the Blog entry using the Contao Back end.
Contao does make it easy to create a Blog Entry section for the website, but controlling how the interface evolves with additional entries will require close maintenance and management of the Contao site. Here's an example of how the entry appears in the front end as per the settings in the screenshots presented in the tutorial above:
Information on how to perform moderation/management of the comments added for the blog entries can be found in Managing Comments in Contao.
Did you find this article helpful?
Tweet
Category
Creating Content with Contao
Help Center Login
Creating Content with Contao
Related Questions
Here are a few questions related to this article that our customers have asked:
Ooops! It looks like there are no questions about this page.
Would you like to ask a question about this page? If so, click the button below!

We value your feedback!
There is a step or detail missing from the instructions.
The information is incorrect or out-of-date.
It does not resolve the question/problem I have.
new! - Enter your name and email address above and we will post your feedback in the comments on this page!