Creating hyperlinks in the Site Structure with Contao
Hyperlinks allow you to create links to webpages that reside elsewhere on the internet. There are many ways to accomplish this within the Contao CMS, but we will describe the process of adding the links using the Layout Site Structure option in the Back end modules. The following tutorial walks you through the steps to accomplish adding these links as menu items or pages within the Contao Site structure.
Adding Hyperlinks in the Website Layout Using the Contao Back End Interface
- Login to the Contao Back End Interface
- Scroll down the Back End Modules section (on left) and then click on SITE STRUCTURE. You will see a screen similar to the following:
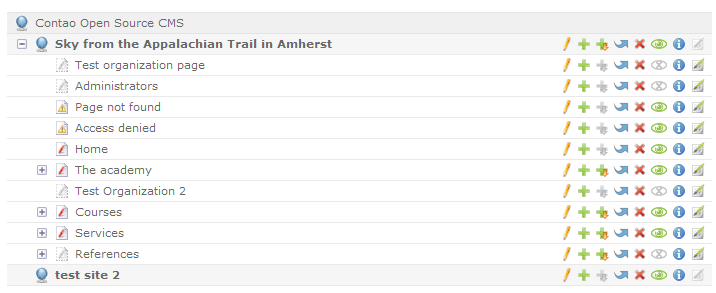
You can create a section in your own menu if you wish. See Creating Menus in Contao for more information on how to create menus. For the purposes of this tutorial, we will be using the REFERENCES menu item as seen above. - At the top of the menu, click on NEW PAGE and then you will see the following instruction:

Click on the clipboard for REFERENCES where the arrow is pointing to the right. This will create the page structure within the REFERENCES section. - Clicking on the clipboard will then open the new form screen that will resemble the following screenshot. For this tutorial, the new section has been named Trail References.
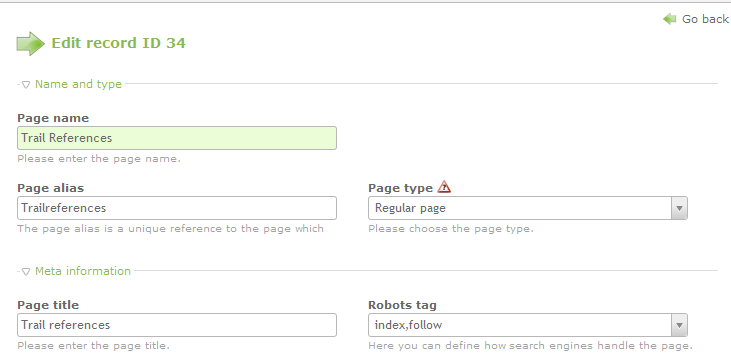
The important parts of this form starts with the PAGE NAME and PAGE TYPE. Make sure that you select REGULAR PAGE. Click in the Page Name field and name it 'Trail References" as it displayed above. - Scroll down the form and fill in the page description and alias section up top. Click on the check box for ASSIGN A LAYOUT. You will see the following appear:
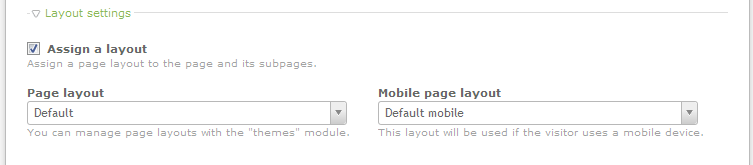
As soon as you check the checkbox, you'll see the two drop-down menus appear. You do not need to select anything from the drop-down menus unless you're not using the default theme for Contao. - Click on the box for PUBLISH PAGE so that the page will be publicly visible.
- Click on one of the SAVE options at the bottom of the screen in order to save your entries.
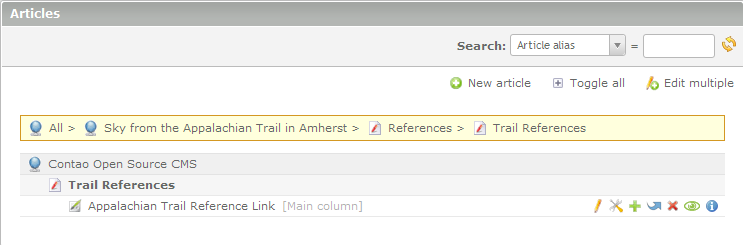
- The site structure you have created and saved is in essence the container for the link(s) that you will be adding. The actual link is done by adding articles to this structure. In the site structure menu, there several icons to the right of the TRAIL REFERENCES PAGE that you just created and saved:

This will bring up the Edit Articles form screen once more. You will need to fill in the information for the article ID for this link. I used Appalachian Trail Reference Link to describe this link. - Once you have completed this form, the screen will show you the following:
Finally, you can add the link by clicking on the first icon to the right of the screen -it resembles a pencil. - The second part of adding content to Contao is to add the actual content - in this case, it is a link. Click on NEW ELEMENT at the top of the screen. Then click on the clipboard to positin the new element immediately under the article ID. You will see the following:
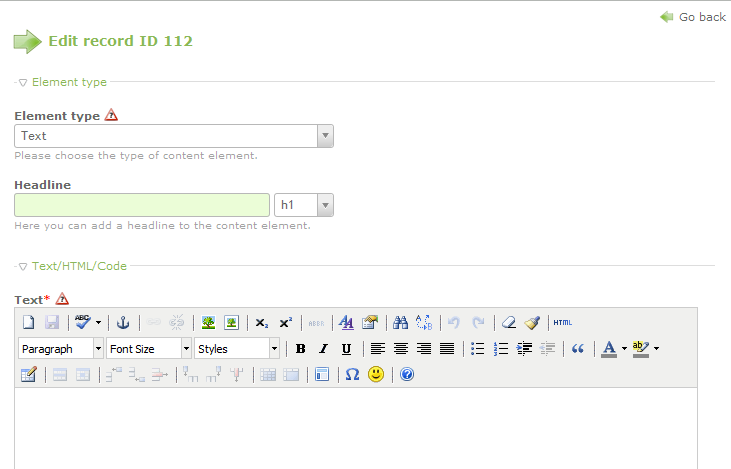
Click on the drop-down menu under Element Type. Select HYPERLINK from the list that appears (it will be under LINK ELEMENTS). - You will next see a form that needs to be filled out. It includes the links that you wish to add. Check out the following:
Enter the link: Part 1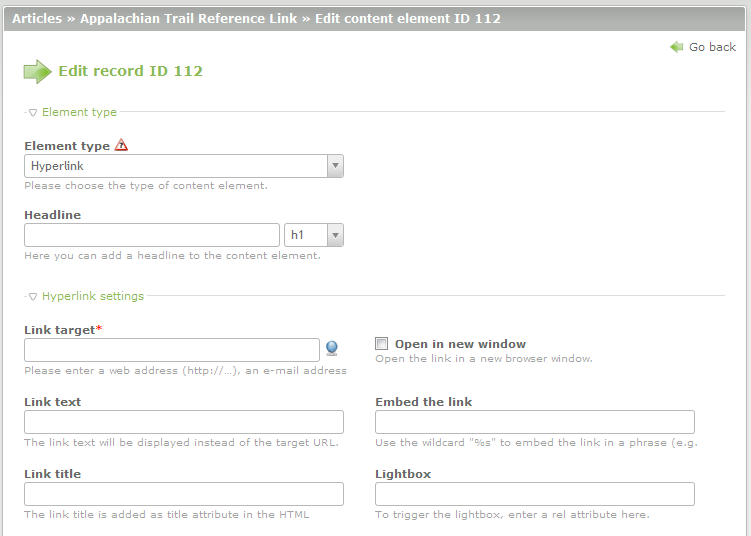
Fill in the appropriate fields to describe your hyperlink and then also check off the options that you might want to use with the link. For example, if you wish the link to open in a new browser window, then make sure to click on the check box for that option. - The second part of the form looks like this:
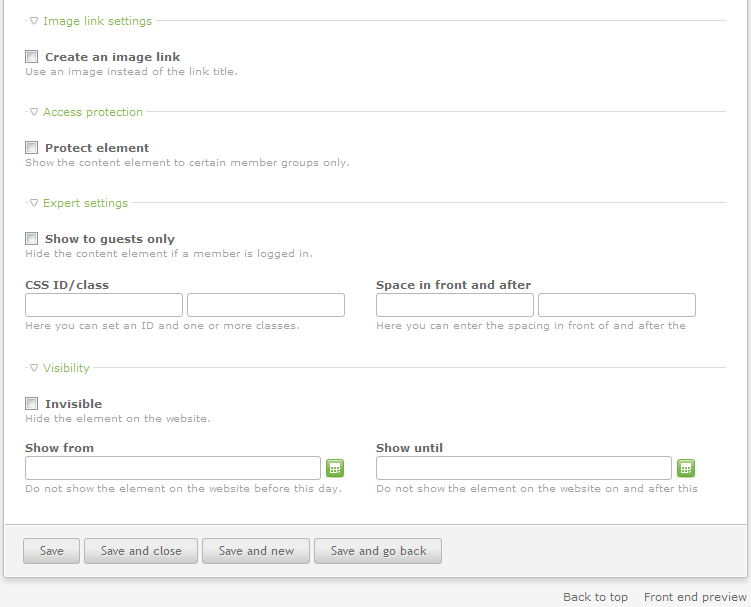
Select the options and fill in the fields to complete the addtion of your hyperlink. Make sure to review ALL of the options and select the options that meet your needs. - Once you have completed adding all of the data, then click on a SAVE option at the bottom in order to save your entries.
Adding a hyperlink using the site structure section of the Back end modules is a relatively simple task. Here is an example of the link will look when completed in the back end. Additionally, we will look at the front end to see its appearance.
Site Structure shows where the link was added below: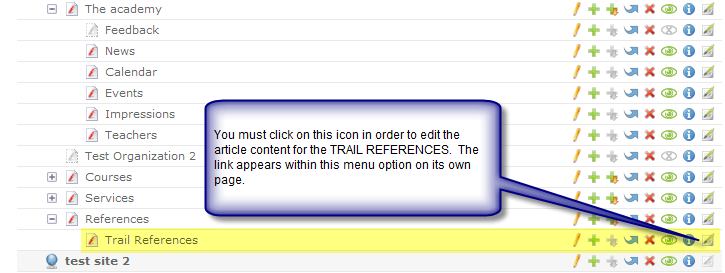
This is how the link appears in the front end of the Contao website: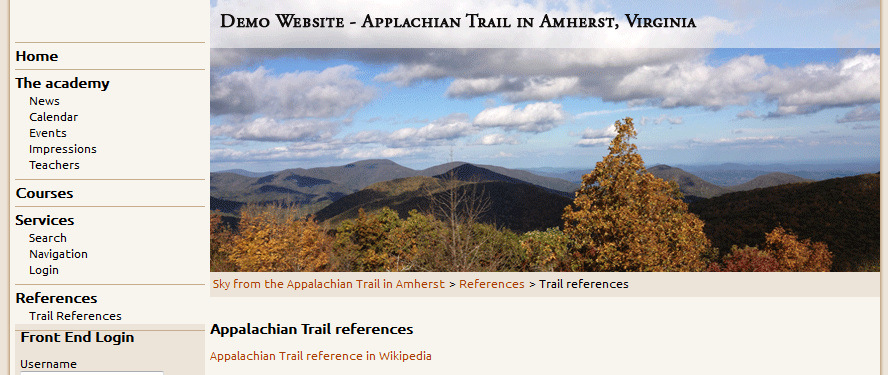
This illustrates the location of the link after adding it in through the Back End modules - Site Structure section. This sreenshot also is a reminder about paying close attention to the formatting and limitations of the theme in use. Remember that some sections may not always adjust for the amount content that you add. For more information about adding content to Contao sites, please see: Creating a New Article ID in the Contao CMS and Creating New Content Elements in the Contao CMS.
Did you find this article helpful?
Tweet
Category
Creating Content with Contao
Help Center Login
Creating Content with Contao
Related Questions
Here are a few questions related to this article that our customers have asked:
Ooops! It looks like there are no questions about this page.
Would you like to ask a question about this page? If so, click the button below!

We value your feedback!
There is a step or detail missing from the instructions.
The information is incorrect or out-of-date.
It does not resolve the question/problem I have.
new! - Enter your name and email address above and we will post your feedback in the comments on this page!