Setting up the Specials Module in OpenCart 1.5
One of the modules used to emphasize sales in OpenCart is the Specials module. This allows you to specify particular products so that they are highlighted in an area of the store for the customer. The following article shows how to install and configure the Specials Module for OpenCart 1.5.
Installing the Specials Module in OpenCart 1.5
- Login to the OpenCart Administrator Dashboard.
- Hover the menu bar where it says EXTENSIONS, then click on MODULES when the drop-down menu appears.
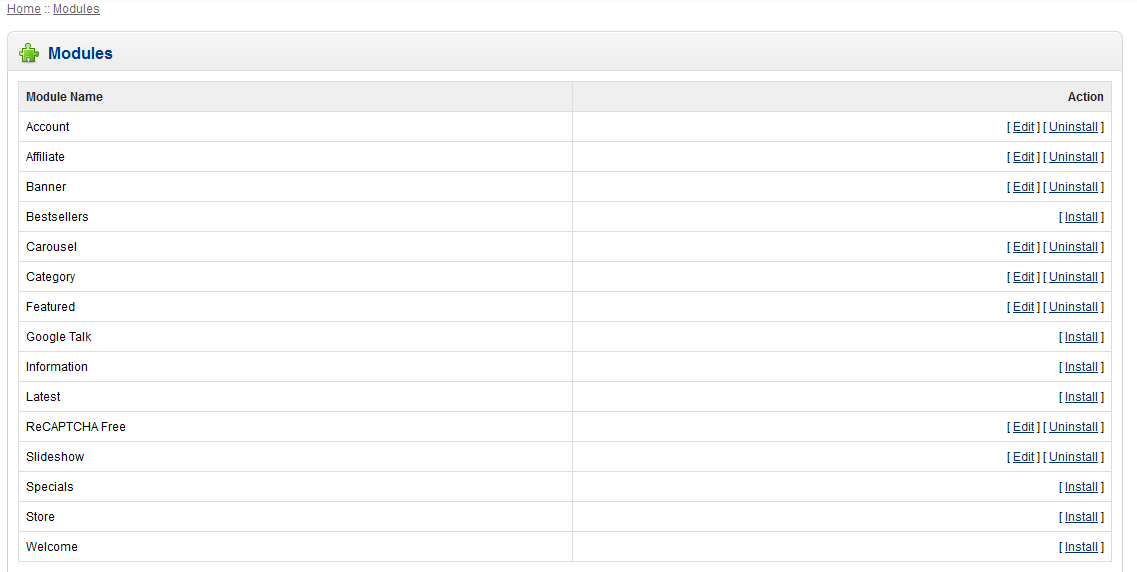
Specials is a free module that is pre-loaded with the default installation of OpenCart 1.5, but as per the table above (Specials is third from the bottom), the module is not installed or configured. Click on INSTALL to proceed with the installation. - The installation should complete within a few seconds and then show two new options in the Actions column of the table: EDIT and UNINSTALL. Click on EDIT in order to proceed with configuring the module.

When you click on EDIT, you will see a blank table with the headings above. Click on the ADD MODULE button, and you will see the screenshot as it appears above. These are the default values that appear. The table below describes the columns above:
Limit Limit on the items that you can set Image(WxH) Size of the image displayed in the specials section Layout Page where the specials will be displayed Position Location on the page where the specials will be displayed Status Indicates if specials are enabled or not Sort Order Order of specials if there are more than one module on a page - Once the Specials module has been configured, in order to use it you need to add PRODUCTS to the Specials section. In the menu bar, hover over CATALOG then click on PRODUCTS when it appears in the drop-down menu. Here's an example using the sample data:
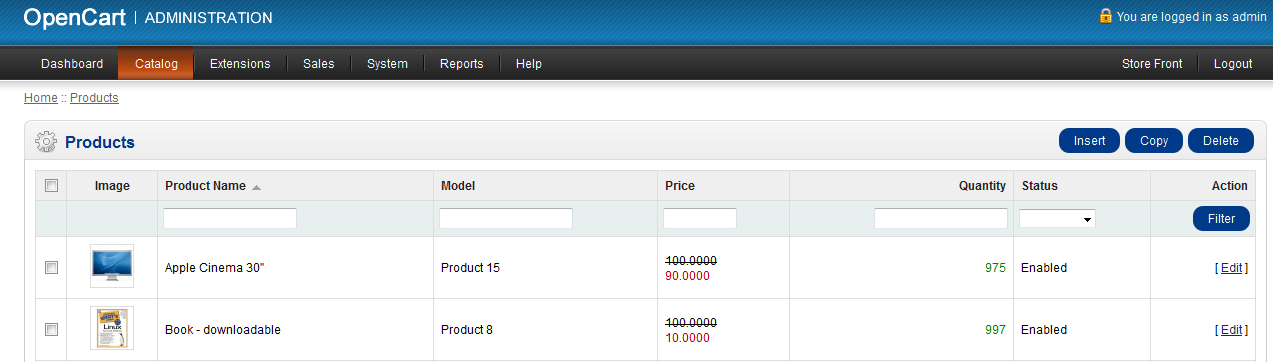
- Select the product you wish to add as a special. In the sample screen shop below, we have selected the Apple Cinema 30" monitor. Click on the EDIT button to the right of the product as per the screenshot above. When the product appears you will see the following:
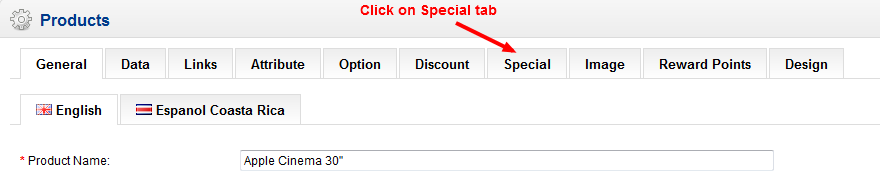
Click on the SPECIAL tab on the screen that appears after you have clicked on the EDIT button above. - When the SPECIAL tab is selected you will see the following screen:

Customer Group Customer group that can see the special Priority Priority given to special sale - if multiple groups are assigned to sale, then highest priority pricing applies first Price Price for special Date Start Beginning date for special (leave blank to have no start or end date for special) Date End End date for special (leave blank to have no start or end date for special)
Create a special by selecting and filling in the items in the table in the screenshot above. If you do not wish to assign a specific start or end time, then leave it blank. If you are assigning multiple specials based on CUSTOMER GROUP, then change the priority per group. If a customer is in more than one group, then they will see the price that is applied to the higher priority group (where a priority of 1 has a higher priority than a priority of 2).
For example:
You might have a group called "Gold Star Customers". You can also have a default group and have special pricing applied to both groups. Though the pricing differs per group in the special, the pricing that appears to the customer will depend on the priority given to each customer group. Here's how it would appear in the Products Special tab: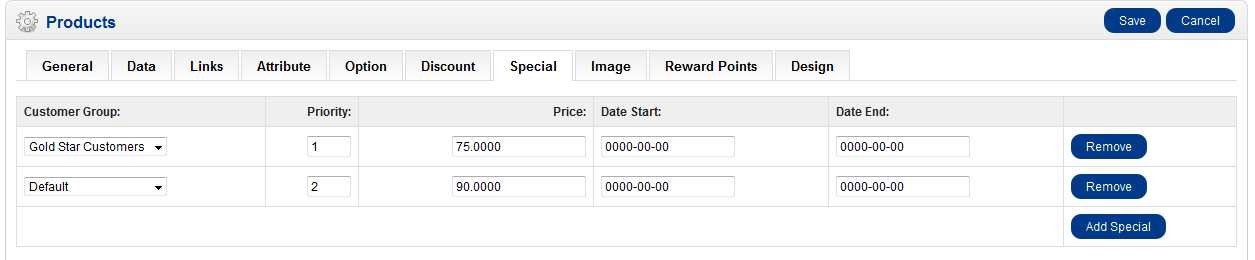
- When you have completed defining your special pricing, then click on the blue SAVE button in the top right hand corner to save your entries.
The Special module is often used to emphasize product sales within the OpenCart store. Use it to help define your product sale pricing and improve specific product sales. Here's an example of how the the customer will see the product with the sales pricing applied to several store products: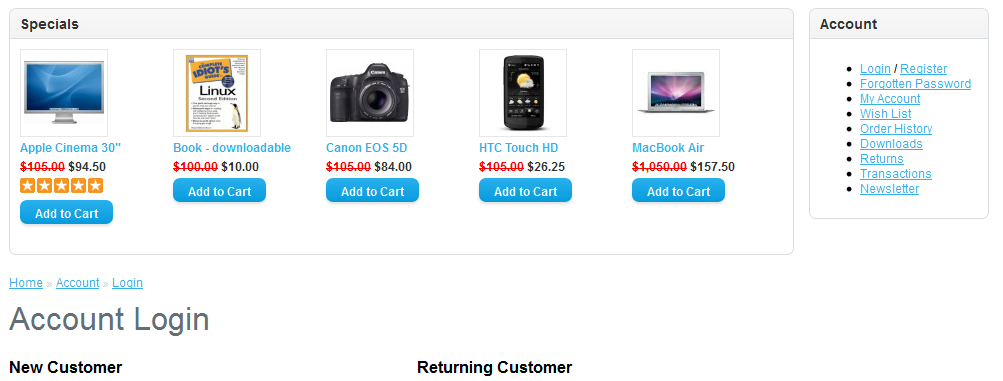
Did you find this article helpful?
Tweet
Category
Working with OpenCart Modules
Help Center Login
Working with OpenCart Modules
Related Questions
Here are a few questions related to this article that our customers have asked:
Ooops! It looks like there are no questions about this page.
Would you like to ask a question about this page? If so, click the button below!

We value your feedback!
There is a step or detail missing from the instructions.
The information is incorrect or out-of-date.
It does not resolve the question/problem I have.
new! - Enter your name and email address above and we will post your feedback in the comments on this page!