How to use a Chunk Tag within Modx
Tags are used within Modx to allow you to substitute defined values with a value that you have defined elsewhere in the application. This allows you to create a formatted page (or template) that you can modify by simply replacing the tags that you defined in the page. One of the many type of tags that are used in Modx is the chunk tag.
For example:
If you have a value on a webpage that represents a meeting place that randomly changes, you can define that "chunk" of text in the Modx administrator to update the value on the webpage. The tag can then be placed in the Modx website without having to use the actual text. The chunk tag represents the text on the page or template within the Modx website. This makes changes on the web page quicker and simpler since you don't need to find the value buried in the code of the page.
The following article walks you though an example of creating the simple tag for a resource called a chunk.
Creating a Chunk Tag within your Modx Website
- Login to the MODX Administrator Dashboard as Admin
- A CHUNK is simply a block of text that you can define within the resource section of MODX. To start with using a tag for a chunk, we will need to first define a chunk. In the Resource Tree at the left of the screen click on the ELEMENTS tab as per below:
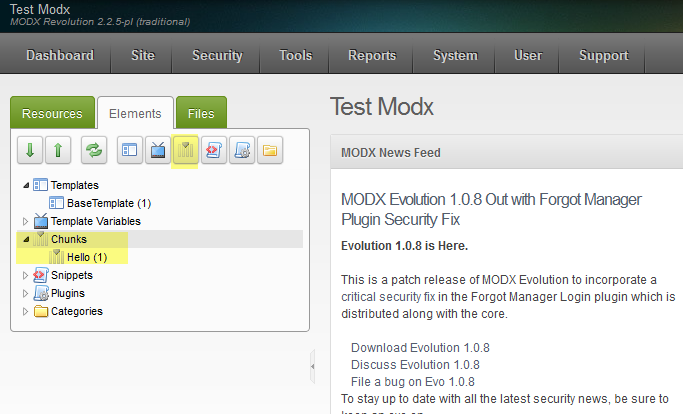
The icon highlighted in the screenshot above lets you create a new chunk. If you hover over the icon it will also show you text: NEW CHUNK. - Click on the NEW CHUNK icon and you will see the following form:
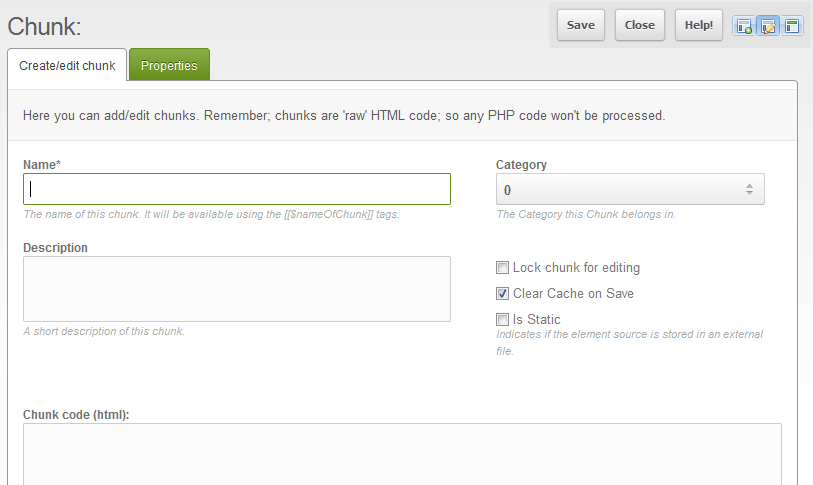
Fill in the NAME of the chunk as "CHUNKTEST" (Note: quotation marks should be left out of these text examples) - Type in a short description (you can use the following): "This is my test chunk"
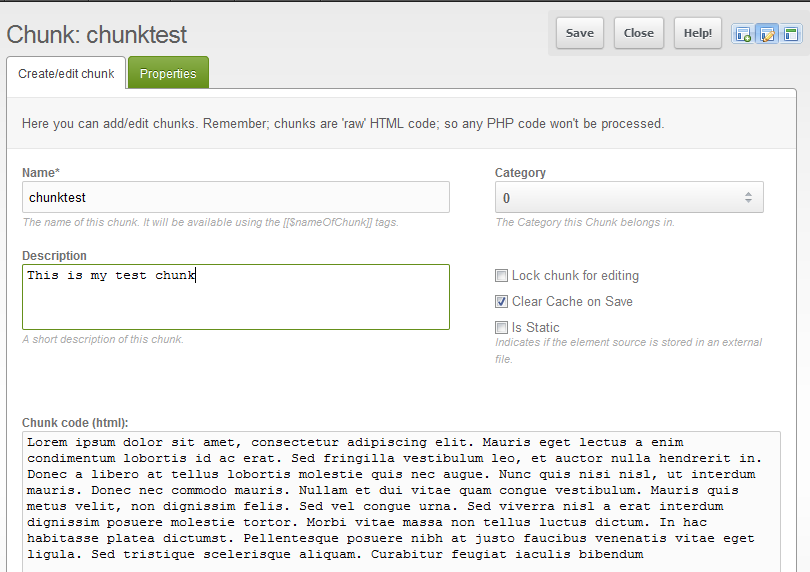
- Note that the last field is labeled CHUNK CODE (HTML). This means that you can add text with HTML if you wish. However for our example we're going to use the following so that we have a nice paragraph of text.
Example text:
Lorem ipsum dolor sit amet, consectetur adipiscing elit. Mauris eget lectus a enim condimentum lobortis id ac erat. Sed fringilla vestibulum leo, et auctor nulla hendrerit in. Donec a libero at tellus lobortis molestie quis nec augue. Nunc quis nisi nisl, ut interdum mauris. Donec nec commodo mauris. Nullam et dui vitae quam congue vestibulum. Mauris quis metus velit, non dignissim felis. Sed vel congue urna. Sed viverra nisl a erat interdum dignissim posuere molestie tortor. Morbi vitae massa non tellus luctus dictum. In hac habitasse platea dictumst. Pellentesque posuere nibh at justo faucibus venenatis vitae eget ligula. Sed tristique scelerisque aliquam. Curabitur feugiat iaculis bibendum
Copy and paste the paragraph above into the CHUNK CODE field. You don't have to use the example above, but the screenshots that follow will reflect those entries. - There are other options available for the CHUNK, but we are keeping this simple for the purposes of the tutorial. You should see the following:
In the floating menu bar in the top right hand corner, click on SAVE to save your entries. When you save the entry you will see the entry in the resource tree on the left appear. It will appear as follows: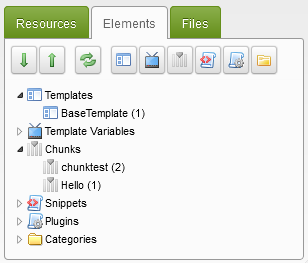
- Now that we have the CHUNK defined we need to show how it can be used on a page within the Modx website. One of the simplest definitions for a TAG is that it is a placeholder for a value. We are going to place a tag on a web page. For the purposes of this tutorial we will be using the HOME page of a default Modx website. Typically, a newly loaded default HOME page will be blank. However, as in previous tutorials, we have used the following text:
A simple web site
Bits of words and pictures make
Something with nothing
Click on the RESOURCE tab of the resource tree on left, then click on the HOME page in order to select it. If you do not already have some sample text, you can copy the above text into the HOME page's CONTENT section (towards the bottom of the HOME page form on right). If you have text already in place and you are ready to proceed, click on the end of the last sentence of text so that you have the cursor blinking, then hit the ENTER key of your keyboard twice so that you have two lines below the text. - The format for a CHUNK tag looks like this:
[[$chunkName]]We will use that tag on the page so that instead of having to type out that long paragraph of text ,we simply have to hold its place with the CHUNK tag. Here's what it will look like: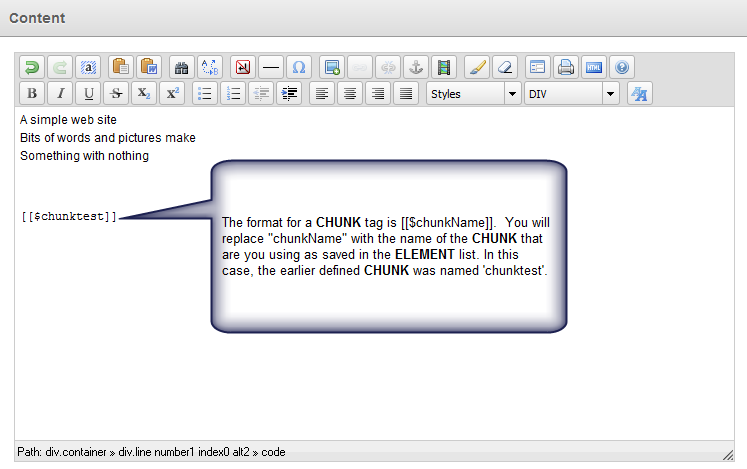
Note that the text "chunkName" is replaced with the name of the CHUNK that you created in beginning of this tutorial. To see the name of the CHUNK, simply click on ELEMENTS in the resource tree on left, and then look for the CHUNK that you wish to use. For the purpose of this example, the tag will be shown as per above:
[[$chunktest]]
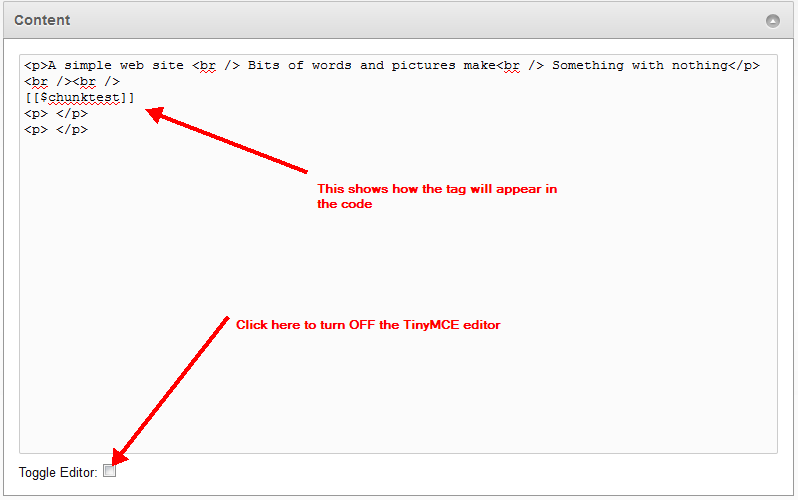
IMPORTANT NOTE: If you are using an editor like the TINYMCE, you will need to add the tag WITHOUT using that editor. The TinyMCE (or other editors) will attempt to add HTML code with the tag and therefore render it inoperable. To turn off the TinyMCE editor go to the bottom of the editor and click on TOGGLE EDITOR (as shown below). The correct form for the tag is also shown below.
- Click on SAVE in the top right hand corner in order to save your entries. Click on VIEW and the resulting web page should look like this:

The screen shows how the CHUNK tag is used to hold the place for the paragraph text.
Tags are basically placeholders for various types of text or code that you can substitute within the templates or pages that make up your Modx website. Chunks specifically can be represented by tags in the Modx website or template to make editing the website's large text sections a much easier and organized task. The power of these tags is their ability to make it easy to replace a large section within a website without having to directly re-program the website. Changes can also be made directly to the tag content so that you simply have to change the tags in order to update your website. The example presented above was a sample using the CHUNK tag. For further information on tags, please go to Commonly used tags within Modx.
Did you find this article helpful?
Tweet
Next »
Commonly Used Tags in Modx
Category
Creating Content in Modx
Help Center Login
Creating Content in Modx
Related Questions
Here are a few questions related to this article that our customers have asked:
Ooops! It looks like there are no questions about this page.
Would you like to ask a question about this page? If so, click the button below!

We value your feedback!
There is a step or detail missing from the instructions.
The information is incorrect or out-of-date.
It does not resolve the question/problem I have.
new! - Enter your name and email address above and we will post your feedback in the comments on this page!