Using Customer Groups in Prestashop 1.5
Customer groups allow you identify and group customers who have access to your PrestaShop installation. The following tutorial will show you how to add, edit, or delete customer groups in PrestaShop 1.5.
Managing Customer Groups in PrestaShop 1.5
- Login to the Administration Dashboard as the Administrator
- Go to the Menu Bar and hover over CUSTOMERS, then select GROUPS when it appears in the drop-down menu. It will be the third item in the drop-down menu that appears. There are three default customer groups: VISITOR, GUEST, and CUSTOMER. The following screenshot shows you the main list when first opening the GROUPS option:
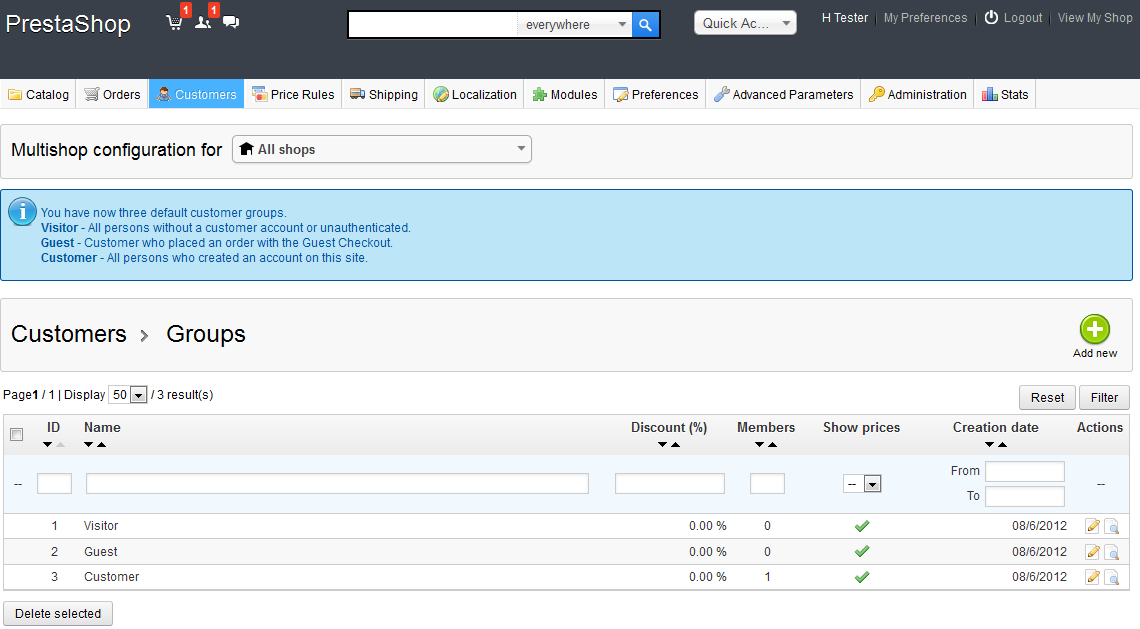
In this screen you can ADD NEW customer groups by clicking on the green ADD NEW button in the top right hand corner. You can also filter the results by number on the next line. The list includes the option to EDIT an existing group and also an option to VIEW the members of each group. And finally, you also have the option to DELETE a group.
The ADD NEW and EDIT options actually show two different screens. We will detail each below starting with ADD NEW. - Select ADD NEW to add a new group and you will see the following screen:
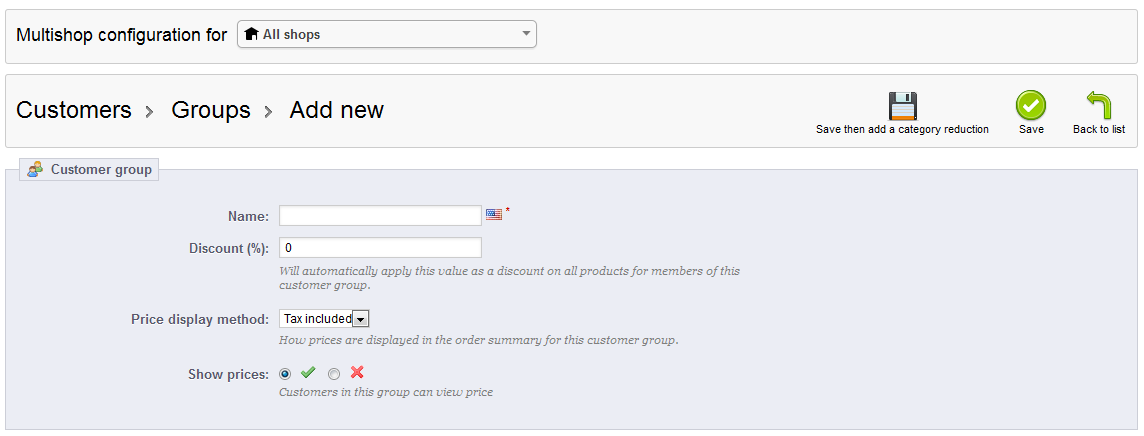
The NAME field is required before you can save the list. The DISCOUNT(%) allows you set a percentage discount for this customer group. The PRICE DISPAY METHOD gives you the option to show pricing with or without taxes. The final option, SHOW PRICES, allows customers in the group to view price. - If you were to EDIT an existing group, the screen that you would see is as follows:
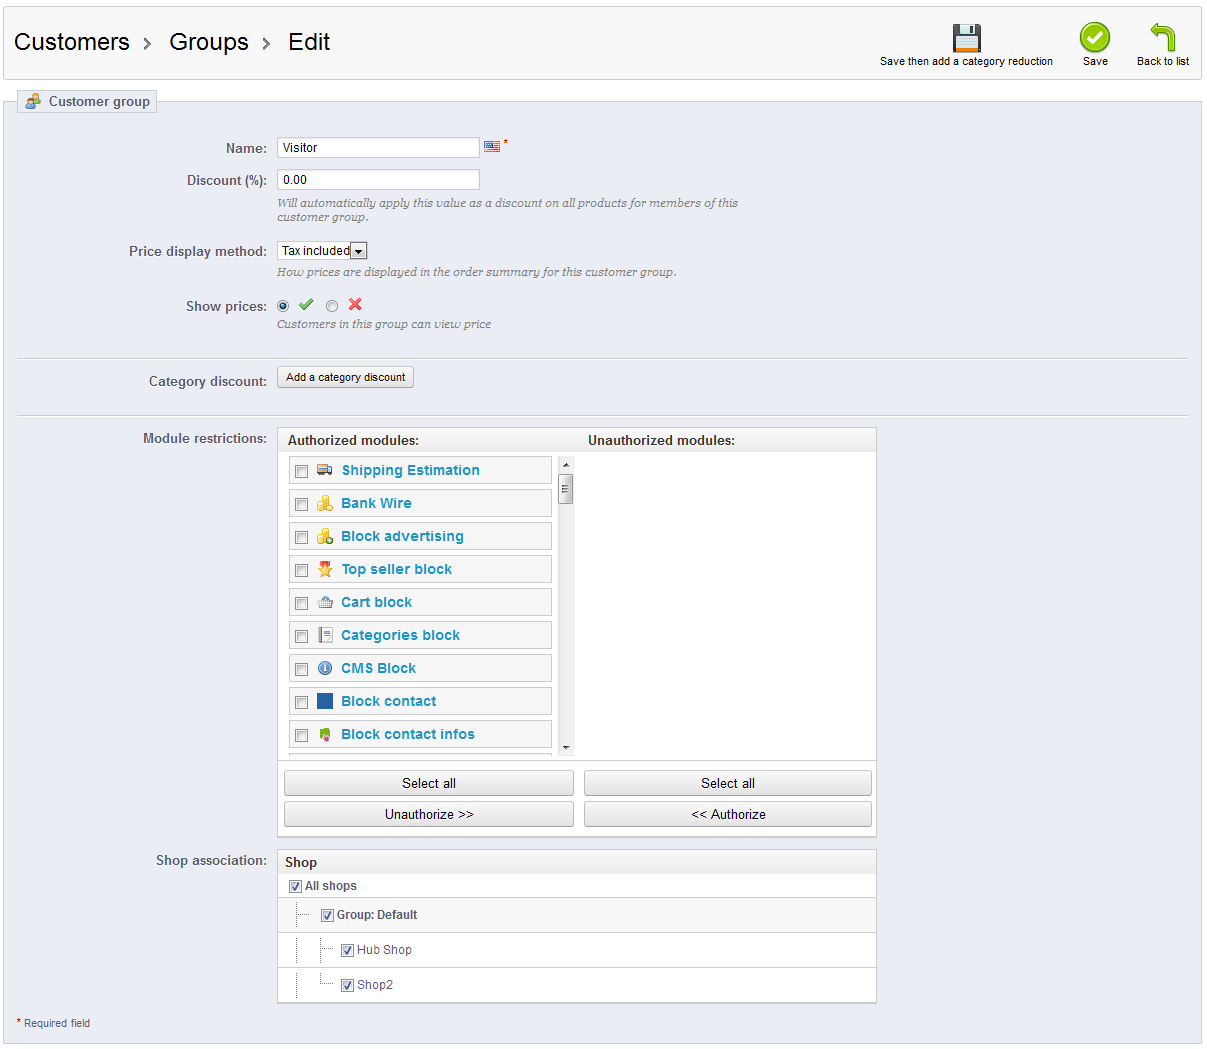
When editing an existing group, you will see CATEGORY DISCOUNT. Selecting this option will bring up this window: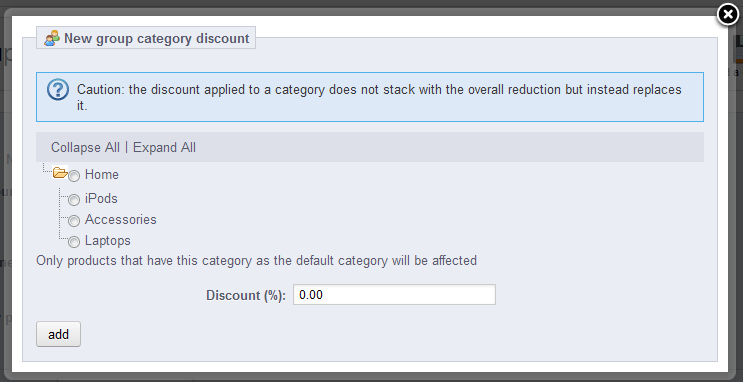
To emphasize the listed caution - THE DISCOUNT APPLIED TO A CATEGORY DOES NOT STACK WITH THE OVERALL REDUCTION, BUT INSTEAD REPLACES IT.
If your group requires a category-based discount, please apply, then hit ADD to close the pop-up window and save your entry. - The following group is for MODULE RESTRICTIONS. Here's a close-up of that screen:
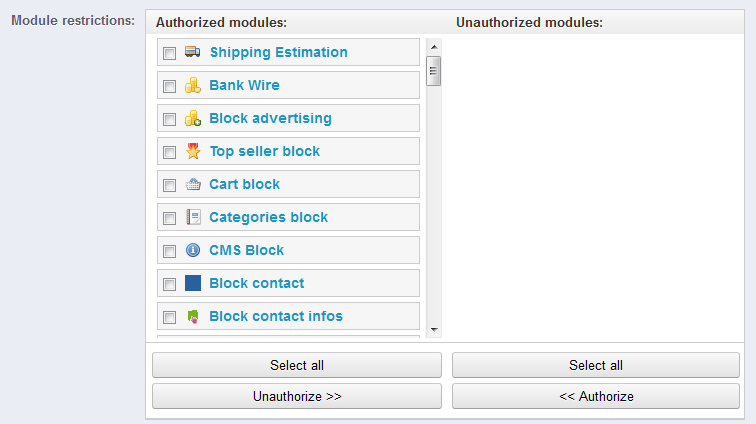
This option lets you restrict loaded modules by GROUP. You will need to determine based on the groups that you have created. Select as necessary, then move on to SHOP ASSOCIATION. - Shop Association basically determines of the group is active for that shop. If you wish to restrict a group from a shop, then simply uncheck the group from that shop.
- When you have completed making your group changes, select SAVE in the top right hand corner. If you still need to make a category reduction, then select the option to SAVE THEN ADD CATEGORY REDUCTION.
- The final function that Customer Groups allow is to VIEW the members of each group. On the far right, each group in the list has two icons, one for editing the group and the other for viewing the group. Select the icon to the right in order to VIEW the group and you will see the following screen:
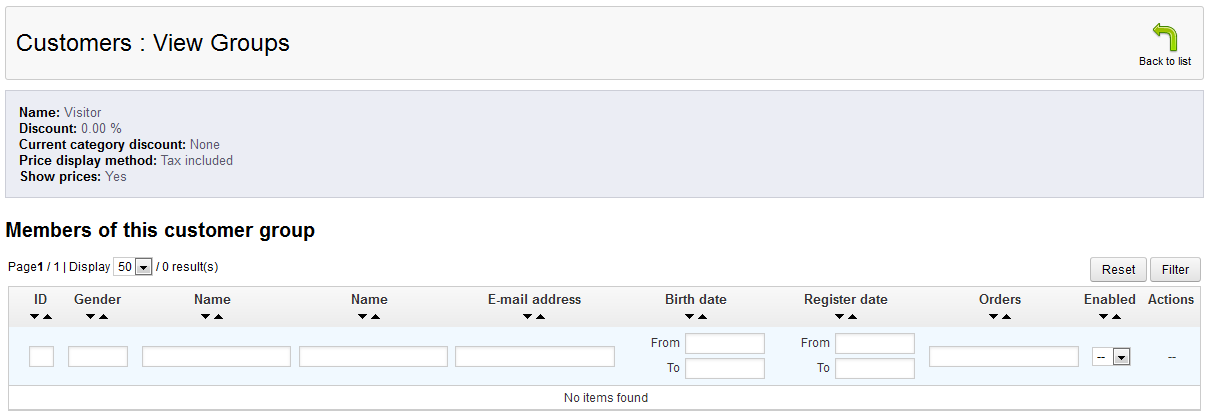
All of the options for the group are summarized at the top of the report. You can again filter the report results to only show a certain number of entries, if required. When viewing a group, you can also review/edit individual information by clicking on the EDIT or VIEW option at the far right hand side of the screen. Here's an example of the CUSTOMER group: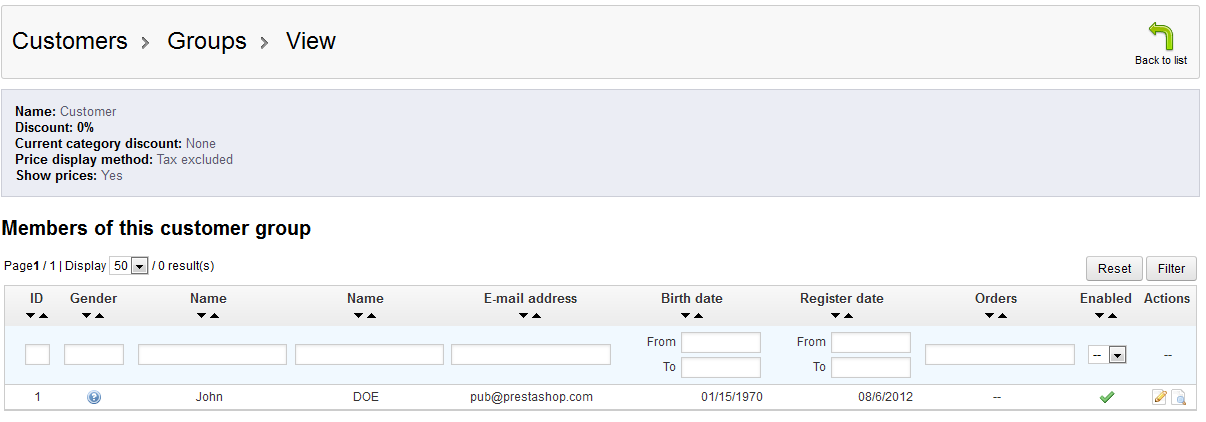
Customer GROUPS has been improved to offer even more flexibility to the customer options. When adding customers, be sure to add them to a group in order better organize their information and appropriately provide discounts as needed.
Did you find this article helpful?
Tweet
Comments

n/a Points
|
2014-11-21 5:01 am
Is there a way to create one order from the back office and applied the order to a group of users? We have a wine club with 700 members, once a year, we process auto shipment to the member. Everyone gets the same wines with the same price. I would like to create one order and apply to a group (Wine Club Group). |

Staff 12,339 Points
|
2014-11-21 6:32 pm
Hello Nanqui,
Thank you for your question. I spent some time researching this, and was not able to find a "built-in" way to accomplish this in PrestaShop. This means you would have to custom-code/develop a solution. Thank you, John-Paul |
Help Center Login
Managing your Customers in PrestaShop 1.5
Related Questions
Here are a few questions related to this article that our customers have asked:
Ooops! It looks like there are no questions about this page.
Would you like to ask a question about this page? If so, click the button below!

We value your feedback!
There is a step or detail missing from the instructions.
The information is incorrect or out-of-date.
It does not resolve the question/problem I have.
new! - Enter your name and email address above and we will post your feedback in the comments on this page!