Choose a Template for your Website
Once you have chosen the type of website that you want to create, next you can select the template that you want to use for your website. This is done on the 2. Design page, which can be selected at any time by clicking Design on the top right toolbar. The Design page will look like this:

There are many things that you can do on this page, so we will highlight some of the most important features.
How do I Choose a Template?
On the Design screen, there are three different ways to search through the templates:

By Category Type
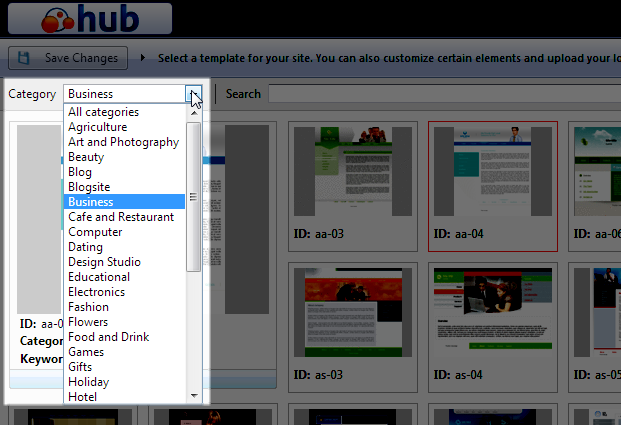 Choose the category you want for your website from the drop down, which will show the templates available that match that category.
By using Search
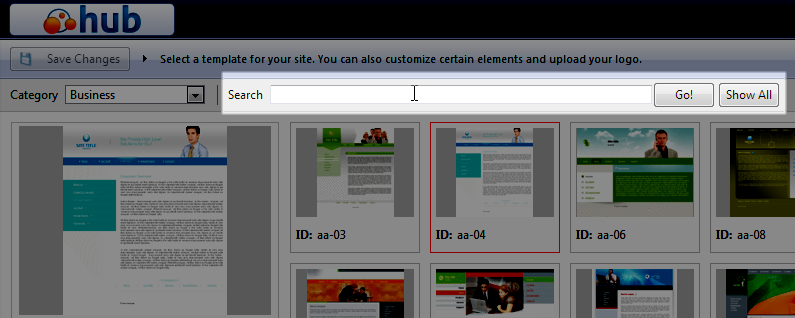 In the Search, you can search for a certain type of template (for example, "food").
By Browsing through Templates per page
 You can also scroll through all the templates. To do this, click the > at the bottom of the page to flip through the pages of templates that are available.
Once you found a template that you like, click on it to chose the theme as your template. Once it is clicked on, you can hit the PREVIEW button to see what your site will look like with that template. If you are satisifed with your template selection, click on Save Changes on the top left side of the page.
How do I modify the Template?
Once you have chosen your template, on the right hand side you can make a few other adjustments:

- Color Scheme. Each template will have three different colors to choose from.
- Banners. You can use the default banner, or upload a banner for your site of your own.
- Menu styles. Here you pick what "bullet" you want your menu items to have.
- Logo. You can use the default logo, or upload a logo for your site of your own.
- Site info. Make sure you change the Site Title to the Title that you want your site to have. The Subtitle and Footer message are optional if they are needed for your site.
For more information on updating the look and feel of your Premium Web Builder, check our next Class, Build Your Website Structure. After you are happy with the design for your site, click on "Next" to go to the Pages section of the Premium Web Builder.
To return to your previous class, go to Choose the Type of Site You are Creating.
For a list of the classes in this course, go to 101: Building Your First Website.
Did you find this article helpful?
Tweet
Next »
Build your Website Structure
Category
Building your First Website
Help Center Login
Building your First Website
Related Questions
Here are a few questions related to this article that our customers have asked:
Ooops! It looks like there are no questions about this page.
Would you like to ask a question about this page? If so, click the button below!

We value your feedback!
There is a step or detail missing from the instructions.
The information is incorrect or out-of-date.
It does not resolve the question/problem I have.
new! - Enter your name and email address above and we will post your feedback in the comments on this page!