How to create a brochure website
 A brochure website is simply an informational website that is static- meaning that it doesn't change or does so infrequently. An example of a brochure website might be a realtor's website. The website may include information about the owner of the website, the services they provide, and contact information. As the name implies, it is simply a website that advertises or shares the information on the business. There are many ways to create a brochure website. You can code it yourself in HTML, or you can use an existing tool or software solution. To give you an easy-to-follow solution, we will use WordPress to quickly and easily create a brochure website.
Setting Up a Brochure Website with WordPress
- WordPress was originally specifically made for blogging. However, many users on the internet have re-purposed the product to meet their website building needs. In order to setup WordPress, simply use Softaculous for the installation.
- Once WordPress is installed, login to your WordPress Administrator Dashboard.
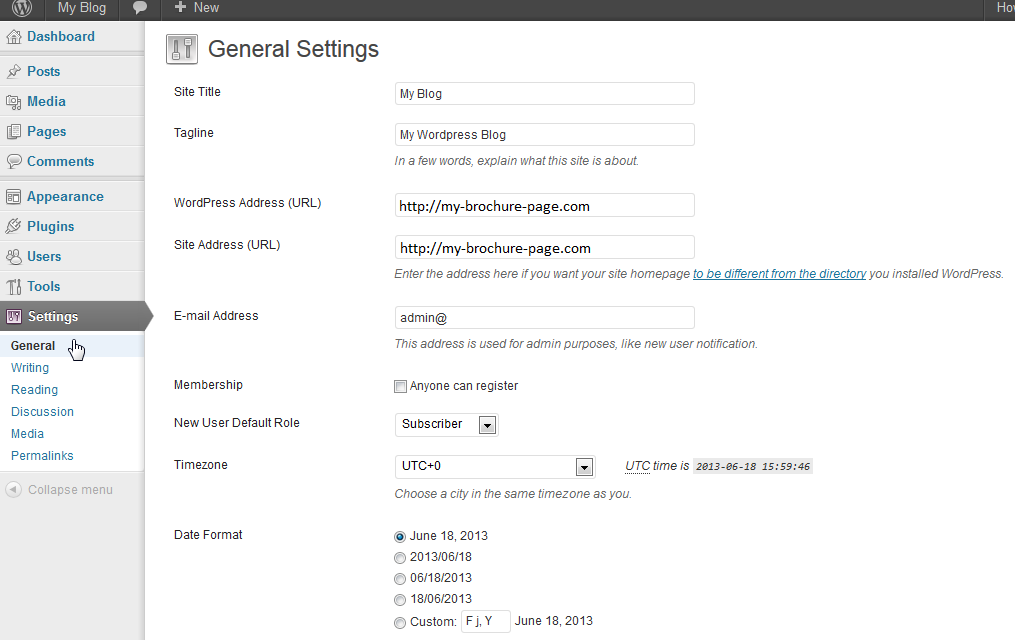 In the lefthand side of the dashboard, scroll down until you find SETTINGS and click on General to select it. Check to make sure that your website name and email address are set correctly. Click on SAVE CHANGES at the bottom of the screen to save your changes.
- Since this is will simply be a brochure (static) website, you will want to turn off any possible setting that allows people to interact with you. This includes the self-registration option in General Settings and the option to allow people to post comments on an article in the Discussion Settings. To make sure these options are disabled, go to SETTINGS > General and look for MEMBERSHIP. By default, this option should already be unchecked. If you make any changes make sure you click on the SAVE CHANGES button at the bottom of the screen.
- Next, scroll down the SETTINGS area on the left and select Discussion. Uncheck the option to " Allow people to post comments on new articles". Click on SAVE CHANGES button at the bottom of the screen to save your change.
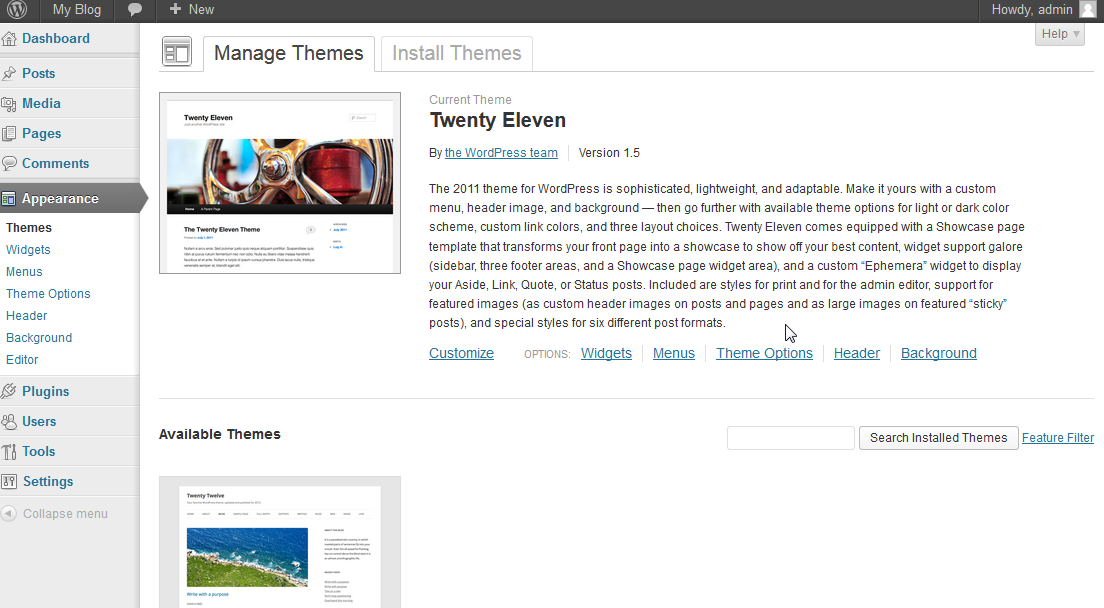 Once these settings have been set, you can then concentrate on the appearance of the website. Go to the APPEARANCE menu in the lefthand column and select THEMES. Note that you should have a few themes that you can select. The MANAGE THEMES section is a great way to see how particular themes appear. There are thousands of available themes and many of them are free! Browse and find a theme that meets your needs. You can also go to the WordPress.org website and look through the themes there. To save time and make this easier, simply select the default theme. In order to use the theme that you select, make sure to click on the link labeled ACTIVATE for that that theme.
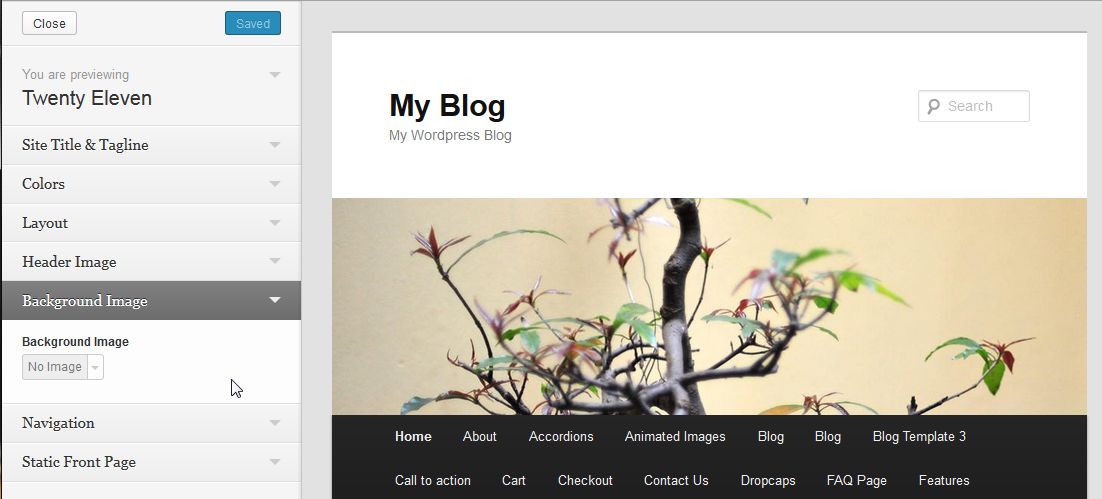 Modify the theme. When you click on THEMES in the menu, you will see that the active theme has the option to CUSTOMIZE. Click on CUSTOMIZE and then change the title, colors, header image as you wish. It also gives you the option to use a static page that you may have created within WorPress.
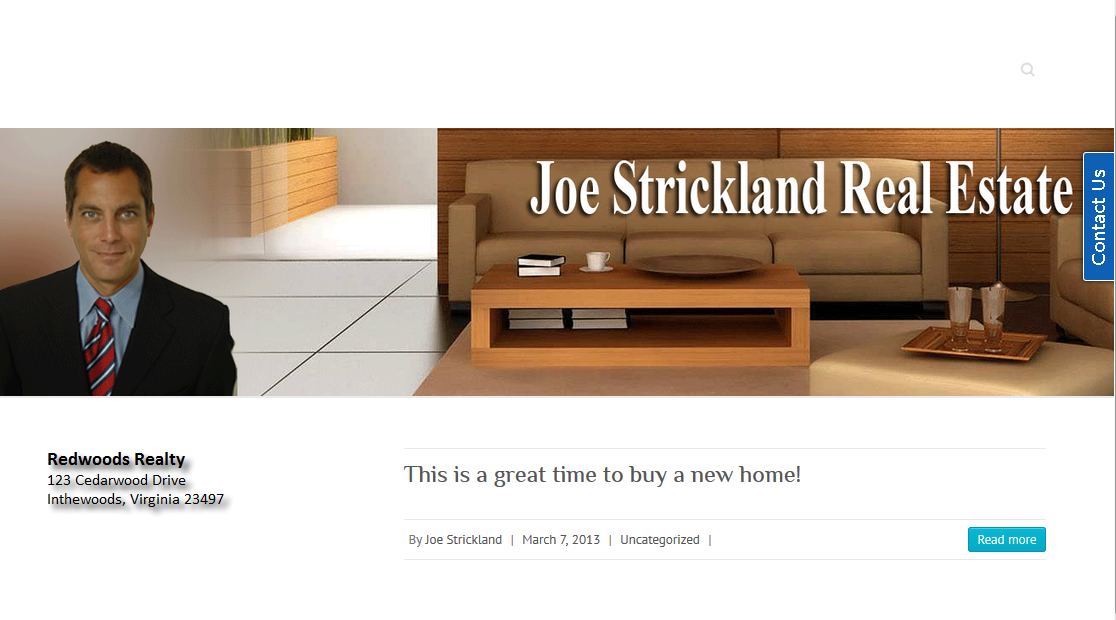
View of the finished Static website
Once you have finished with your front page, you're done! Simple, right? If you want view your website, go to the top of the page, and click on your website name (next to the WordPress logo) and when a drop-down menu appears, click on VISIT SITE.
Brochure sites often have very little in the way of code, functionality, or features. They mostly only provide information and possibly a way to contact the website owner through an email address or form. If you want to learn more about using WordPress, go to the WordPress Education channel.
Did you find this article helpful?
Tweet
Category
Building your First Website
Help Center Login
Building your First Website
Related Questions
Here are a few questions related to this article that our customers have asked:
Ooops! It looks like there are no questions about this page.
Would you like to ask a question about this page? If so, click the button below!

We value your feedback!
There is a step or detail missing from the instructions.
The information is incorrect or out-of-date.
It does not resolve the question/problem I have.
new! - Enter your name and email address above and we will post your feedback in the comments on this page!