Overview of how to create a new Carrier in Prestashop 1.5
Note: The interface for adding carriers has been updated in versions 1.5.5 and above. Please use the following documentation for PrestaShop versions 1.5 - 1.5.4.1. For instructions on using the new interface, please go to Adding a Carrier using PrestaShop 1.5. The update utilizes a wizard that takes you through each detail of the carrier setup.
The following overview reviews the overall steps to add a new shipping carrier. Individual details for each step will be available in the links below. You will require all of the shipper's information in order to complete the addition of a new carrier. This includes the company name, logo, shipping times, zones, acess, costs, fees, and maximum package limits. The following tutorial will walk you through each step required to make the new carrier available to your customers.
Overview of how to Add a new shipping carrier in Prestashop 1.5
- Login to the Administration Panel as an Administrator
- Hover over the menu bar where it says SHIPPING, and then click on CARRIERS in the drop down menu. This will bring you to a list of the existing carriers. The screenshot below shows the carriers in the test shop:

- On the far right hand side of the screen, click on the green ADD button to add a new carrier
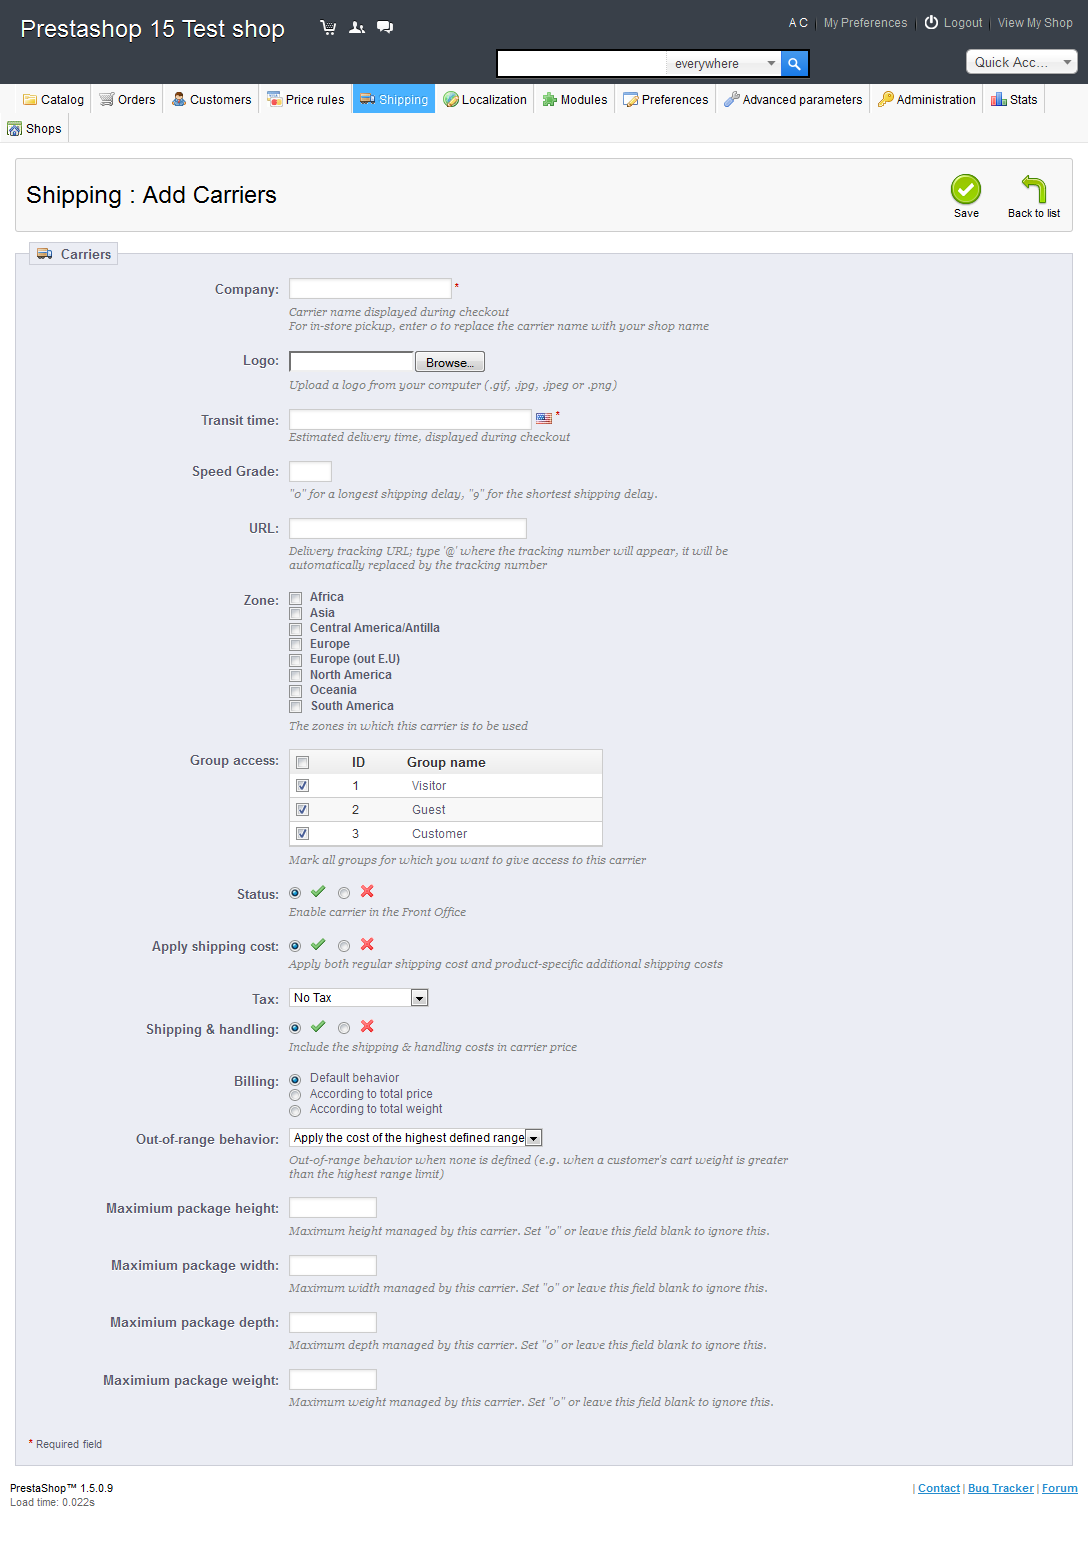
- Fill in the files for the new shipping carrier. Screenshot below illustrates the fields to be filled
- Once you have all of the fields completed, select the green SAVE button in the top right hand corner of the screen to save your changes.
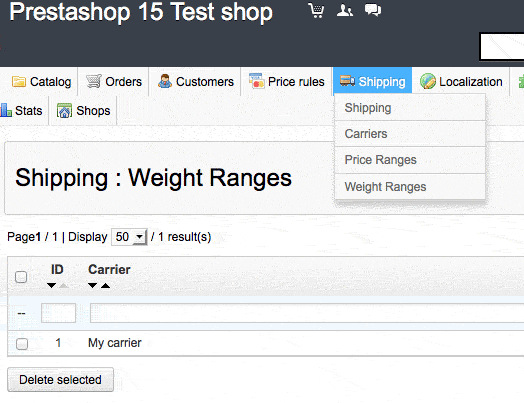
- The next step requires that you determine the price or weight range that new carrier will cover. Select either PRICE RANGES or WEIGHT RANGES from the SHIPPING MENU:
- Regardless of which you select (Price Ranges or Weight Ranges), select ADD NEW to create a new range (price or weight) for the carrier you have created.
- Select the green SAVE button to preserve the range that you have created.
- Go to the SHIPPING MENU once again and click on SHIPPING. Scroll to the bottom and select the FEES section (go to How to set fees by carrier, zone and range in Prestashop 1.5 for further information).
- Select the green SAVE button to save the fees you may have added. This completes the overall new carrier addition process.
The addition of a new shipping carrier requires a variety of information in order to be set correctly. To see more detail on all of the specific steps please refer to the following section on setting up the Carrier: Setting Up Shipping in PrestaShop 1.5
When the process is completed, your customers will be able to select the carrier that they wish to use for the shipment of their purchased product. Make sure to add only the specific carriers that match your (and your customer's) shipping requirements in relation to the products that you are trying to deliver.
Did you find this article helpful?
Tweet
Help Center Login
Setting up Shipping in PrestaShop 1.5
Related Questions
Here are a few questions related to this article that our customers have asked:
Ooops! It looks like there are no questions about this page.
Would you like to ask a question about this page? If so, click the button below!

We value your feedback!
There is a step or detail missing from the instructions.
The information is incorrect or out-of-date.
It does not resolve the question/problem I have.
new! - Enter your name and email address above and we will post your feedback in the comments on this page!