How to Install Wordpress Manually
Sometimes it is necessary to install Wordpress through a manual process instead of installing it using an automatic installation. Web Hosting Hub uses the application installer called Softaculous to install web applications like Wordpress. The steps to install Wordpress manually are surprisingly short, but they will require access to your hosting service web server files and database application. The following article will walk you through the steps necessary to manually install Wordpress onto Web Hosting Hub's hosting servers.
The Manual Steps to Installing Wordpress
Obtain the Wordpress installation files
- Launch your favorite internet browser and then go to the Wordpress.org Home page - http://wordpress.org.
- It may vary at times, but the DOWNLOAD link for the newest version of Wordpress is generally on the front page or in the menu item labeled DOWNLOAD.
Download the latest version of WordPress. Make sure to note where you downloaded the file on your computer so that you can find the file later.
Setup the Database and User for Wordpress
- Login to the Cpanel
- Scroll down the menu until you find the DATABASE section. Click on MySQL Databases to proceed.
- Click in the field to create a new database and give the database a name. As per the screenshot below, note that there is a prefix that precedes the name. The prefix will always precede the database name.
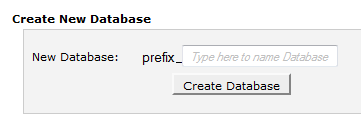
For example: If you name your database wordpress1, then the actual full database name is prefix_wordpress1. Make sure to note the database name that you have chosen to reference in later steps in the install process. When the database has been created, you will see a confirmation screen showing the name of the database. - The next part to the database setup is to create a user name to access the database. Scroll down the MYSQL interface until you see MYSQL USERS. Click in the field and then type a name for your MySQL user. The screen will appear as follows:
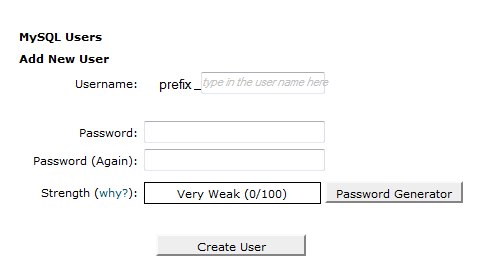
Similar to the database name, there is a prefix that precedes the user name. For example: prefix_username. - Next, type in a password and then verify it in order to make sure it is correct. You can use the Password Generator to create your password if you want a secure password, but be sure to note both the user name and password that you use so that you don't forget it later.
- Click on the CREATE USER button in order proceed.
- The next step in the database process is to ASSIGN the user you have created to the database that you have created. Right below the create user dialog window is the section to ADD USER TO DATABASE. Click on the drop-down arrow for the user and select the user you just created from the list. After you have found the user you created, click on drop-down menu for the database and then select the name of the database that you just created. It will appear similar to the following screenshot:
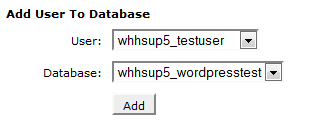
- Click on ADD in order to add the user to the database. You will then see the following screen to setup the privileges that your user has for the database you have created. It will appear as follows:
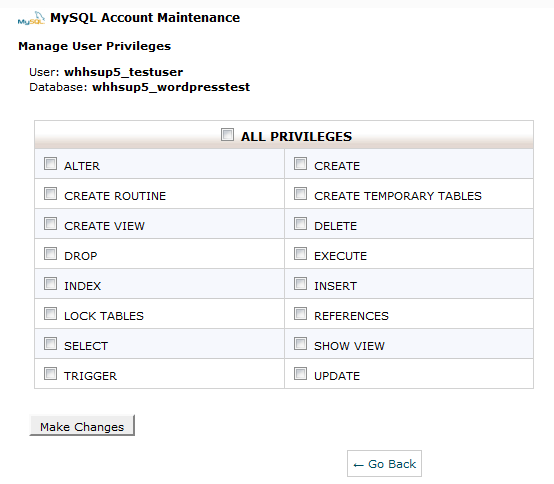
- Select the option labeled ALL PRIVILEGES by left-clicking in the checkbox, then click on the button in the bottom left-hand corner labeled MAKE CHANGES.
This completes the database portion of the manual process. Make sure that you have noted the user name and password.
Create the directory and move the files into place
If you are installing Wordpress so that the primary domain name is being used, then the files need to go into the PUBLIC_HTML folder for a Web Hosting Hub hosting account. The primary domain for the account is the domain name that was given during the account creation. If you are not using the primary domain, but you are hosting it on the Web Hosting Hub account, then you will need to use either an add-on domain or subdomain. Here's an example of how the URLs look for each type:
Primary domain or Add-on domain: http://domainname.com
Sub-domain: http;//domainname.com/subdomainname
As you can see, the primary domain name and add-on domain are basically the same - they can be individual URLs. However, subdomains require a primary or add-on domain name in order for the website URL to exist. This distinction is important because the path that you use for the installation may be a part of the URL and affect your Wordpress configuration.
The next steps involve placing the files into the directory that you have created or will need to create. We will be taking advantage of the Cpanel File Manager and its ability to uncompress files.
- Login to the Cpanel (if you have logged out from earlier).
- If you are using an add-on domain, then create your add-on domain before proceeding. For more information on creating add-on domains, please go to How to Add an Add-on Domain. If you need to add a subdomain, you can do so by simply creating a new folder in the public_html folder or within the folder of a new add-on domain. Here's how the folder structure would appear for each possible type of installation (primary domain, add-on domain, and subdomain installations) in the Cpanel File Manager.:
PRIMARY DOMAIN install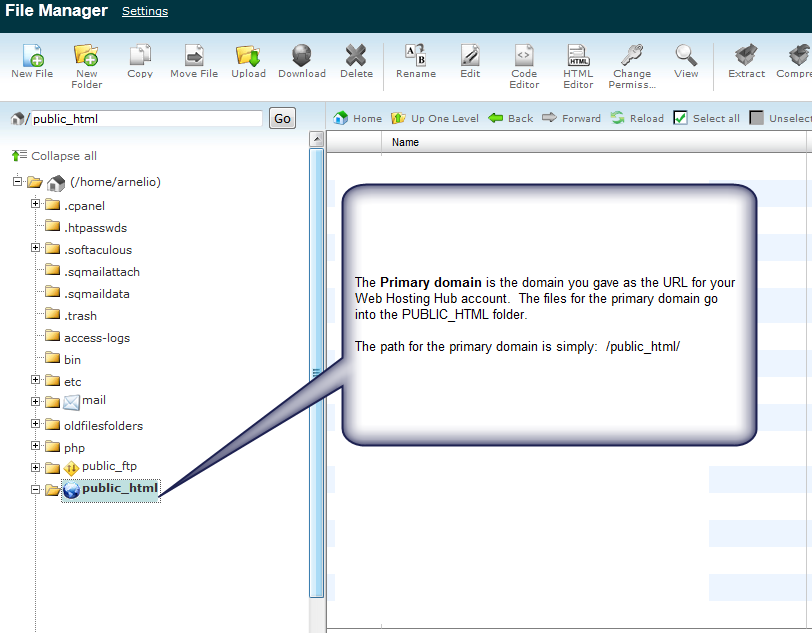
ADD-ON DOMAIN Install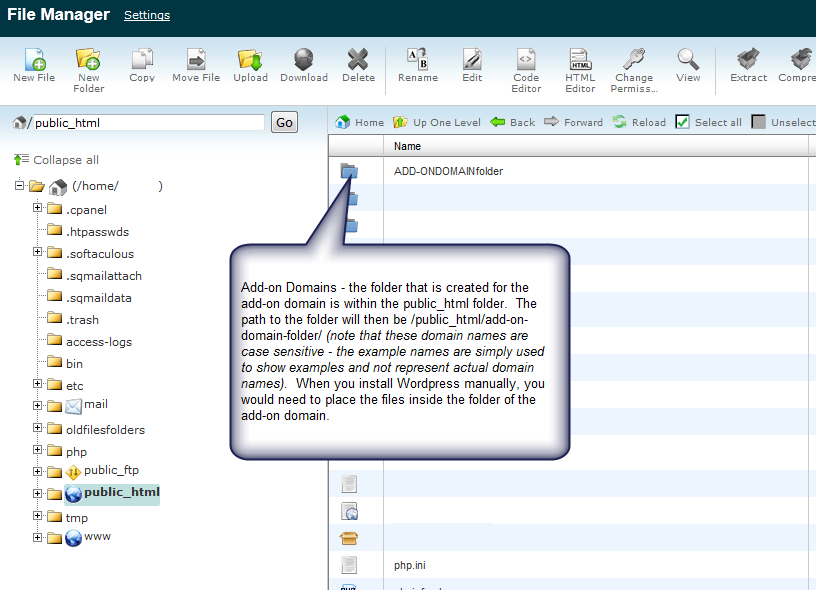
SUBDOMAIN Install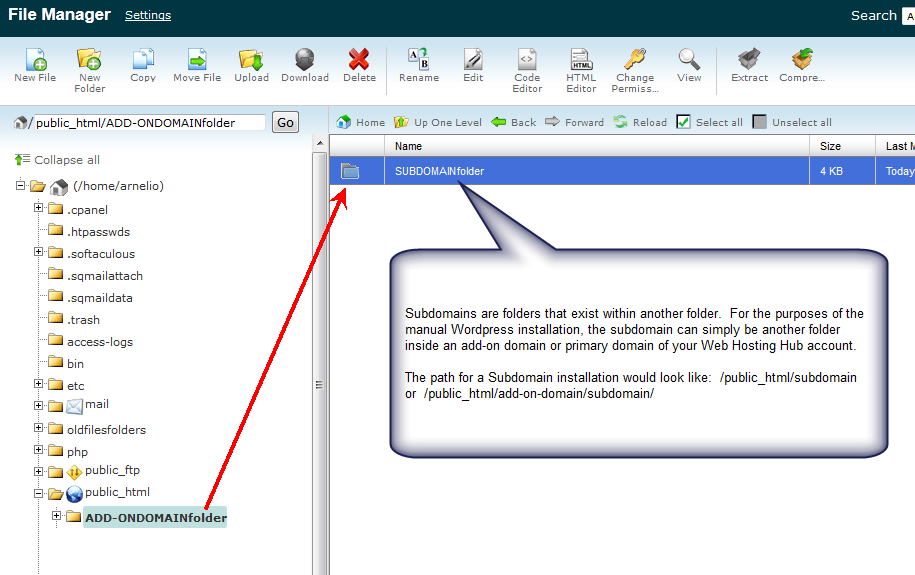
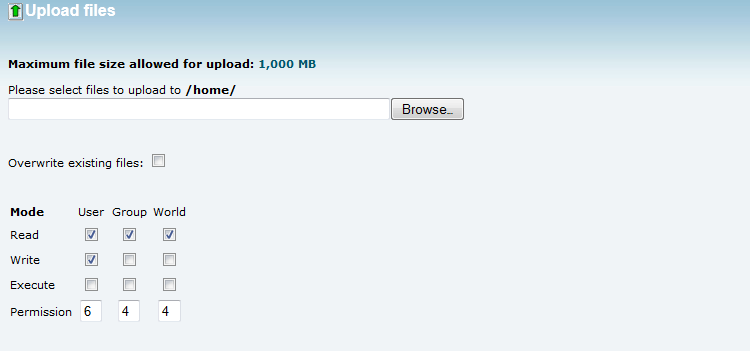
If you are ready to start putting the files into place, then upload the Wordpress installation file that you downloaded earlier into the folder where you will perform your installation. To do this, first select your installation folder by double-clicking on the folder you have selected, then click on UPLOAD at the top of the file manager. You will need to select the file in the right window pane of the File Manager (this is the only place to manage/edit files at the file level in the File Manager). - Next, click on BROWSE to find and then select the compressed file that you obtained from Wordpress. To start the upload, click on OPEN.
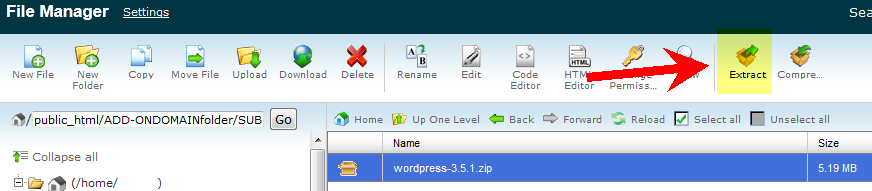
When the upload completes, click on the link to return to the File Manager at the bottom of the upload dialog window. You will then see that the compressed file for Wordpress is located within the folder you have selected. - Select the Wordpress installation file in order to highlight it, then click on EXTRACT in the top right section of the File Manager interface.
- You will then see the following dialog:
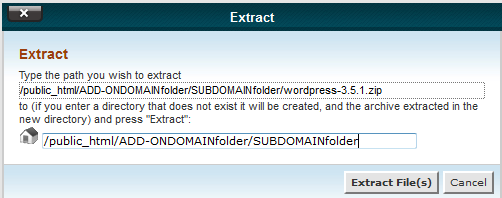
Click on EXTRACT FILE(S) in order to proceed. - When the files are extracted, note that a WORDPRESS folder was created inside of the folder that you selected. We will need to move the files and folders for the Wordpress installation out of the WORDPRESS folder. Otherwise, the path will need to include the word 'wordpress' in order to be seen. For example, the Wordpress files and folders are currently in the following path: /public_html/add-on-domain/subdomain/wordpress. If the files were left there, then after the installation was complete, the path to the Wordpress installation would have to include domain-name.com/subdomain/wordpress.
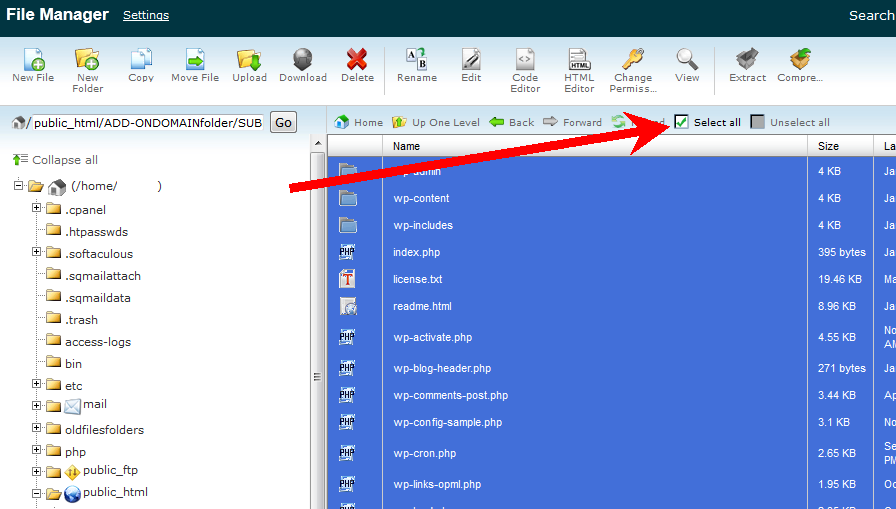
To move the files, first double-click on the WORDPRESS folder so that you see its contents in the right-hand window pane. - Click on a single file or folder in the file list in the right-window pane, then click on the SELECT ALL in the File Manager as per below:
- In the top left-hand side of the File Manager you will see the option that says MOVE FILES. Click on this option and you will see the following dialog window:

When the dialog first opens the folder "wordpress" will still be in the path listed at the bottom. You can click on this field and change it so that you designate the proper target for where the files will actually moved. In the example above, "wordpress" was removed from the path leaving the path as: /public_html/ADD-ONDOMAINfolder/SUBDOMAINfolder/. The files will be moved into the SUBDOMAINfolder.
Change the path to meet appropriately meet - Click on MOVE FILES to move the files into the correct folder. Note that the WORDPRESS folder that originally contained the files will still be there, but it is not needed for this installation and can be deleted if you wish. NOTE: Due to the amount of files, you might see a slight delay before all of the files are actually moved. Give it a few minutes to complete the process.
Running the Installation Script for Wordpress
The finish line for the manual installation is in sight! The next part will require you to run the actual Wordpress installation script. In order to do this, you will need to know the URL where you have set the Wordpress installation files. For example:
http://demo-domain.com/wordpress/wp-admin/install.php
The path above is a sample URL where the Wordpress files are located in a subdomain to 'demo-domain.com'. The actual install script is in the wp-admin folder as indicated above.
- Load up your internet browser, then run the installation script per the path you have used for the installation.
- When the script first runs, you will see the following since we did not create a configuration file:
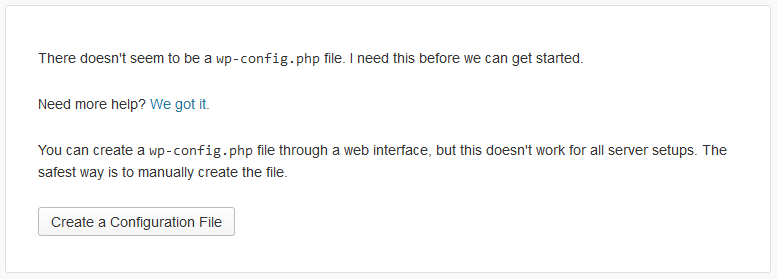
Click on the CREATE A CONFIGURATION FILE button at the bottom. - Next you will need the information you noted for the database setup earlier. You will see the following screen:
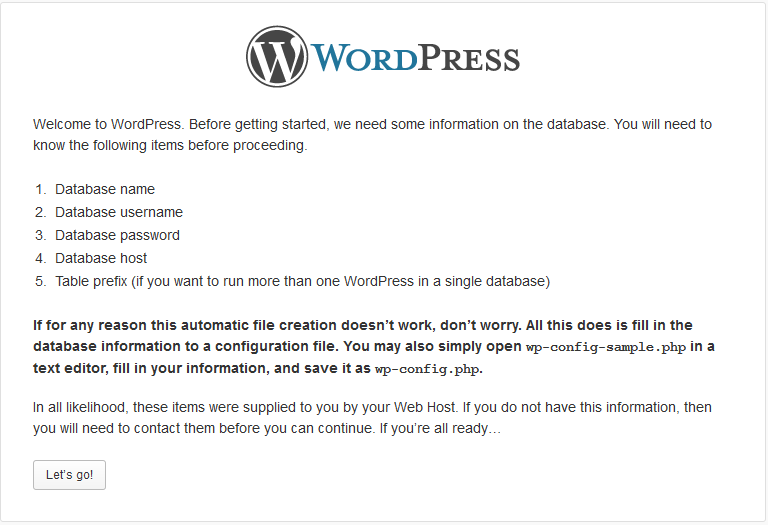 Read through the information above, then click on the LET'S GO button to proceed.
 - The first needed is the information listed in the previous screen - the database information. If your database server is in the same location as your web server, then the database host setting will be LOCALHOST. Here's a screenshot of the database settings:
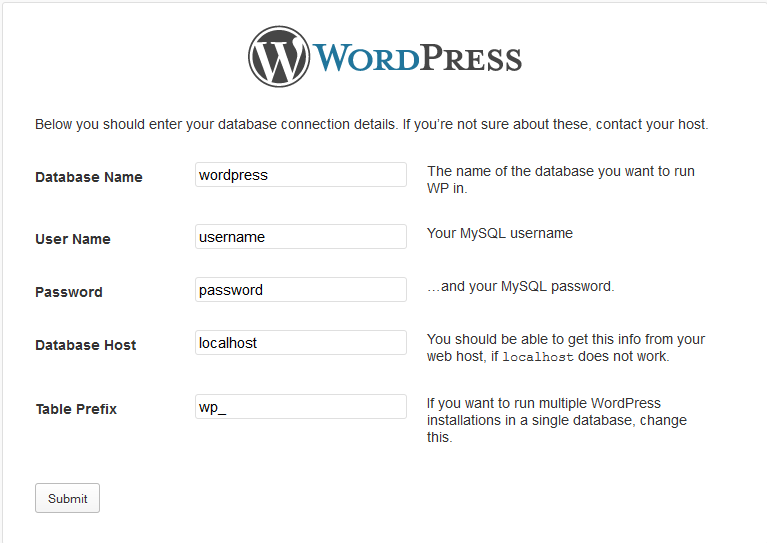
Note that for every Web Hosting Hub installation, the database and user name will be prefixed by the user Cpanel user name.
Table prefix - is the prefix that applies to each table created in the database. You do not need to change this, but it's available for modification if you wish to change the value. Note that as per the above note, that you would need to change this if you're using multiple wordpress installations in one database.
Fill in each field as per the values you used to setup your database. - Click on SUBMIT to proceed. If there is no problems with connecting to your database, then you will see the following:
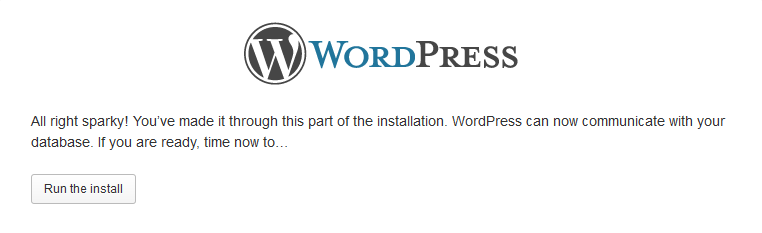
Click on RUN THE INSTALL. - The screens you are going to see are the settings for naming the site and setting the user name and password to access the website. The screenshot shows the
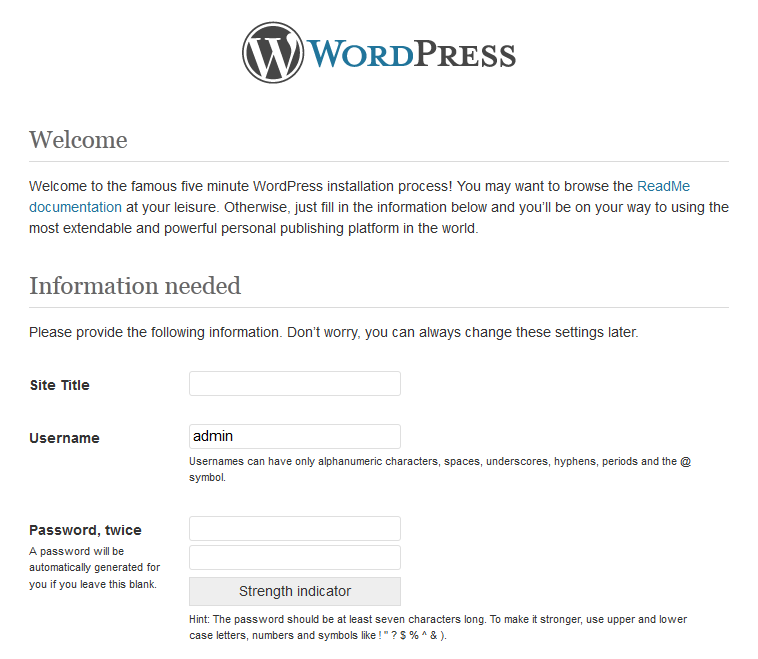
Fill in the Site Title, User name and Password then scroll down to complete the form. - The last part of the form is for your email address. This sends an automatic email to you that will give you the URL and the login name. Note that the PASSWORD is not included, so make sure you have it noted elsewhere.

Additionally, the Privacy option lets you choose if you want search engines to be able to hit your site. Click on the INSTALL WORDPRESS button to finish up.
The Wordpress installation will finish up at this point. You will get a confirmation screen and then a link to login to the Wordpress back end. Generally, the Wordpress administrator URL will be as follows: http://domain-name.com/wp-admin. If you want further information on Wordpress, check out the Wordpress Tutorials in the Support Center.
Did you find this article helpful?
Tweet
Category
WordPress Getting Started Guide
Help Center Login
WordPress Getting Started Guide
Related Questions
Here are a few questions related to this article that our customers have asked:
Ooops! It looks like there are no questions about this page.
Would you like to ask a question about this page? If so, click the button below!

We value your feedback!
There is a step or detail missing from the instructions.
The information is incorrect or out-of-date.
It does not resolve the question/problem I have.
new! - Enter your name and email address above and we will post your feedback in the comments on this page!