Creating Menus in the Contao CMS
Creating Menus for the Contao CMS consists of manipulating or creating the Site Structure. The Site Structure is the option in the the Contao Back end Layout Module that lets you manage the website structure by adding/editing/deleting items in a tree-style view. The following article will explain how to add menus within the site structure using the Contao CMS back end interface.
Adding Menus to the Contao CMS Layout
Note that the instructions below are using the default Theme that comes with the Contao CMS. Adding menus starts with creating site structures.
- Login to the Contao Back End
- Scroll down the left hand column that is labeled Back end Modules and then click on SITE STRUCTURES. You will see a structure of the current website constructed using the default Contao theme.
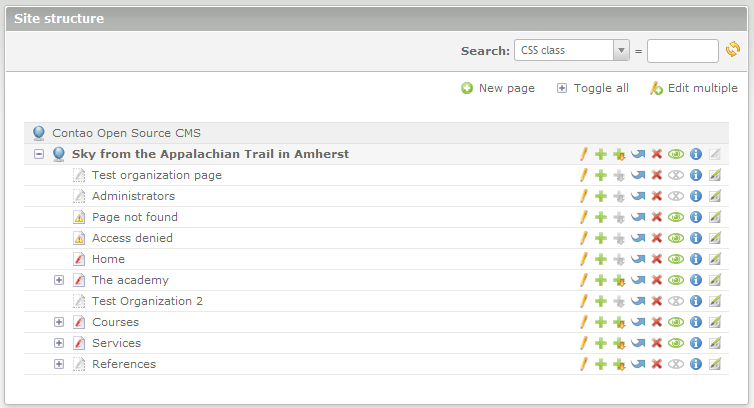
- At the top of the interface, click on NEW PAGE. The first thing you will be required to do is position the item. You will see instructions indicating this need:
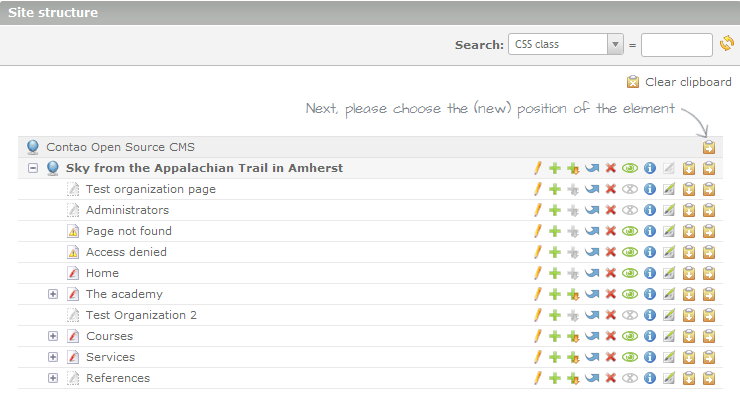
Click on one of the clipboards to the right in order to set the position the of the page you are adding. - Pages that you add in the site structure can be part of another group, or you can create a new group. If you click on the clipboard with the arrow pointing down, then the page will be placed BELOW the site structure item you are selecting, and it will create a new “group." Selecting the clipboard with the arrow pointing to the right will create a group that is inside the group that you have selected. Note that the site structure added (termed as PAGE in the interface) can be either an organizational unit (menu item), a re-direct, or website page depending on your selection. Here are a few screenshots demonstrating these groupings:
New Page positioned under Main Menu item -can be used for another URL
Menu item below website root item ("Sky from the Appalachian Trail in Amherst" is the root URL item) - items placed beneath the website root can be main menu items or pages. You can easily move the added item throughout the site structure at any point after the item has been saved.
Menu item created as sub-menu under an existing menu option
- After you position the page you will see the following form to fill out for the page/menu item you have created. Note that the form is broken up into three pieces because of its length:
Part 1 of the New Page form entries - includes the required item of the page name, page alias, page type (Name and type section)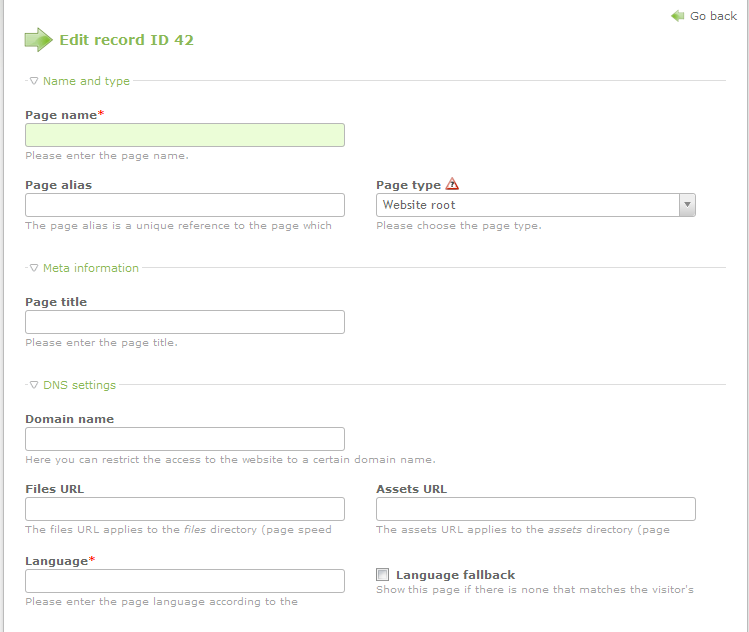
The top part of the form includes the mandatory fields for the Page name, and language. The other important section of this form is the Page Type drop down menu. Here's a quick table descrbing the options that can be selected:
Regular page Normal website page Website root Primary domain for website Internal redirect Re-directs to a location within the website External redirect Re-directs to a location outside of the website 403 Access denied Error page for access denied attempts 404 Page not found Error page for page not found errors
In order to make a menu item simply select Regular page. If you intend to redirect from the menu entry, then select one of the redirect types. If you intend to create a new menu for a separate URL (apart from the primary one established with the start of the menu), then select Website root.
Part 2 of the form - Includes the global settings, XML Settings, and layout settings.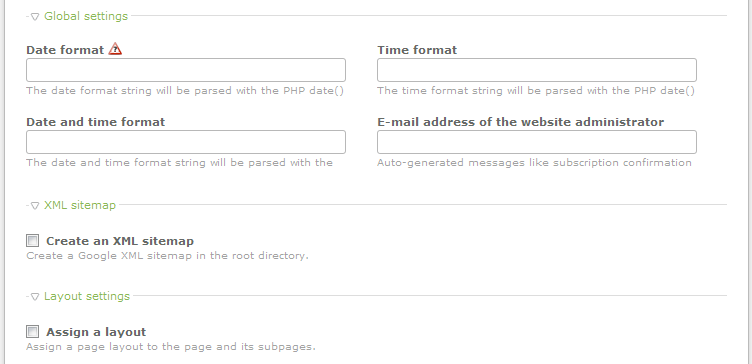
Do not click on ASSIGN A LAYOUT if you intend to create a menu item. This item should be selected if you are creating a page that will be opened. If you click on this option you will see the following: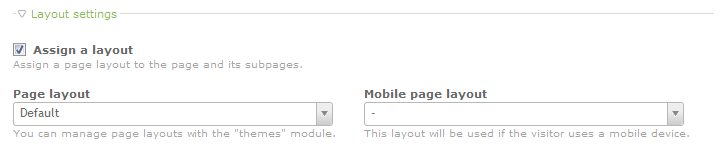
Part 3 of the form includes the cache settings, access rights, publishing settings, and viewing restrictions (based on date and time).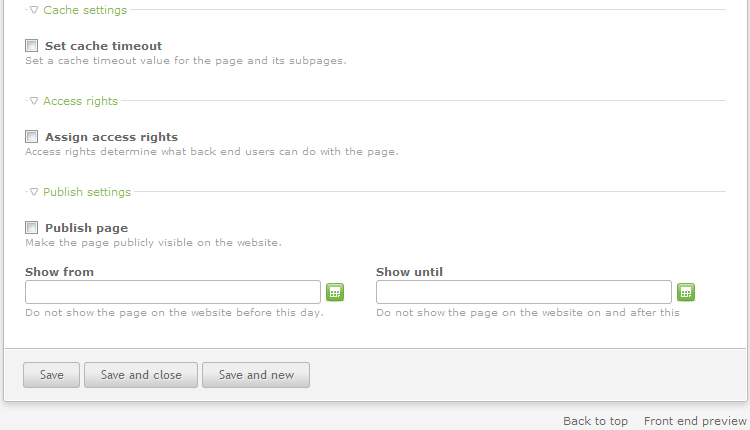
Make sure to click on PUBLISH in order to be able to see the page/menu item within the website. Pay close attention to the form options because they will change per the page type. - Click on a SAVE option at the bottom of the page to save your entries.
It is important to remember that we are modifying the existing default Contao demo website and therefore, the default Contao theme. This gives us a baseline in which to understand how to manipulate and create the menu and site structure that Contao provides. The following screenshots show you an example of what you will see when you add/modify a portion of the site structure and how it will appear in the front end:
Site Structure in Contao Back end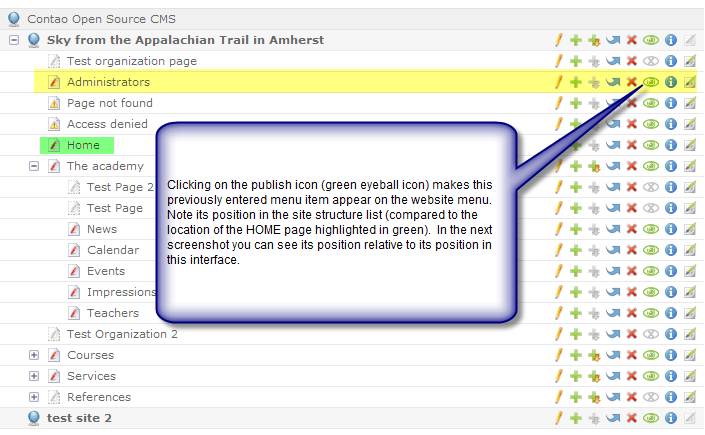
Front end appearance after menu change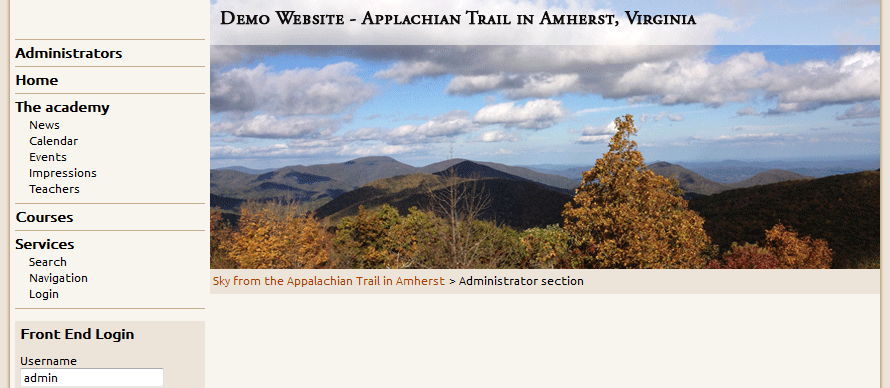
As you can see, the Administrators menu item is above the HOME section which matches the positioning of the menu item within the back end interface. The appearance of the menu, its positioning and limits are all governed by the theme used with the CMS. If you intend to use this theme or any other Contao theme, you will need to stay within the limits of the theme's formatting in order to avoid possible issues such as overlapping menus or missing elements. Keep close watch over the appearance of the front end by reviewing its appearance when you make changes to menu structures or other visible sections of the website.
Did you find this article helpful?
Tweet
Category
Creating Content with Contao
Help Center Login
Creating Content with Contao
Related Questions
Here are a few questions related to this article that our customers have asked:
Ooops! It looks like there are no questions about this page.
Would you like to ask a question about this page? If so, click the button below!

We value your feedback!
There is a step or detail missing from the instructions.
The information is incorrect or out-of-date.
It does not resolve the question/problem I have.
new! - Enter your name and email address above and we will post your feedback in the comments on this page!