Quick Start Guide to Website Creation in Contao
Explaining how Contao works internally to display a website can be fairly complex. We could say that the Contao page consists of a layout (made up of CSS, modules and themes) and the article that contains the content (text, graphics or other media), but this in-depth understanding of the structure can be slow and difficult to understand for the novice. To give you a quick general start on the system, this tutorial will give you only general steps on putting together a website based on modifying the default template with the Contao CMS.
Modifying the Website with Contao
When you install Contao, you will be able to setup a test site that comes with a theme, user data and the other general structures that will be part of a typical Contao website. The template provided with the install can be quickly modified to create a specific website to meet your needs. We will be using the default site in order to familiarize you with using Contao by modifying the header image of the default theme and changing menu structure.
- First, login to the Contao Back end interface. Note: Steps 1-4 give you a quick look at the interface. Skip down to step 5 in order to begin modifying the existing theme so that you can add your own content to the demo site.
- You will see the general Contao interface that will appear as follows:
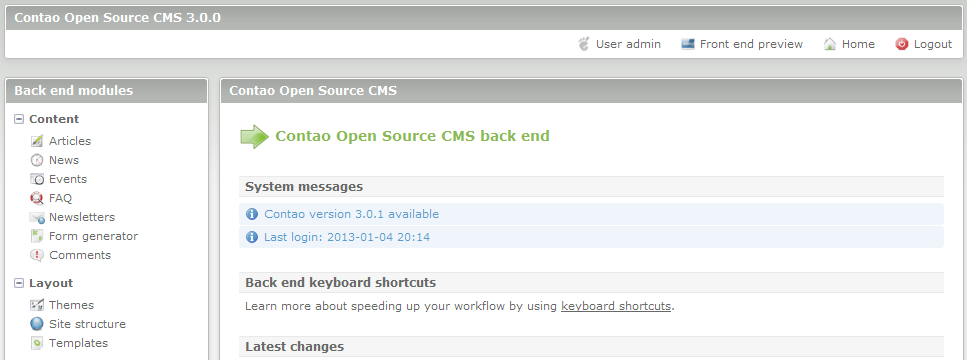
There 3 main sections with each section highlighted in gray and labeled as: Contao Open Source CMS 3.0.0 (the top menu bar), Back end modules, Contao open Source CMS (the largest window). The window on the right will change as you select items in the Back end Modules section.
At the top menu bar, click on FRONT END PREVIEW. The preview shows the default website:
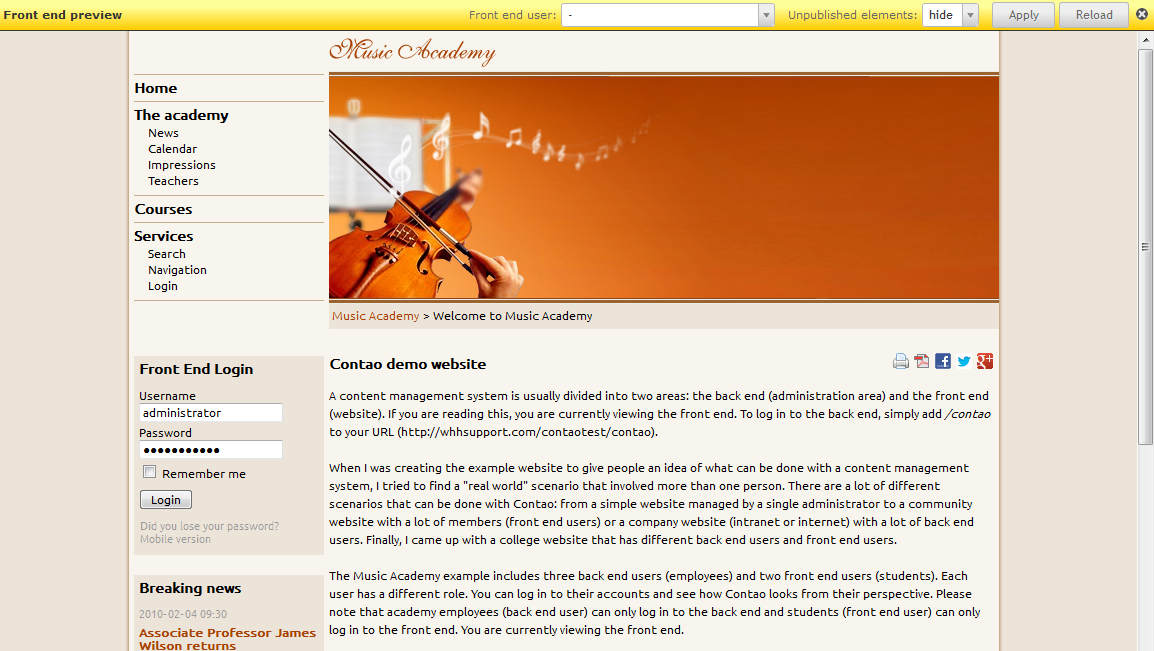
- The front end preview shows the website that we will be modifying. This page is the default available when loading Contao. Note the yellow bar at the top of the page. You can choose to show the web page based on existing users and also hide unpublished elements using each option's drop-down menu. Clicking on the preview will open a new tab within the browser and show the website as it appears now. Here's a breakdown of the front page for the default template:
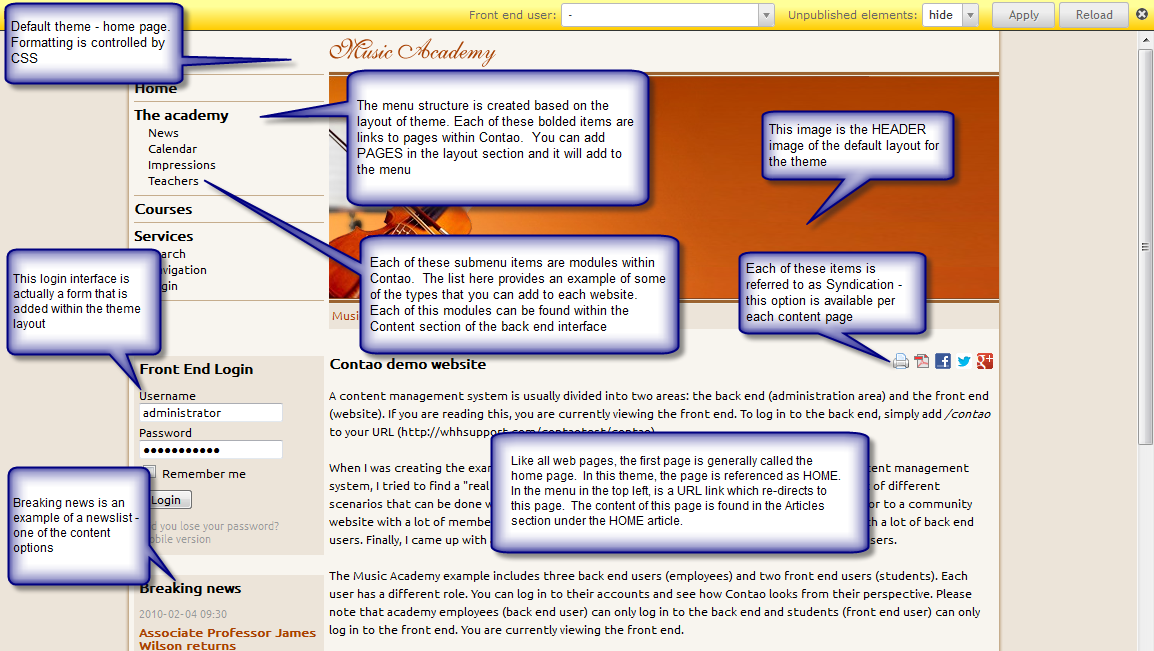
Click back to the back end interface and we'll summarize each section before starting to add a page to the website.
- Each of the sections identified in the webpage above correspond with the backend interface. Here's a quick look at the sections to help familiarize you with the setup:
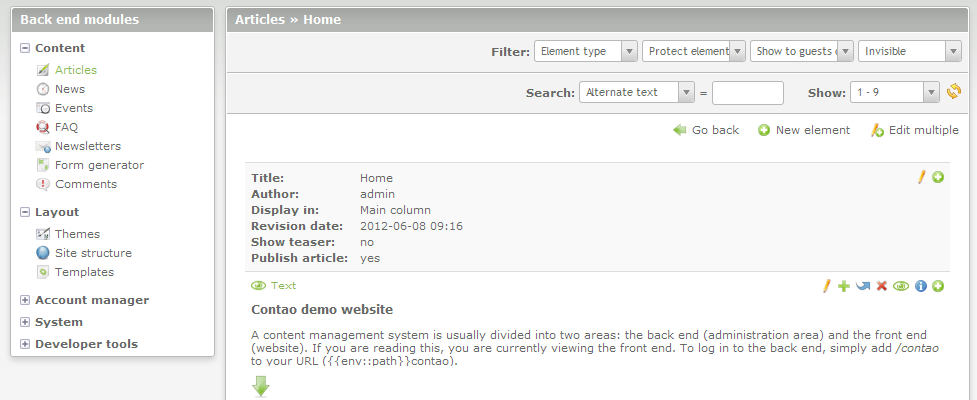
CONTENT Module - The screenshot below shows the list of content found in the articles section:
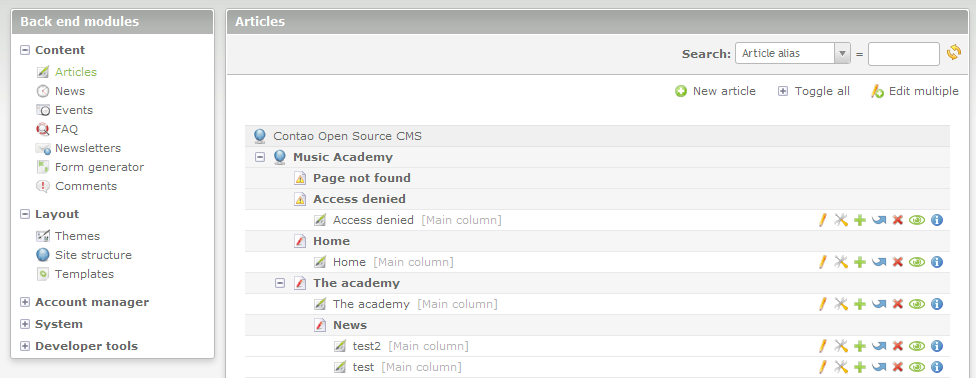
ARTICLES - You can click on the articles in the list above in order to get to the actual content that actually makes up the article. Additionally, it is important to remember that when creating a new article, you will be creating an article ID section (which contains the many of the settings and identification information for the article) in addition to the article content as seen in the screenshot below.
The other section of the interface that you will quickly begin to use is the SITE STRUCTURE within the Layout section. This is where you will be adding pages that will become the parts of the menu that link to the other pages within the website.
We will begin by modifying the demo site. In the Back End Modules menu (the left hand column menu in the back end), click on THEMES under the Layout section. The screenshot here shows two themes (though you'll only one in the default installation of Contao).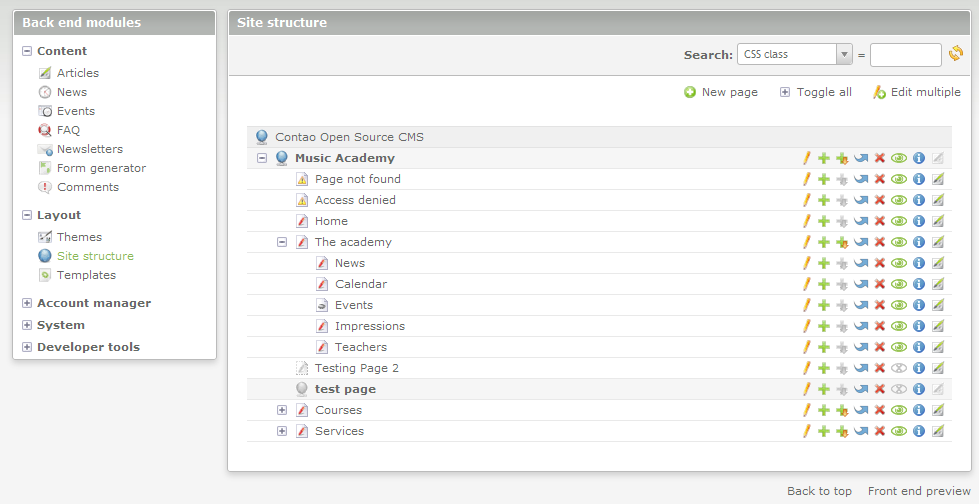
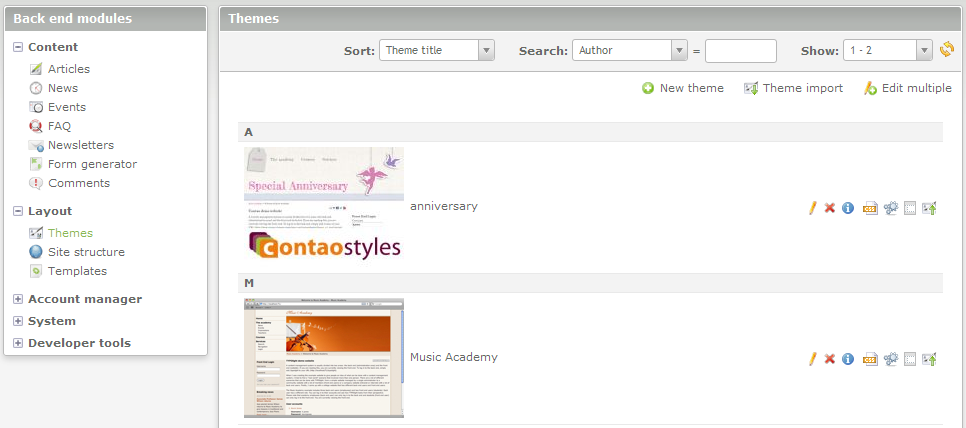
To the right of each theme, you will see a series of icons. Click on the second to last icon in order to edit the MUSIC ACADEMY theme's page layouts. You can hover each icon to see a description of each option. We will be editing the page layouts to simplify and personalize the website header image: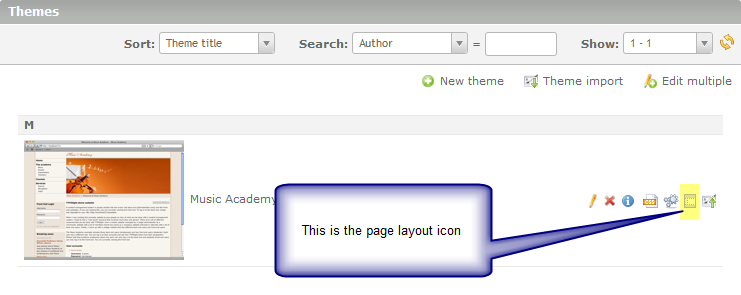
- We will start the changes to the site by modifying the theme graphic - When you click on the EDIT PAGE LAYOUTS icon, you will a list of the page layouts. You will see that there are 6 page layouts. Each page layout has an option for a mobile device display and then one for a non-mobile device display. We will be working with the DEFAULT layout. Click on the pencil icon (the first icon) to the right of the layout name. You will see the following:
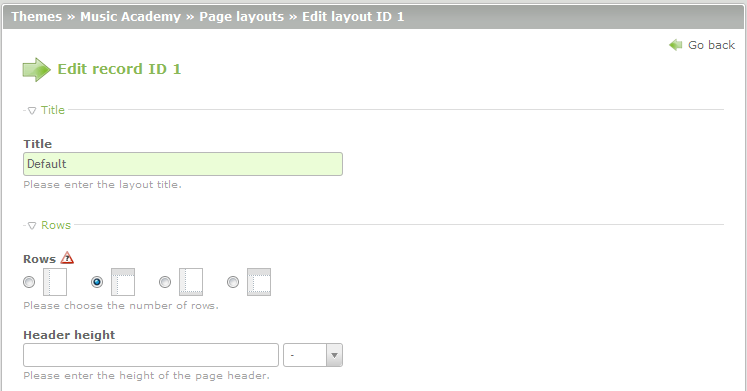
This is a partial capture of this section. Take a look at the options that you have for modification. Scroll down until you see the following:
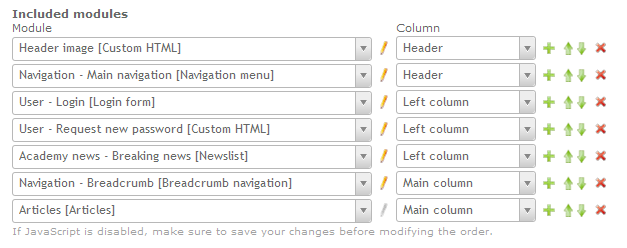
For the purposes of this tutorial, the header image will be replaced. If you wish to replace it with an image of your own, note that the image is 670x273 pixels. Click on the edit option (looks like a pencil icon) next to the HEADER IMAGE.
- You will see the following screen that will allow you to modify the current image file. For more information on adding images, go to Creating new Content Elements the Contao CMS.
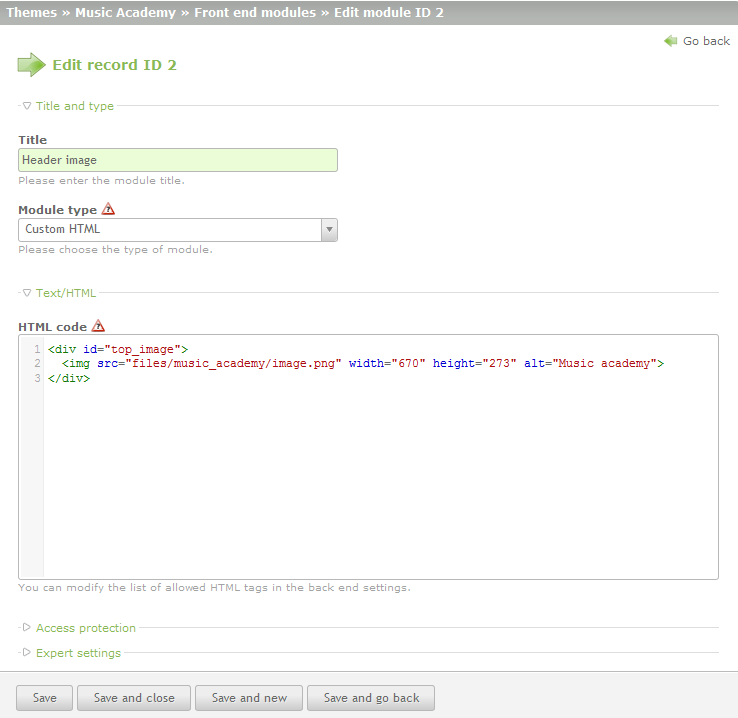
The image will be changed to the following file name: amherst-apptrail.png. In order to change the image, the text in the file above has to be changed to the new file name. This is done by clicking the editor and editing the text. The alt text should also be changed to reflect the new image.
- Here you can see the changed image file and alt text.
<div id="top_image"> <img src="/help/files/music_academy/amherst-apptrail.png" width="670"height="273" alt="View from the Appalachian Trail in Amherst, Virginia"></div>
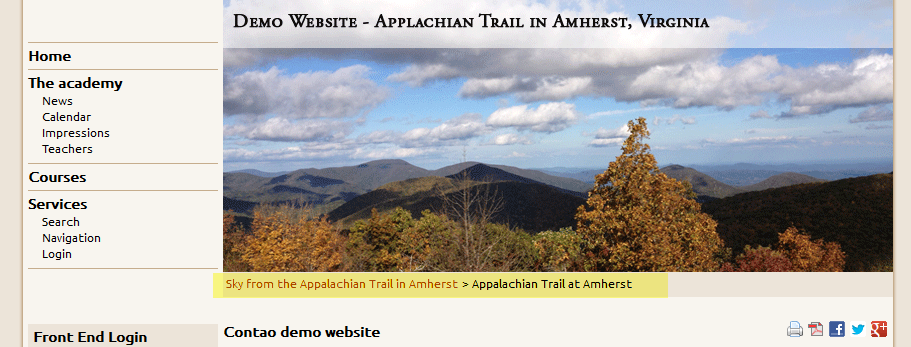
Click on a SAVEoption at the bottom of the page in order save any changes. The following screenshot shows the change in the front end: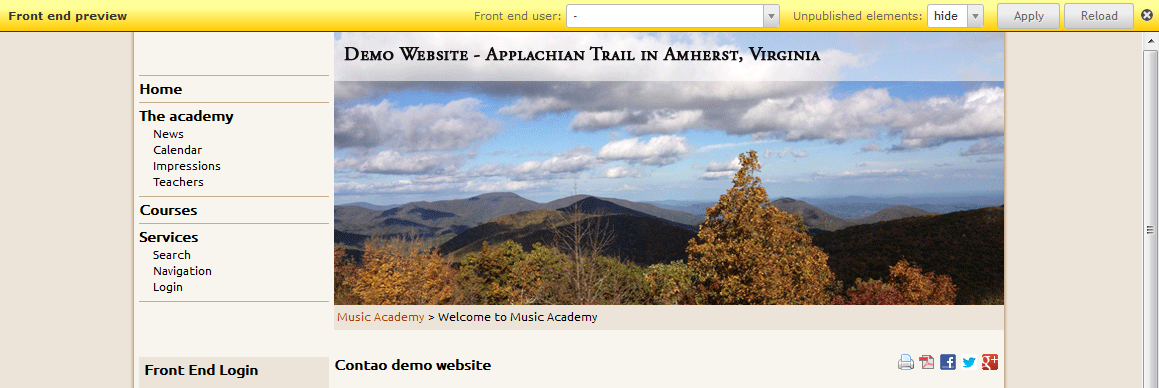
As you can see, the change is relatively simple and quick. The picture also includes text that can be added with a graphic editor to help quickly change how the user will identify the website. Notice however, that the text under the header image still says "Music Academy>Welcome to Music Academy". We will change this next. In the back end interface, go to the Site Structure menu and return to the view of the tree view of the Site Structures that make up the website.
- Click on the menu item labeled "Music Academy". Click on the edit icon (the pencil icon) to edit this page. If you hover over the pencil icon, you will see the pop-up text that says "Edit page ID1". You will see the following:
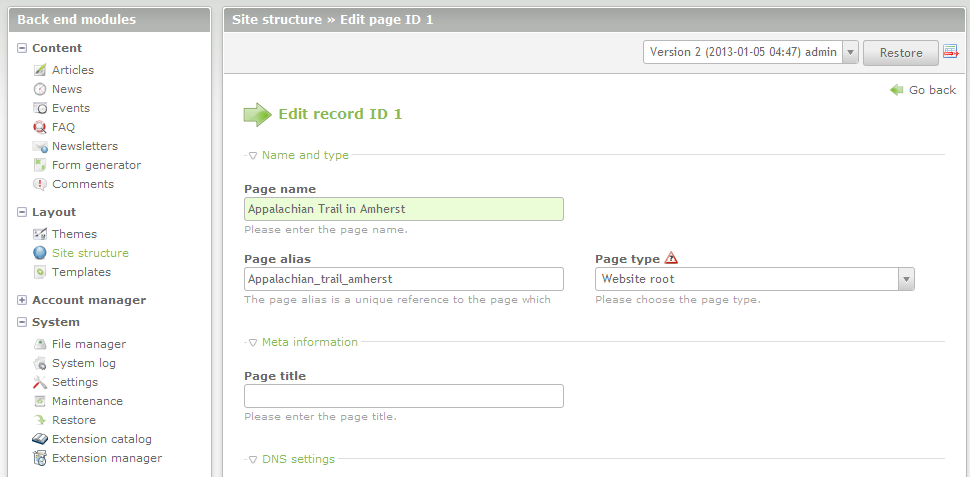
The screenshot above shows the Page Name and alias has been changed. Next, we will change the Page name used for the Home page. Go back to the Site Structure and click on the edit icon for the HOME page. - Change the title of the page (this will be for ID2). Notice the highlighted text under the picture below. The text has been changed since the site description was changed. You can also make changes to the any of the site structure names so that the menu is modified to your liking.
- After making the changes to the site structures, make sure to click on a SAVE option at the bottom in order to save your changes.
As you can quickly see, the appearance of the front end can be quickly changed to become a more personalized website by simply making changes to the default Contao website. You can see that it is easy to make changes to the appearance and menu structure. If you want to continue using another quick start guide, go to the Quick start to Creating a Page in Contao.
Did you find this article helpful?
Tweet
Category
Getting Started with Contao
Help Center Login
Getting Started with Contao
Related Questions
Here are a few questions related to this article that our customers have asked:
Ooops! It looks like there are no questions about this page.
Would you like to ask a question about this page? If so, click the button below!

We value your feedback!
There is a step or detail missing from the instructions.
The information is incorrect or out-of-date.
It does not resolve the question/problem I have.
new! - Enter your name and email address above and we will post your feedback in the comments on this page!