Creating Product Attributes and Attribute Groups in PrestaShop
If you will be selling products with attributes (e.g. size, color, style, etc.) these attributes and the groups they are organized in should be created before you begin adding the actual products to your PrestaShop store. Keep in mind that attributes differ from features in PrestaShop. For more information on the differences, please see our article Understanding Product Attributes and Features in PrestaShop.
Adding an Attribute Group in PrestaShop
- Begin by logging into your PrestaShop back office.
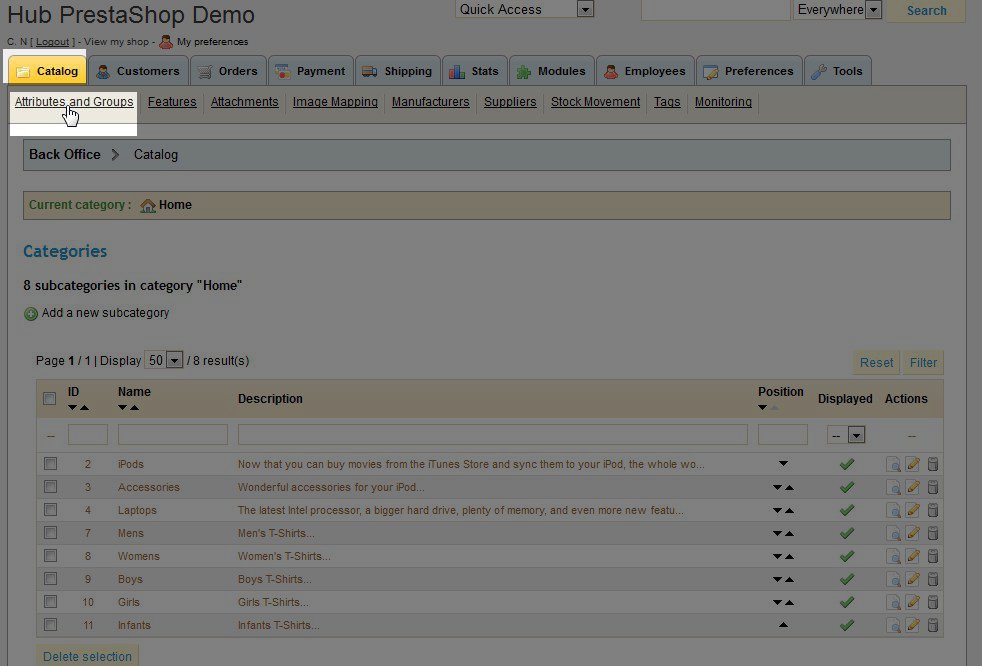
- Select the Catalog tab and click the Attributes and Groups link.
- If you chose to install the demo data when installing PrestaShop, you will see a few attribute Groups already listed. You can delete these later if you do not need them for your store. For now we will focus on creating a new group.
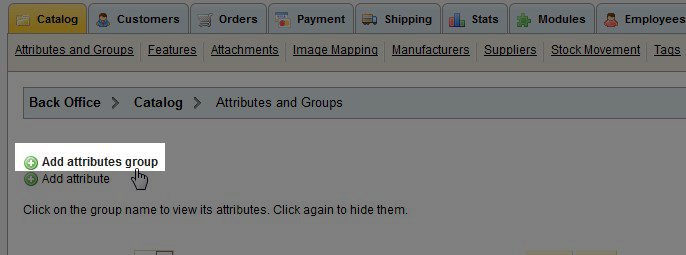
- Click on the link for Add attributes group.
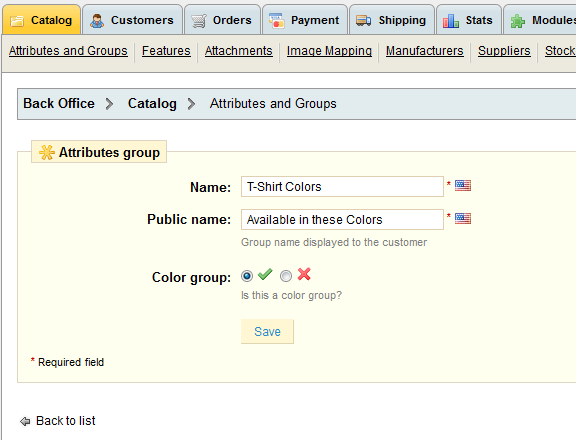
- Enter in the following information for your new attribute group:
Name This is the name that will be shown in the back office for this attribute group Public Name This is the name that will be shown publicly in your online Color group If this attribute group will contain color selections, select the check mark. - Click the Save button to save your changes and return to the Attributes and Groups listing page.
- Create any additional attribute groups you need for your PrestaShop store.
The next step is to create attributes for your new attribute group.
Adding an Attribute in PrestaShop
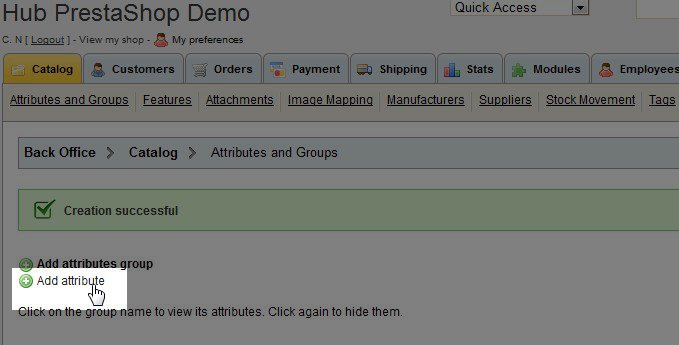
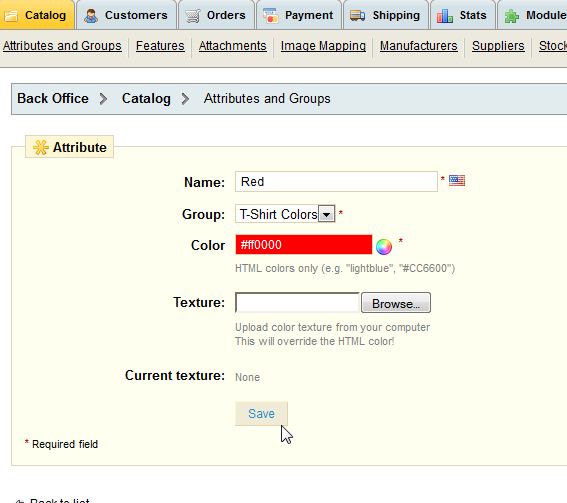
- On the Attributes and Group page, click the Add attribute link.
- Fill in the following information for your attribute:
- Click the Save button to save your new attribute and return to the Attribute and Groups list page.
- Continue adding any additional attributes needed for each attribute group.
| Name | Name for your attribute (e.g. Red, Large, etc.). |
|---|---|
| Group | Choose the attribute group you want to add this attribute to from the drop down menu. |
| Color | If your attribute is a color, either input the hex code for the color or select it using the color picker next to the color input field |
| Texture | If your attribute is a texture, you can upload an image file to display the texture. This will overwrite the Color field above |
Once you have completed the attribute groups and attributes you need, you can either move on to creating product features or begin adding products in PrestaShop.
Did you find this article helpful?
Tweet
Help Center Login
Managing Products and Categories in PrestaShop
Related Questions
Here are a few questions related to this article that our customers have asked:
Ooops! It looks like there are no questions about this page.
Would you like to ask a question about this page? If so, click the button below!

We value your feedback!
There is a step or detail missing from the instructions.
The information is incorrect or out-of-date.
It does not resolve the question/problem I have.
new! - Enter your name and email address above and we will post your feedback in the comments on this page!