Adding a Shop in PrestaShop 1.5
Setting up a shop in Prestashop 1.5 is a simple task that can be found under the menu item called SHOPS. PrestaShop allows you to manage multiple shops at once. This tutorial we will guide you through the setup of one additional shop. By default, there will be one shop already created and it will be used as the template for the creation of the additional shop.
Adding a SHOP
In order to add a shop, you need to first login to the Prestashop Administration Panel as an Administrator. Go to the far right end of the menu bar and select SHOPS. You will get a drop-down menu with th 3 choices. Select SHOPS from the menu and then follow the steps listed below:

The Steps to adding a new shop in Prestashop 1.5
- To add a shop, go to the right hand side of the screen and click on the plus sign labeled "ADD NEW"

- After clicking the ADD NEW button, you will see the following screen:
Fill in the SHOP NAME field with the name you want for the store. You can also set the Group shop, Category Root, Associated categories, Status (enabled/disabled) of the shop. It will show the loaded theme below the Status. Note that you can always edit the shop later to add these settings as needed
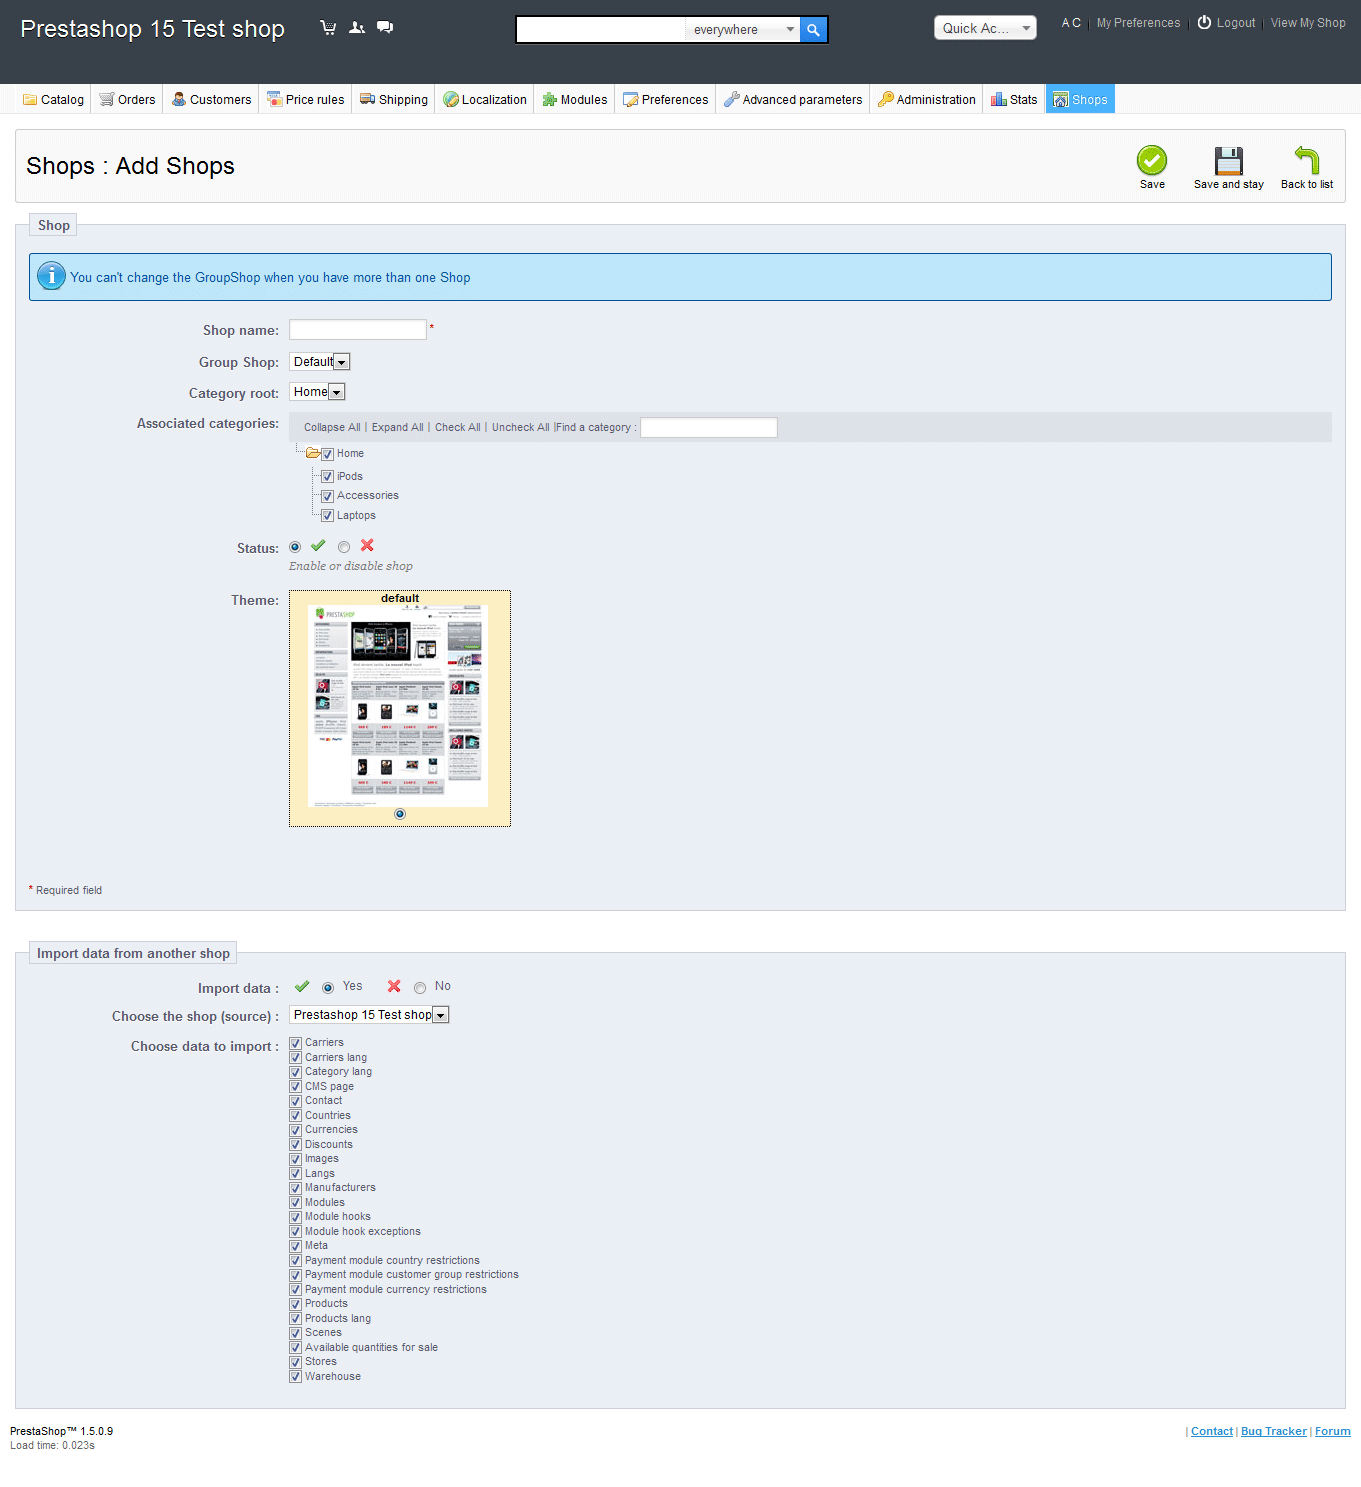 The STATUS option of enabled or disabled is a nice feature that will allow you set a maintenance mode. This means that you can prevent access to the shop so that only Administrators can see it if you are still setting it up or performing maintenanceAt the bottom of the page is the IMPORT DATA FROM ANOTHER SHOP option. This is a nice time-saving feature that will allow you pass over organizational and product data without having to duplicate data entry.Once you have completed making these settings, select SAVE in the top right hand corner. SAVE saves all the changes you have made and then goes back to the shop list. SAVE AND STAY saves the changes and remains on the same screen. BACK TO LIST will bring you back to the SHOP LIST with no changes saved
 - The next step in adding the shop is important in that it sets up the SHOP URL. The small print under the fields explains the physical URI and VIRTUAL URI. The final URL is then shown in addition to the SHOP that will be used. Prestashop allows the administrator to create a VIRTUAL location that doesn't physically exist but will be used to identify a shop. Based on what you have set, the final URL for the store is listed. In the example below, the Virtual URI will be based on "cameras/".
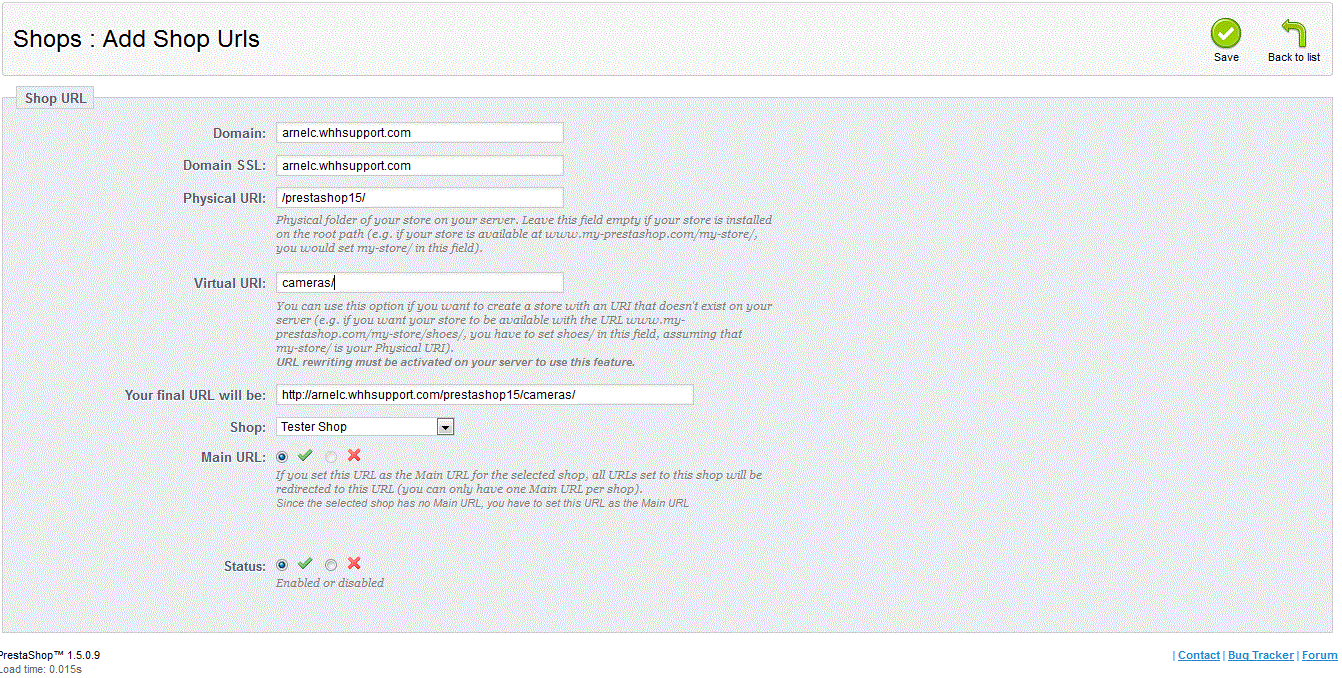 The other important concept on this page is that the final URL can also be set as the MAIN URL. This means that any further URLs will be based on the URL shown in the FINAL URL box. And they are set as the MAIN URL for the selected shop. This may seem a little confusing, but it basically sets the shop URL for the SHOP - since the SHOP NAME is not a URL. This is the address that your customer will be able to access on the internet to get to this particular shop.
 - And the last setting on this page is the STATUS. You again can DISABLE or ENABLE the store before saving it. This will allow the shop to be "live" or "still under maintenance/construction".
Select SAVE to commit the URL that will be used for the shop and you have completed the steps for adding a new shop to PrestaShop 1.5!
Did you find this article helpful?
Tweet
Category
Getting Started with Prestashop 1.5
Help Center Login
Getting Started with Prestashop 1.5
Related Questions
Here are a few questions related to this article that our customers have asked:
Ooops! It looks like there are no questions about this page.
Would you like to ask a question about this page? If so, click the button below!

We value your feedback!
There is a step or detail missing from the instructions.
The information is incorrect or out-of-date.
It does not resolve the question/problem I have.
new! - Enter your name and email address above and we will post your feedback in the comments on this page!