Configuring the UPS Shipping Module in PrestaShop 1.5
One of the most common concerns for users of a software like PrestaShop is the process of setting up shipping carriers. One of the most popular carriers is the United Parcel Service (UPS) which PrestaShop conveniently supports through a installable module. In order to find more information on installing modules go to How to Load New Modules in PrestaShop 1.5. The following article explains how to install and configure the UPS module in PrestaShop 1.5.
Setting up the UPS Module in PrestaShop 1.5
- Login to the PrestaShop 1.5 Administrator Dashboard
- Hover over the menu bar where it says MODULES, then click on MODULES when it appears in the drop-down menu.
- When the list of modules appears, it will appear similar to the following:

Note that the UPS Carrier module is INSTALLED above. By default, this module is not installed. You would need to click on INSTALL in order to load the module. The installation process does NOT complete the setup for the module. Click on CONFIGURE at the bottom of the module in order to proceed. - When you click on CONFIGURE, you will need to all of the information that is requested on the page. In order to use the UPS system, you will need to have started an account with UPS. You can start the account here: UPS Developer Kit page. Here's a screenshot of the configuration page:
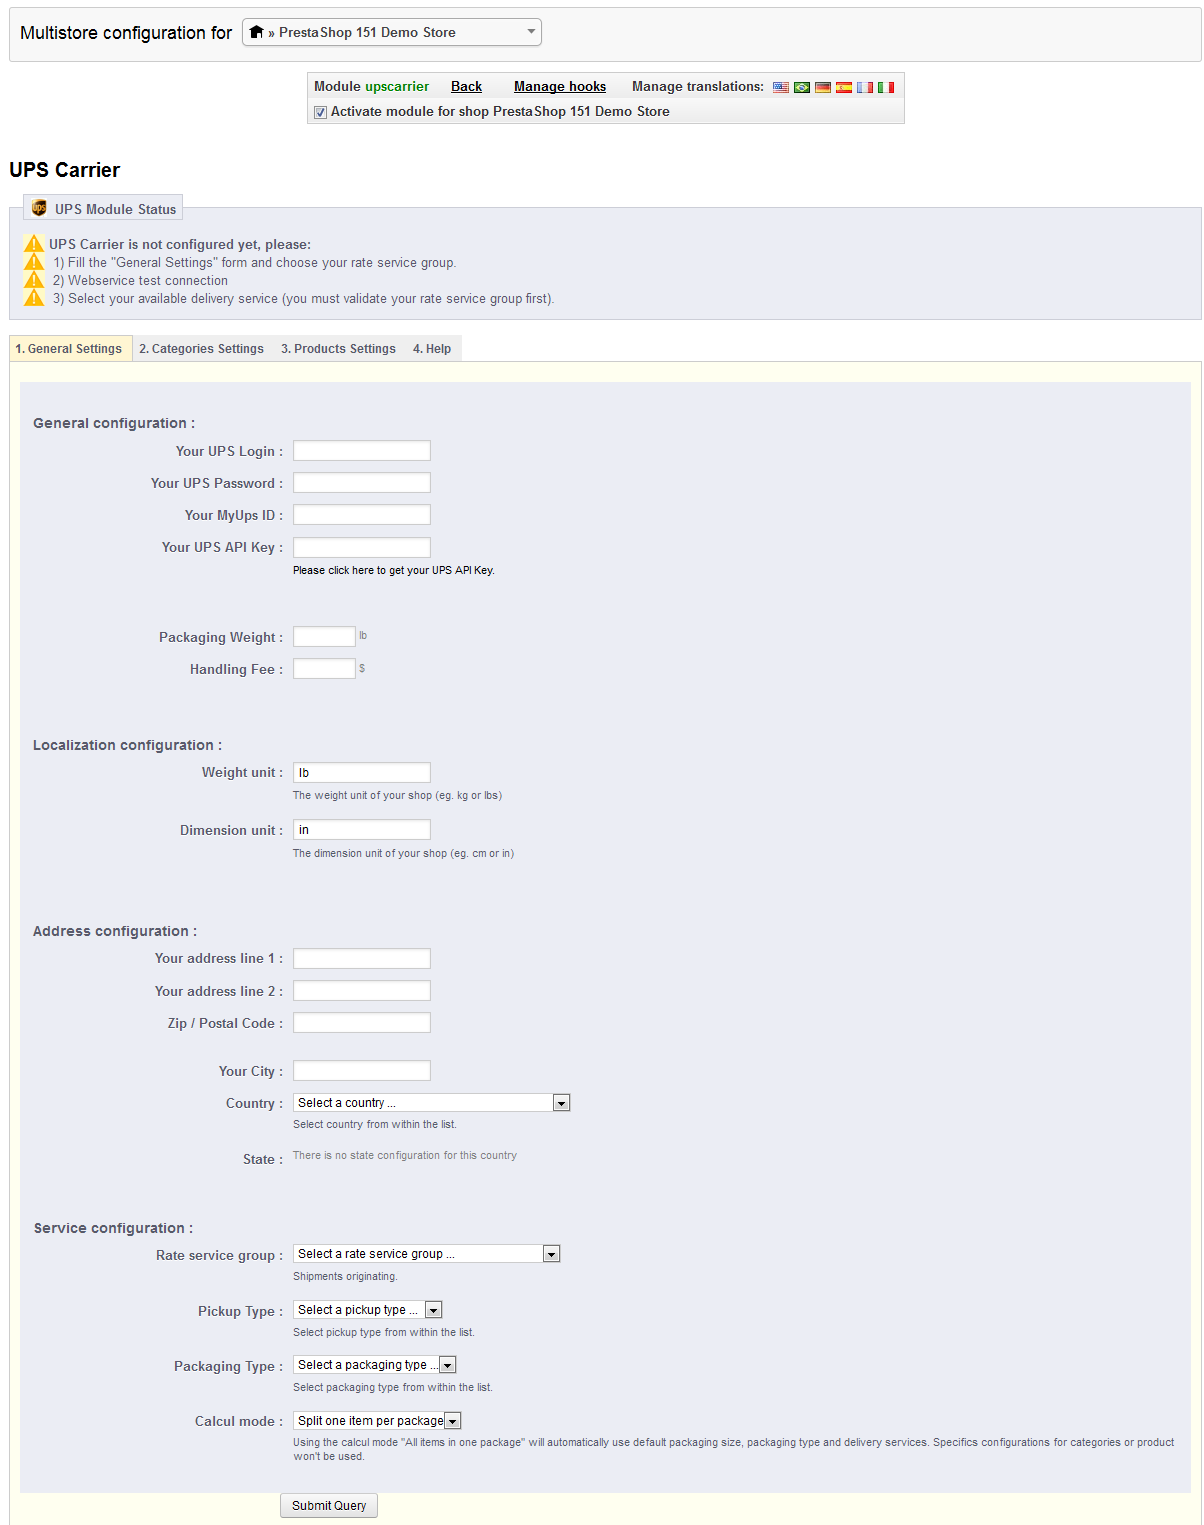
Once you have completed filling out the entries on this page, click on SUBMIT QUERY at the bottom of the page. The next section you will need complete is the Categories Settings - this is the second TAB at the top of the configuration page:
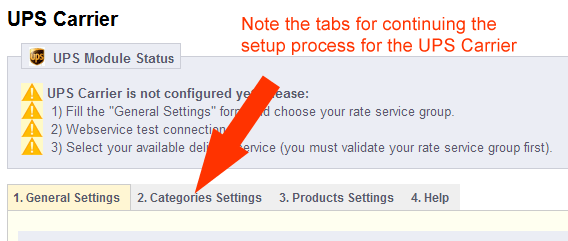
- Complete the CATEGORIES SETTINGS and then proceed to the PRODUCTS SETTINGS to complete the process.
Setting up your UPS Carrier gives you the option to offer UPS as an option for shipping when the customer checks out. Here's an example of what they may see when checking out of your shop:
Did you find this article helpful?
Tweet
Category
Using Modules in PrestaShop 1.5
Help Center Login
Using Modules in PrestaShop 1.5
Related Questions
Here are a few questions related to this article that our customers have asked:
Ooops! It looks like there are no questions about this page.
Would you like to ask a question about this page? If so, click the button below!

We value your feedback!
There is a step or detail missing from the instructions.
The information is incorrect or out-of-date.
It does not resolve the question/problem I have.
new! - Enter your name and email address above and we will post your feedback in the comments on this page!