Creating Systems Settings in Modx
You can modify the behavior of the Modx CMS or provide a system-wide value by adding a System Setting. For example, let's say that you want to reference a description for a system setting like the global template that you might be using for your particular Modx website. You could quickly add a new system setting, add the description and then reference the custom system setting later within your web pages. If you require more information on system settings, please go to Changing System Settings in Modx for a list of the settings areas/groups and information on how to change these settings. The following article explains how to add a system setting using the Modx Administrator Dashboard interface.
Making a New System Setting in Modx
- Login to the Modx Dashboard Administrator
- Hover over the menu bar at the top of the page where it is labeled SYSTEM. Click on SYSTEM SETTINGS when the drop-down menu appears.
- In the top left-hand section of the SYSTEM SETTINGS, click on the CREATE NEW SETTING button. You will see the following form appear:
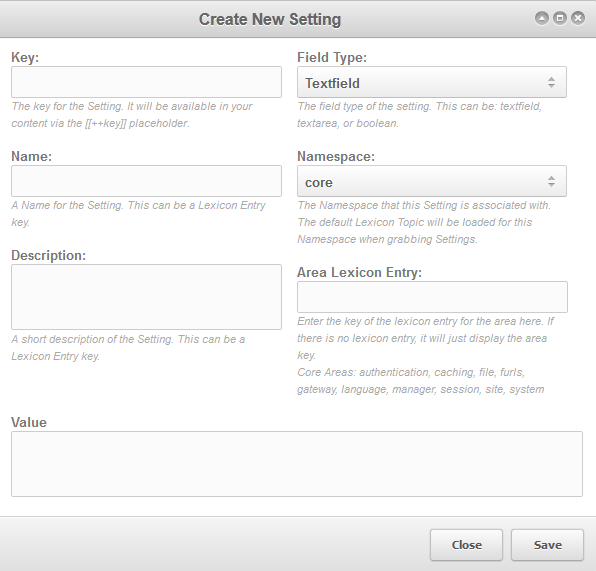
NOTE: All system settings are referred by the [[++key]] tag. The key field is used for this setting, so make sure to make this name unique.
- Fill in the KEY field with a unique name.
- In the FIELD TYPE, click on the up-down arrow to open the drop-down menu. Select the field type that best matches the value that you want the setting to represent. For example, if the VALUE of the System Setting that you are creating is a description, then select TEXTAREA to write a long description. If it's a Yes/No answer, then select the 'Yes/No' option from the drop-down menu.
- Click in the NAME field and type a name for the setting that you are creating. This is used to identify the setting in the System Settings list.
- Click on the DESCRIPTION field and then type in a short description of the setting. This is displayed in the Systems Settings list when clicking on the '+' sign next to the system setting listing.
- Click on the Area Lexicon Entry field and name the area for the setting you are creating. This field typically matches with the area definitions already set in the System Settings. For a complete listing of the default Area listings for the System Settings, go to Changing Systems Settings in Modx. If your settings does not mach up with any of the areas, then give it a unique name and it will be displayed as a separate area when the settings are listed.
- Click on the VALUE field and type in the value for the setting that you are creating.
- Click on SAVE in order to save your entries. This completes the creation of your System Setting!
Note that the NAMESPACE field was left to the default value of CORE. This is the setting for the default Modx installation that you are modifying and should not be changed unless you are working on settings for a different namespace. Namespaces can include templates or components that you have installed to Modx.
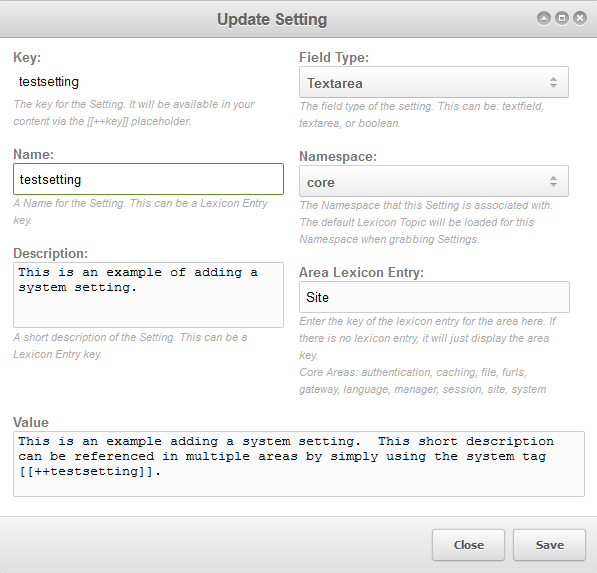
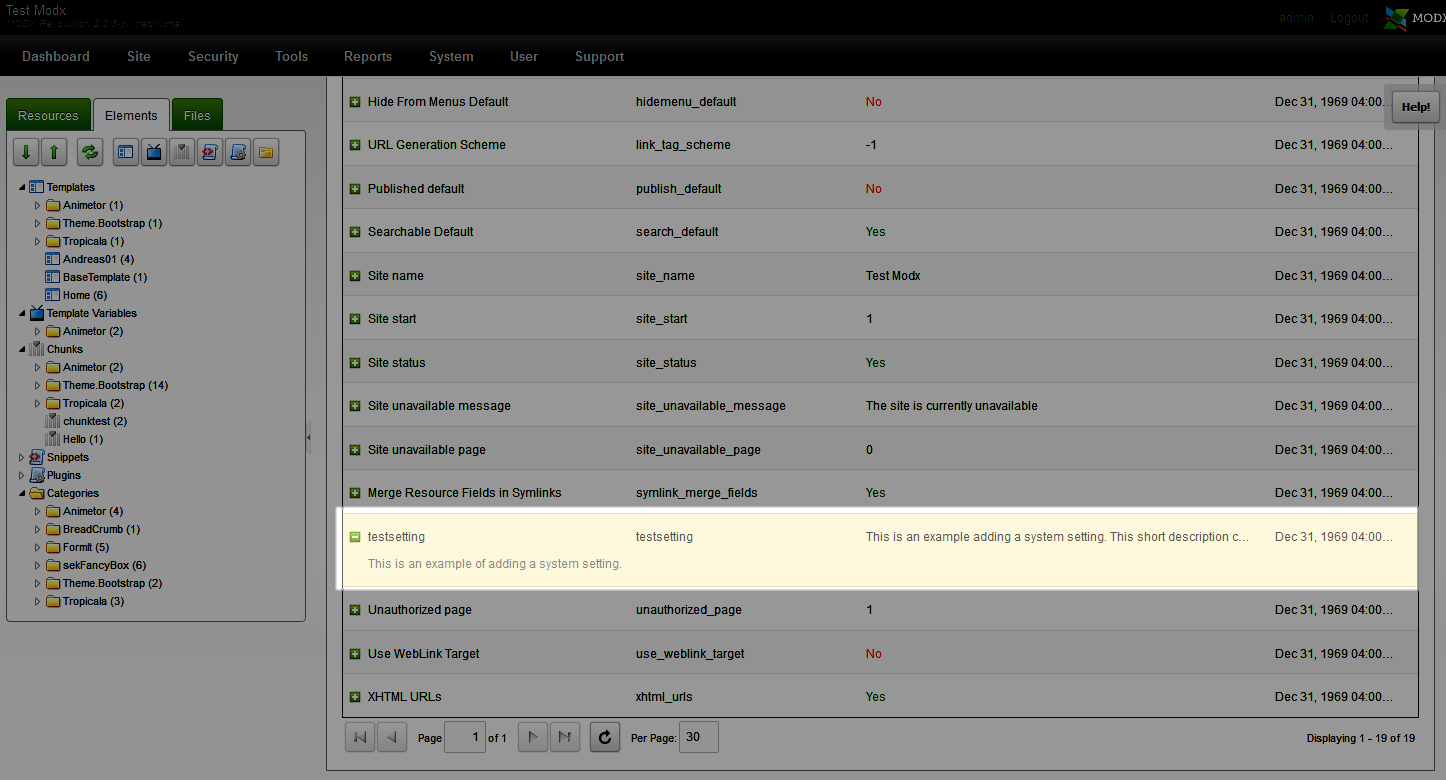
The following screenshots show an example of a test setting that can be referenced in Modx with a system tag and its appearance in the System Settings list after being added:
 |
 |
Did you find this article helpful?
Tweet
Category
Managing Modx
Help Center Login
Managing Modx
Related Questions
Here are a few questions related to this article that our customers have asked:
Ooops! It looks like there are no questions about this page.
Would you like to ask a question about this page? If so, click the button below!

We value your feedback!
There is a step or detail missing from the instructions.
The information is incorrect or out-of-date.
It does not resolve the question/problem I have.
new! - Enter your name and email address above and we will post your feedback in the comments on this page!