Flush Permissions and Sessions in MODX
Caching can cause issues when changes are made and previous rules or settings are still applying. This is because although the change has occurred within the settings for MODX, the older version of a web page has been saved in cache so that the page could be loaded quicker. To reset this there are a few options provided by MODX. The first option available is the Clear Cache option under the Site menu. The following article discusses the other options clear memory in MODX- flushing the sessions and permissions using the MODX Administrator interface.
Using the Flush Permissions and Sessions Option in MODX
How to Flush Permissions
Flushing permissions will simply clear permissions for a person or section of the MODX website based on specific user login. This will clear the cache and any previously saved permissions for that page.
- Login to the MODX Administrator Dashboard.
 Hover over the menu bar where it is labeled SECURITY. Scroll down the drop-down menu and click where it shows FLUSH PERMISSIONS.
 - You will see a confirmation screen. Click on YES in order to complete the flush and reload the cache.
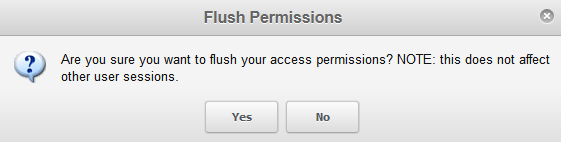
Note that clearing a the permissions does not clear other user sessions if they are logged into MODX at the same time. For example, if an administrator is changing the permissions for a web page or user, the administrator may want to login as that user and then flush the permissions in order to make sure that the user is seeing what they are supposed to be seeing according to the assigned permissions.
How to Flush All Sessions
Flushing all of the sessions clears the cache for all users. Additionally, all users who are logged into the application will be logged out and must login before being able to access the website.
- Login to the MODX Administrator Dashboard.
- Hover over the menu where you see the word SECURITY. Scroll down the drop-down menu that will appear and click on FLUSH ALL SESSIONS at the bottom of the menu.
- There will be a confirmation window. Click on YES in order to complete the flush. Remember that this action will log off all users who are currently logged into your MODX website.
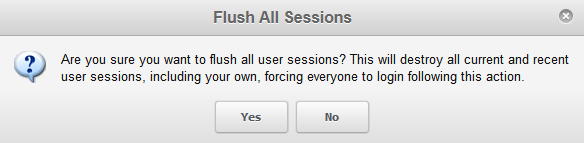
Clearing ALL sessions allows you to change permissions for groups of users, then forcing them off of the website so that they see the changes to their permissions when they log back into the website.
Did you find this article helpful?
Tweet
Category
Managing Modx
Help Center Login
Managing Modx
Related Questions
Here are a few questions related to this article that our customers have asked:
Ooops! It looks like there are no questions about this page.
Would you like to ask a question about this page? If so, click the button below!

We value your feedback!
There is a step or detail missing from the instructions.
The information is incorrect or out-of-date.
It does not resolve the question/problem I have.
new! - Enter your name and email address above and we will post your feedback in the comments on this page!