Managing Users in Modx
Users for Modx websites can be classified in two main groups - front-end users and back-end users. The following article will explain how to manage both front and back end users including creating them, understanding the data required for the creation of the users, determining access permissions, and managing existing users. Front-end users have access to the website that has been created by Modx. Back-end users are typically the users who help manage your website or specific parts of it. For example, you may have users who moderate a Blog or help to manage your users. Assign your backend users with care in order to insure that your website needs are fulfilled.
Creating Users
Creating users involves filling a large form with many settings including contact information, login periods, super-admin access (sudo), login limit (for failed logins), and the password for the user. If you are an administrator make sure you are following your organization rules for creating a user if there are any standards set.
- Login to the Modx Backend.
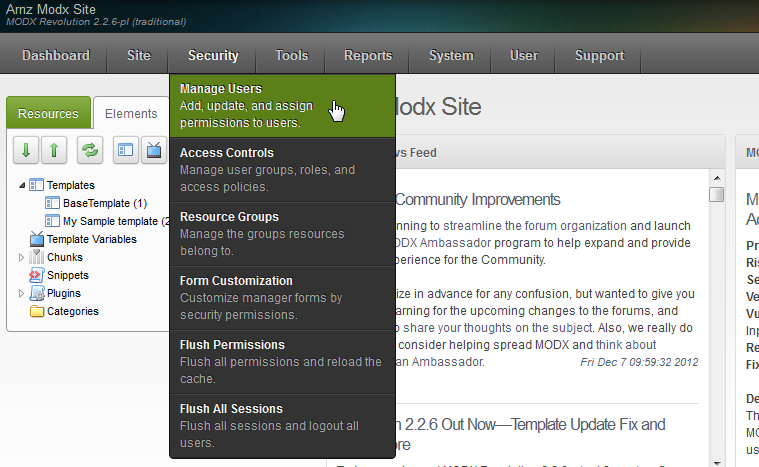
- Hover over the menu where it is labeled Security. Click on Manage Users when it appears in the drop-down menu:
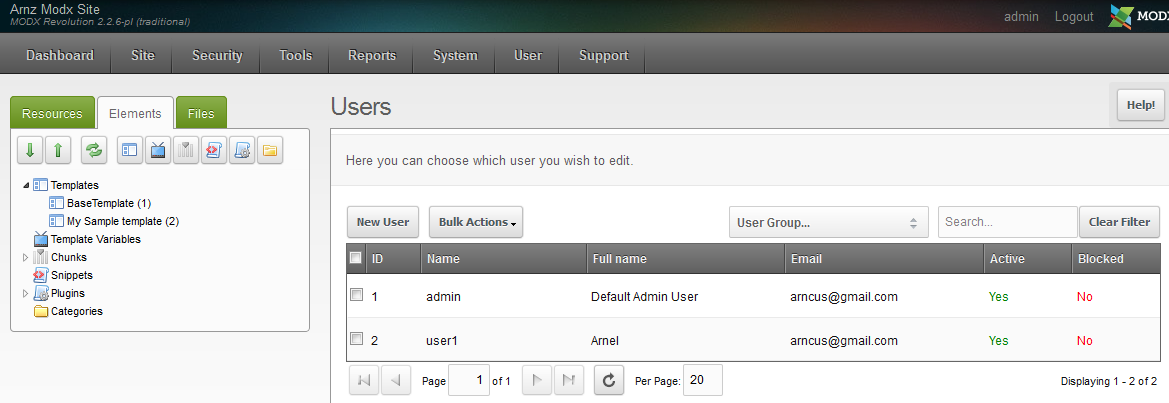
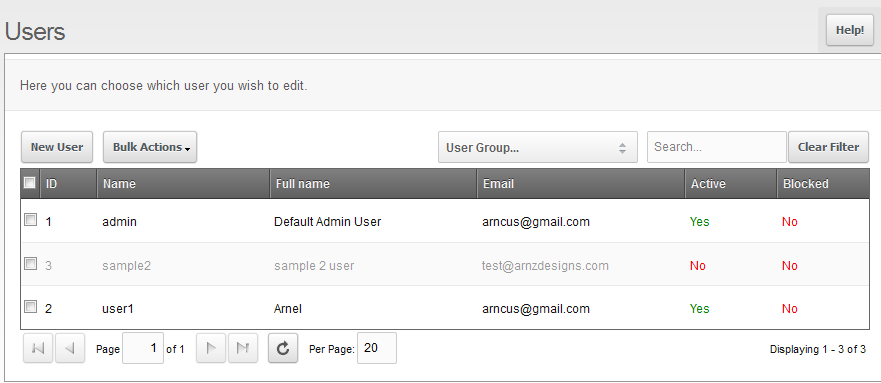
- The screen that appears will list the existing backend users and will appear similar to the following screenshot:
In order to start the process of creating a new user, click on the button labeled NEW USER. - The new user screen will appear as follows (divided into 2 parts in order to provide a clear view):

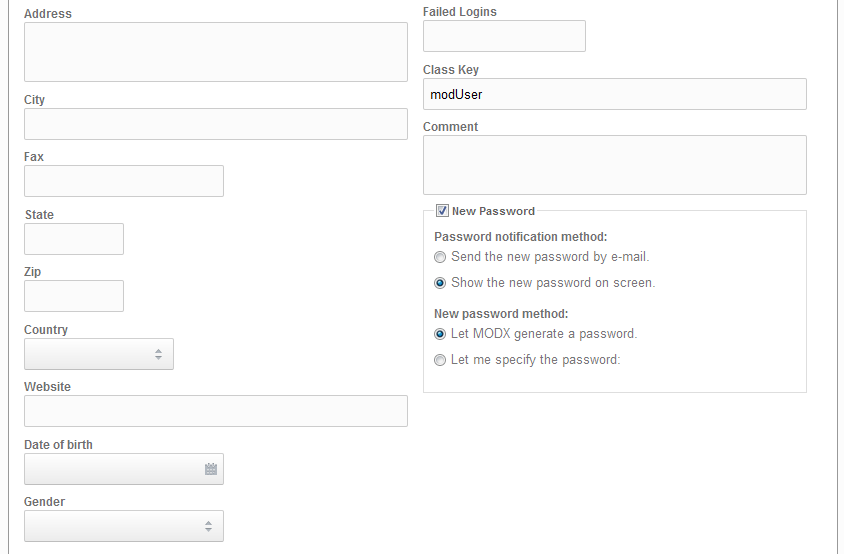
The primary identifier for the new user is the USERNAME. This is also the name used to login to the backend. The following table describes all of the General Information fields for the new user:
User Name User name for the new user you are creating Full Name Full name of the person who will be using the user login E-mail Address E-mail address of the user Phone Number Phone number of the user Mobile Phone Number Mobile phone number of the user Address Address of the user City City of the user Fax Fax number of the user State State of the User Zip Zip code for the user Country Country of the user Website Website of the user Date of Birth Date of Birth of the user Gender Gender of the user (M/F) Active Select checkbox to make user active Sudo User User will have full access the complete site will bypass any Access Permissions, checks. This option should be selected with caution. Blocked Will block user from logging in if checked Blocked Until Will prevent access until date and time specified Blocked After Will prevent access after the date and time specified Number of logins Shows the number of the logins Last login Shows the last login Failed logins Shows the failed login Class Key Modx class for user (Do not change unless you are familar with class keys in Modx) Comment Comment on user New Password Checkbox for determining new password methods Password notification method - send
the new password by e-mailPermits Modx to send an email notification of the new password Show the new password on screen Allows the viewing of the new password on screen New password method - Let Modx generate
a passwordPermits Modx to create the new password for the user Let me specify the password Allows the administrator to create the password for the user
Creating users doesn't require ALL of the information above, but the fields are there should you need them. The main fields that should be filled are the User name, Full name (to identify the user, if necessary), email address, other contact information (if necessary), Active (selected to make user active) and the Password (however you decide it should be generated and displayed). Click on these fields and fill in the blanks as per your organization requirements.
Note: The minimum required information before you can save the user is the user name, full name, email address, and select ACTIVE (so that the user can login). If the password is being generated by Modx, then it will appear when you click on the SAVE button in the top right hand corner. If the new password method for Modx is set to "Let me specify the password", then the password will be required before you can save the user. - After filling out the fields for your new user, click on the next tab called Access Permissions to proceed to the next section.
Adding Access Permissions to a User
Access Permissions are the area that you can add users to a specific user group. For example, if you have a Blog Moderators group, then you can assign the user to that group so that they can moderate the blog area of the Modx site. Note that users can belong to more than one group and permissions from one group may supercede the permissions in the other. An example of this is a user with administrator rights. Even though they may be blog moderators, if they're also an administrator, then they have access to other parts of the Modx website. For this reason, you should be careful when giving rights to your backend users.
- When you enter the Access Permissions tab, then you will see the following screen (or something similar):
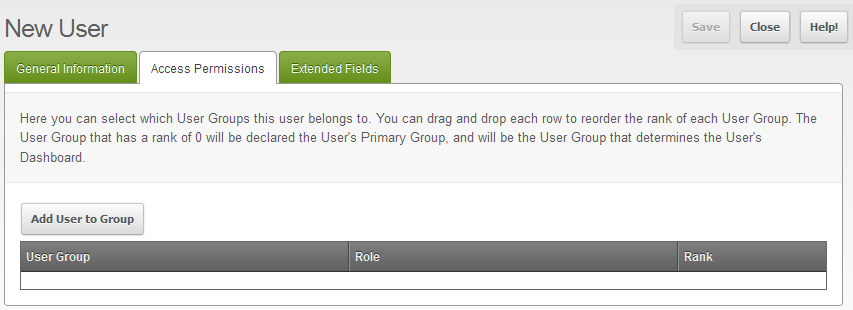
Pay attention to the specific note as it explains how User Group with the rank of 0 will determine the dashboard that user will see upon login.
Click on ADD USER TO GROUP. - When adding a user to a user group, you will get the option to choose the user group and also set the user role. Here's the dialog box that you will see:
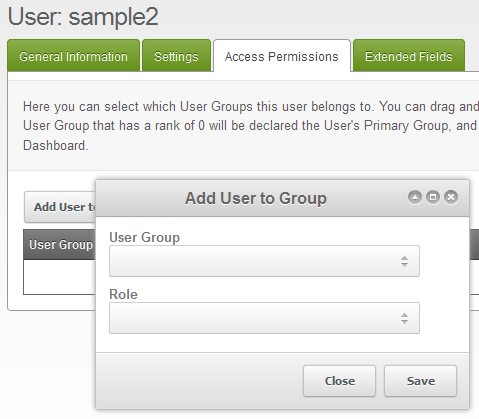
USER GROUP - Modx allows you to manage users in groups and apply roles that govern what a user is capable of doing within the Modx backend.
ROLES - Roles are used to define a user position or status within a user group. They are defined with a field labeled "authority" that uses a integer. The integer is used to determine how policies are inherited when a user is granted multiple roles. Authorities are "inheritable downward". For example, if you have a user set with a role that has an authority of 50, then any roles assigned to the user that are higher than 50 will be inherited by that user.
Click on the USER GROUP field and also ROLE to assign the user to the user group and role that you want for the user. - After you have finished setting the User Group and Role for the user, click on the next tab labeled EXTENDED FIELDS.
Adding Extended Fields
Occasionally, you will find that there are values or organizational headings that may be applied to your users that are not in the typical database area for your user. This means that you you will not see these items in the General Information tab when creating your user. In order to provide support for these items, Modx has provided an option called EXTENDED FIELDS. Here's an illustration that describes them: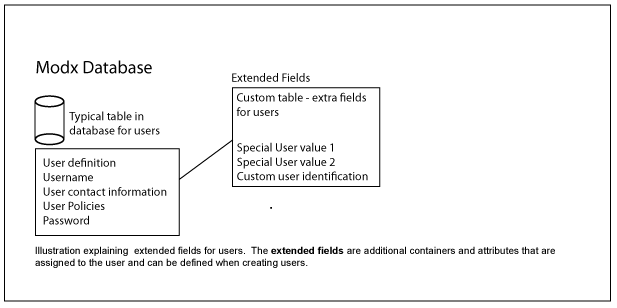
The illustration doesn't provide a direct correlation for the database tables. It is more an illustration of how the extended fields are not a part of the usual definition of the users and can be added as a container and attribute using the interface provided in the Extended Fields tab. This allows you to extend the definition of your user information without having to modify the core database structure. This is important for future Modx upgrades. If you're adding tables or entries that change the database structure, then you may interfere with future upgrades to the software.
- After clicking on the EXTENDED FIELDS tab, you should see the following:
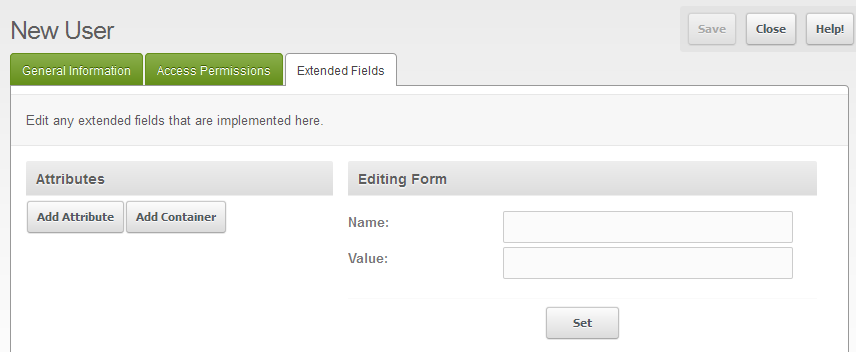
To add a new attribute, click on ADD ATTRIBUTE. You will see the following: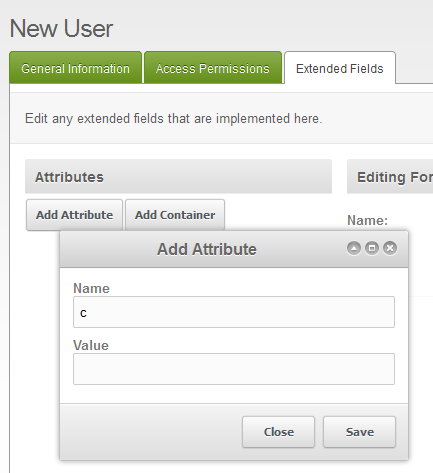
- Click in the Name and Value fields for the Attribute and add the appropriate values that you need to define. These are typically values that you need to assign to the user that are no already in the General Information tab.
- Click on SAVE in the bottom right-hand corner. Or click on CLOSE if you decide not to add a value for now.
- Next, click on ADD CONTAINER, if you need to add a Container value. You will see a screen similar to the Attributes:
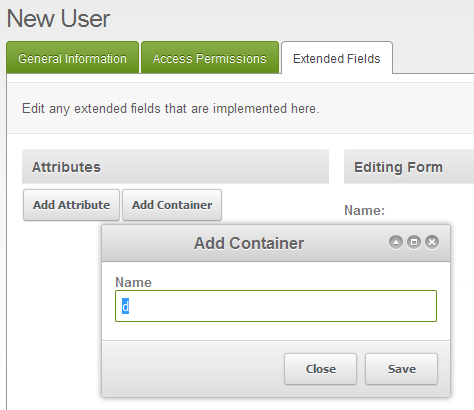
- Click on SAVE in the bottom right-hand corner. Or click on CLOSE if you decide not to add a value for now.
Managing Existing Users in Modx
Editing Users
Editing existing users in Modx is different than Modx, because it will require that you right-click with your mouse on the user that you wish to edit. Additionally, you will see an addtional SETTINGS tab that you did not see when setting up the user.
- Login to the Modx Backend
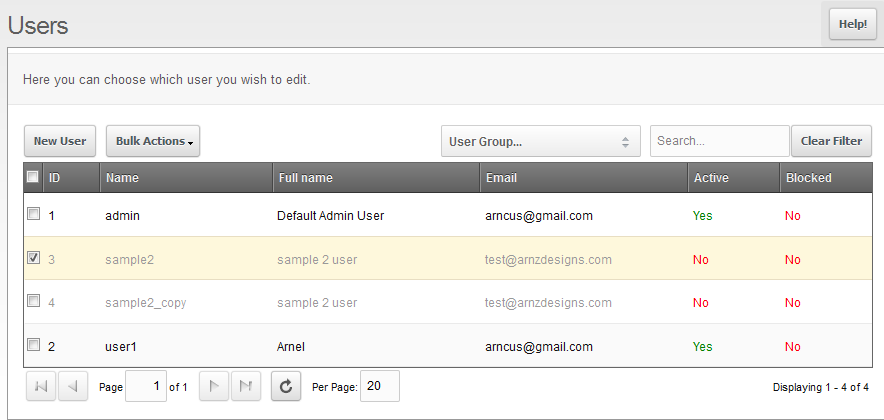
- Hover over the menu bar where it says SECURITY, then click on MANAGE USERS. You will see the following screen or something similar:
Take your mouse and RIGHT-CLICK on the user you wish to edit. When the menu appears, select UPDATE USER. - Updating the user will allow you to make changes to the existing data. It will also show an additional tab as per the screenshot below:
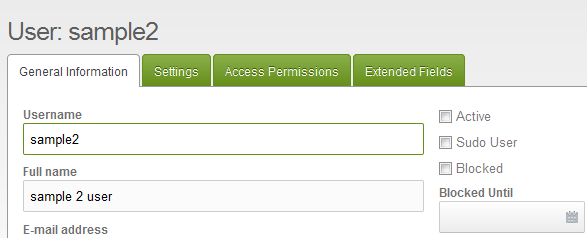
The added tab is labeled SETTINGS. You can add additional settings for the user with this option. Make any modifications for your user, then click on the SETTINGS tab and you will see the following screen: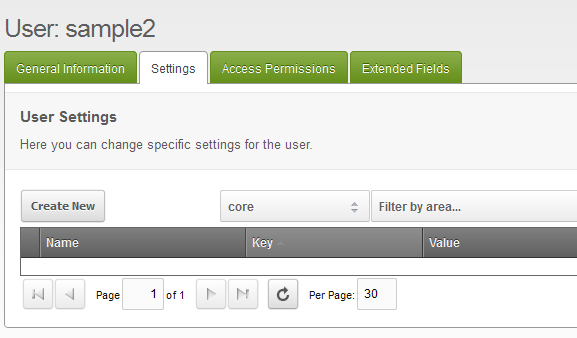
- Click on the CREATE NEW button in order to add new settings for your user. You will see the following screen when creating new settings:
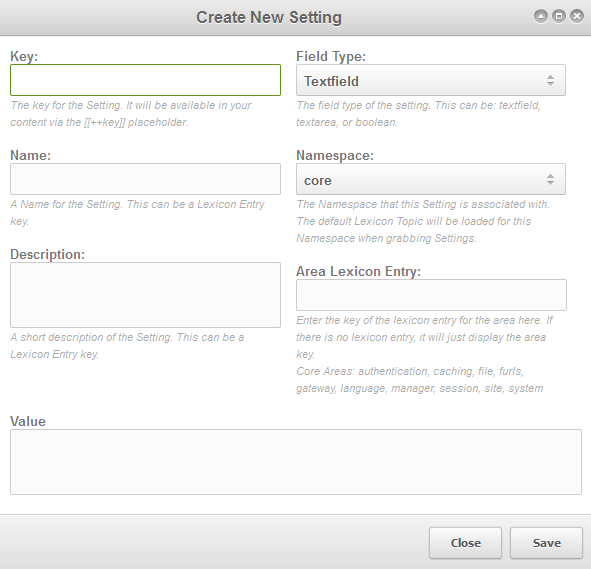
Each field is described above, but for clarity, the fields are defined in the table below:
Key Key for setting ; accessible in site content using the "[[++key]]" placeholder Name Name for the setting; can also be the Lexicon Entry Key Description Describes the setting; this can also be the Lexicon Entry Key Field Type Setting can be text (textfield), an area specified for text (textarea) and a boolean value Namespace Namespace that the setting is linked to. When the Settings are loaded, the default Lexicon Topic is set Area lexicon entry Key for the area lexicon entry is set here. Core Areas include: authentication, caching, file, furls, gateway, langugage, manager, session, site, and system Value Field for Setting value
Fill in the values for the New Setting as per the area. - When the values for the new setting have been entered, click on SAVE in the bottom right hand corner in order to save the entries.
Duplicating Users
Occasionally it is easier to duplicate an existing user instead of having to rebuild one. This is handy because it allows you to take a user with specific permissions or roles and then duplicate it so that you can create multiple users with the same roles.
- Login to the Modx Backend
- Hover over the menu bar where it says SECURITY, then click on MANAGE USERS. You will see the following screen or something similar:

Using your mouse, RIGHT-CLICK on the user that you wish to duplicate. Click on the option in the menu that says DUPLICATE USER. - When you have completed duplicating the user, you will see a copy of the user labeled "username_copy". Here's an example:
You can double-click on the name in the menu to change the name. You can make changes with any value in user table using this method. - Login to the Modx Backend
- Hover over the menu bar where it says SECURITY, then click on MANAGE USERS. You will see the list of users. In order to delete with the mouse, simply RIGHT-CLICK on the user that you wish to delete and you will see a dialog window appear. Select DELETE USER when it appears in the menu.
- Click on the Confirmation screen to delete the user
- If you are deleting using the BULK ACTIONS, then you will need to click on the checkbox to select the user or users that you are deleting. Remember that if you are deleting a user(s) then you will have only one option to stop the cancellation. This occurs when the dialog window appears and asks that you confirm the deletion.
Deleting Users in Modx
Removing users from the list of users is a simple matter in Modx. You can either use your mouse or the BULK ACTIONS option to make this change. Use caution when deleting a user, you will get one confirmation dialog window to confirm the deletion. And you cannot undo the action.
Did you find this article helpful?
Tweet
Help Center Login
Managing Modx
Related Questions
Here are a few questions related to this article that our customers have asked:
Ooops! It looks like there are no questions about this page.
Would you like to ask a question about this page? If so, click the button below!

We value your feedback!
There is a step or detail missing from the instructions.
The information is incorrect or out-of-date.
It does not resolve the question/problem I have.
new! - Enter your name and email address above and we will post your feedback in the comments on this page!