Creating Subscriptions for Contao Newsletters
The other part of tasks assigned to creating Contao newsletters is subscribing them. There are several ways of adding readers to your newsletters: assign them individually, import user name lists, or use the multiple edit options in order to rapidly assign multiple users to the newsletters. The following article summarizes these various options within the Contao Back end interface.
Assigning Contao Newsletter Subscrptions
Using the Newsletter Interface to Assign Users Individually
- Login to the Contao Back End interface as an administrator
- Scroll down the left hand side menus (Back end modules) and click on NEWSLETTERS.
- When you open the NEWSLETTERS interface you will see the list of newsletters added. Select the newsletter for which you wish to subscribe users and you will see the following:
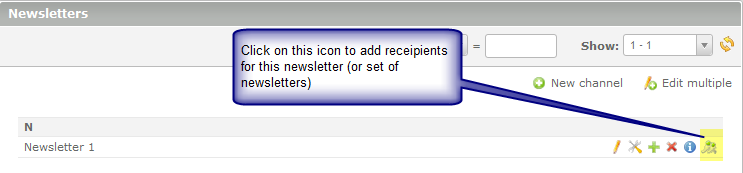
Click on the icon as indicated above, to add recipients. - You will see the following screen when adding recipients through this interface:
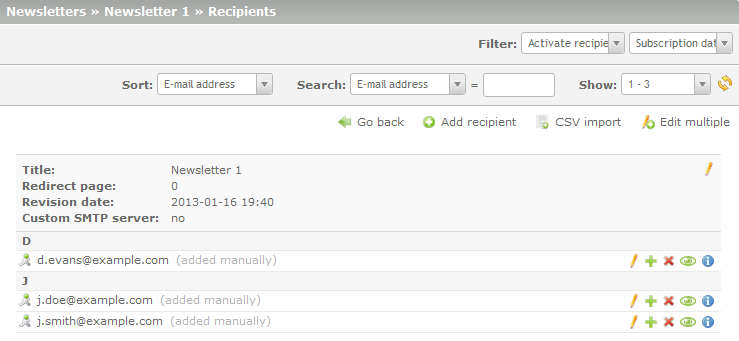
As per the screenshot above, the recients already receiving the newsletter are listed. You can also delete (the red X) and deactivate (the green eyeball icon) recipients. Deactivatiing users makes them inactive, but keeps the name on the list. Click on Add Recipient and you will see the following screen: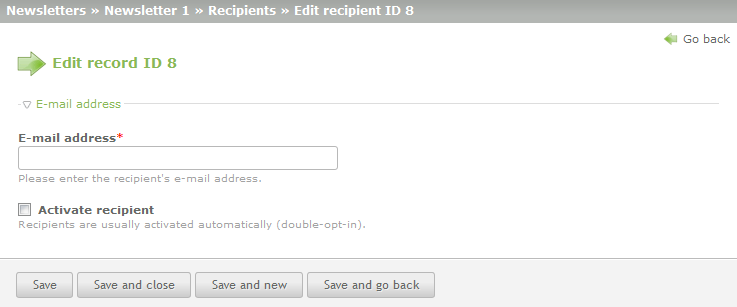
Click on SAVE AND CLOSE after typing in a user email address and the user is
To import a large list of users in the CSV format using the Newsletter section:
- Login to the Contao Backend as an Administrator.
- Scroll down the back end modules on the left side and click on NEWSLETTERS.
- You should see the newsletter channels that you have already created. Click on the last icon at far right of the line of the newsletter you have selected. If you hover over the icon, you will see "Edit the recipients of Channel ID##" (where ## is the ID number of the news channel being edited). It's same icon identified in step 3 of the steps above.
- In the next interface, click on the CSV Import option in the top right corner of the interface. You will see the following interface:

Click on the drop-down menu to change the separator for the file. You can also select the file that you want to import by clicking on BROWSE. Once you have the files set, click on the CSV IMPORT button to run the import. When the process completes you will see the list of names listed as recipients for the newsletter.
Using the Member Interface to Assign Individual Subscriptions to the Contao Newsletter
- Login to the Contao Backend as an Administrator.
- Scroll down the left side of the interface until you find Members. Click on Members and then scroll down the form until you find SUBSCRIPTIONS (expand this section by clicking on the arrow to the left of the word subscriptions if needed).
- You will see an interface that appears similar to the following:

Click on the checkbox for the newsletter you wish to assign to the member. - Scroll to the bottom and then click on SAVE AND CLOSE.
Using the Edit Multiple Member Interface to Assign Contao Newsletter Subscriptions to Multiple members
- Login to the Contao Backend as an Administrator.
- Scroll down the left side of the interface until you find Members. Click on Members, then in the top right hand corner click on EDIT MULTIPLE. You will see something like the following:

Click on the radial buttons to choose the users to edit. Once the users have been chosen, click on EDIT to proceed. - You will then need to choose the field or fields to edit. In this case we are only looking at the editing the newsletter assignment:
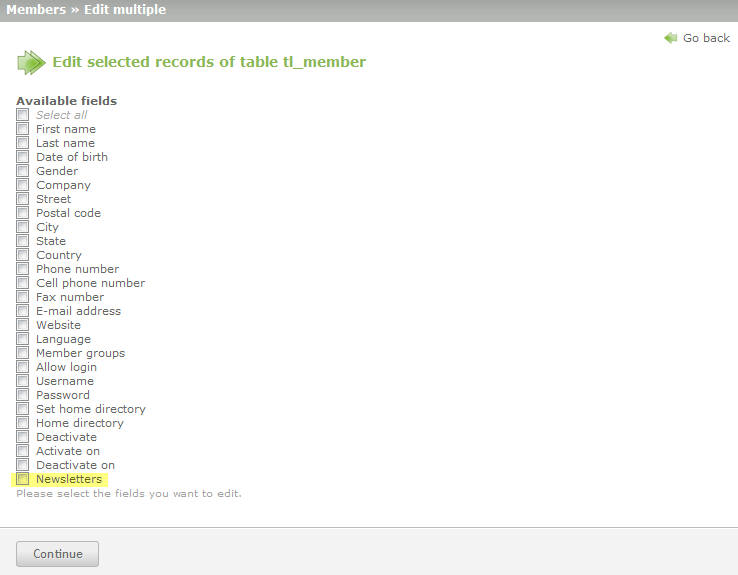
Click on Newsletters, then click on the CONTINUE button to proceed. - You will then be able to assign the newsletter for each member chosen. The screen will look like the following:
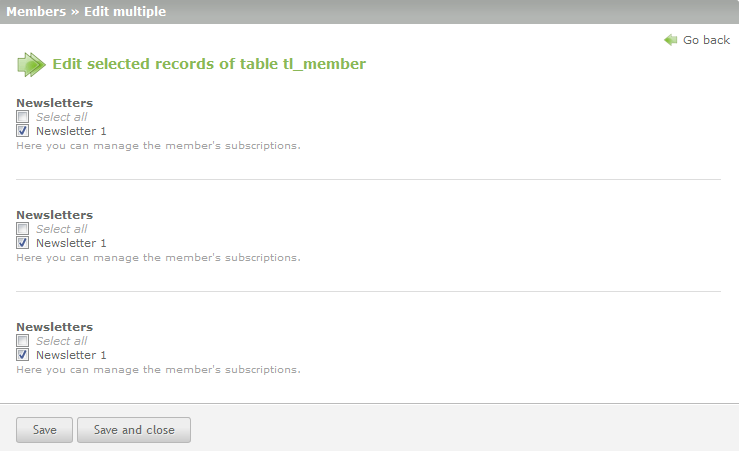
- When you have completed selecting the newsletters to be subscribed to each user, click on SAVE AND CLOSE to complete the process.
Note that only members can be assigned directly to a newsletter for viewing purposes. Users who have access to the newsletters can view, but it is more for editing purposes. If you wish to grant users viewing rights, then they will need to have a corresponding member assignment. If you require further information on understanding User or Member management please see: Managing Members in Contao or Managing Users in Contao.
Did you find this article helpful?
Tweet
Help Center Login
Backoffice Management
Related Questions
Here are a few questions related to this article that our customers have asked:
Ooops! It looks like there are no questions about this page.
Would you like to ask a question about this page? If so, click the button below!

We value your feedback!
There is a step or detail missing from the instructions.
The information is incorrect or out-of-date.
It does not resolve the question/problem I have.
new! - Enter your name and email address above and we will post your feedback in the comments on this page!